User Guide
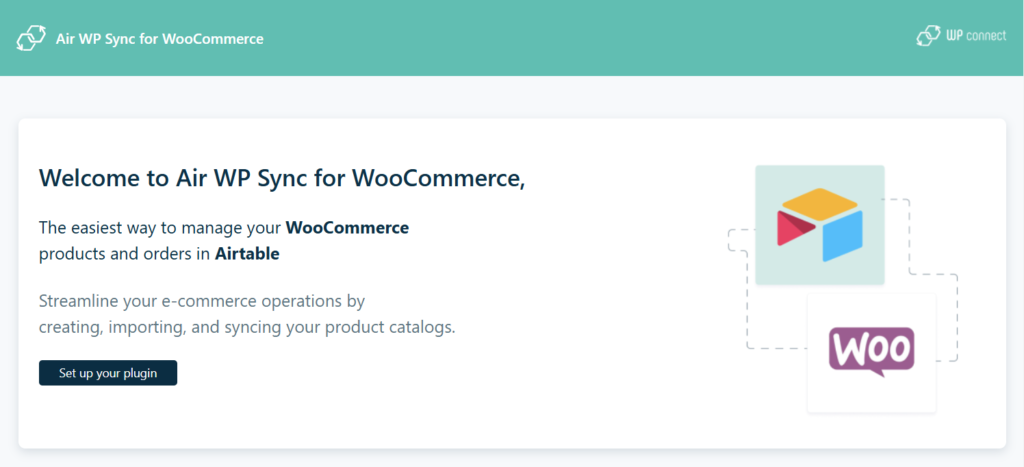
With our Air WP Sync for WooCommerce plugin you can connect an Airtable database to your WooCommerce website, to easily manage your store outside of the WordPress admin panel.
Installation
- Download the zip archive of the plugin to your computer
- Log in to your WordPress dashboard
- Go to Plugins > Add Plugin
- Click Upload Plugin at the top of the page
- Click Choose File and select the plugin file downloaded in step 1
- Click Install Now
- Wait for the plugin to be installed, then click Activate Plugin
The WooCommerce plugin must be installed and activated to enable Air WP Sync for WooCommerce.
Set Up Your Plugin
Before using the plugin, configure it with your license and Airtable token. Prepare both before starting the wizard:
- License key — available in your purchase confirmation email or on wpconnect.co > My Account > My Downloadable Products > License Keys > View Licenses
- Airtable token — create one in your Airtable account:
- Go to Builder Hub in your account drop-down menu
- Click Personal access tokens in the left menu
- Click + Create new token
- Give your token a name and configure Scopes and Access as instructed by the wizard
For the plugin to work properly, set:
- Scopes:
data.records:read,data.records:write,schema.bases:read,schema.bases:write - Access: All current and future bases in all current and future workspaces
If you need help creating the token, watch this video.
To start the wizard, click on Air WP Sync for WooCommerce in the WordPress dashboard and follow these steps:
- Click Set up your plugin
- Optionally activate Air WP Sync (see Air WP Sync Activation)
- Paste your License Key and click Next step →
- Paste your Airtable token into the Access token field
- Click Next step → — your plugin is configured!
- Optionally click Connect to Airtable base → to configure your first connection
First Connection to Airtable Database
Connect the plugin to the Airtable base template to facilitate product synchronization. The template will be copied to your workspace.
Don't rename or modify the template before the copy and your first successful connection. Check the version of the template.
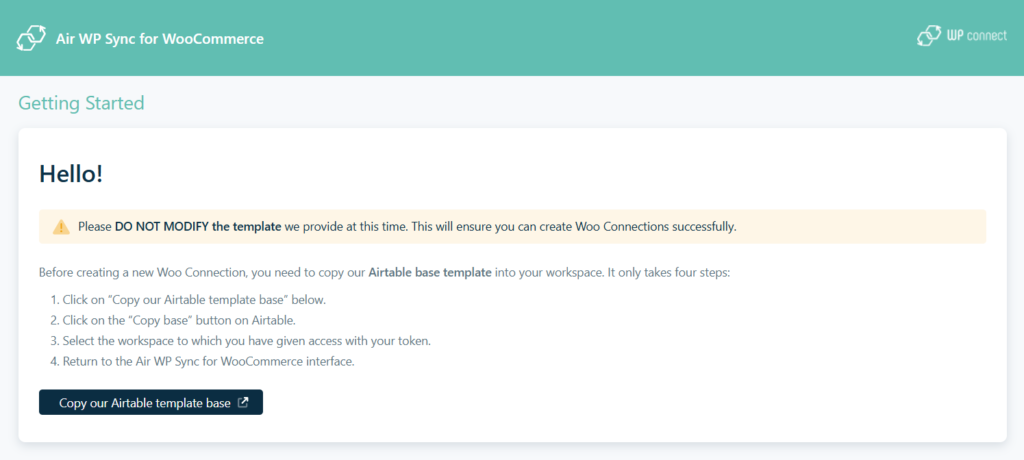
Four steps to copy and connect:
- In WordPress, click Copy our Airtable template base — the template opens in a new Airtable tab
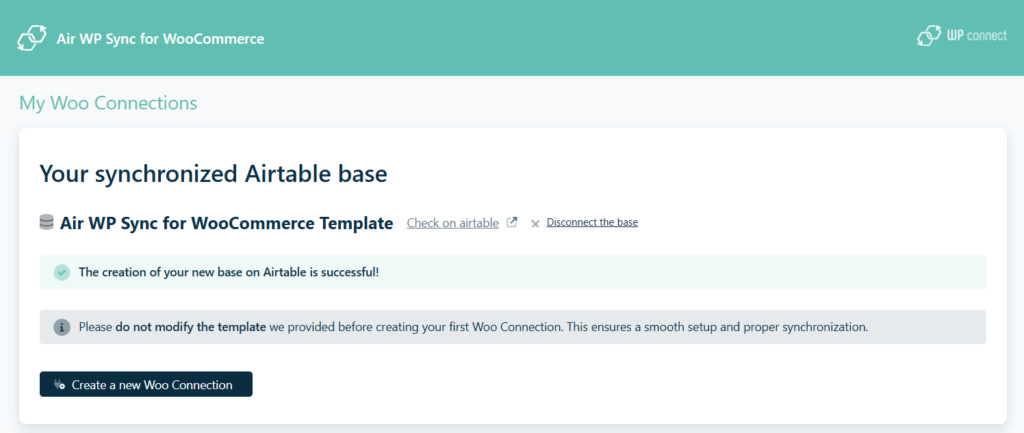
- In Airtable, click Copy base (top right of the page)
- Select your workspace and click Add base
- Go back to the Air WP Sync for WooCommerce interface — the template is now connected
Woo Connections
Create a First Woo Connection
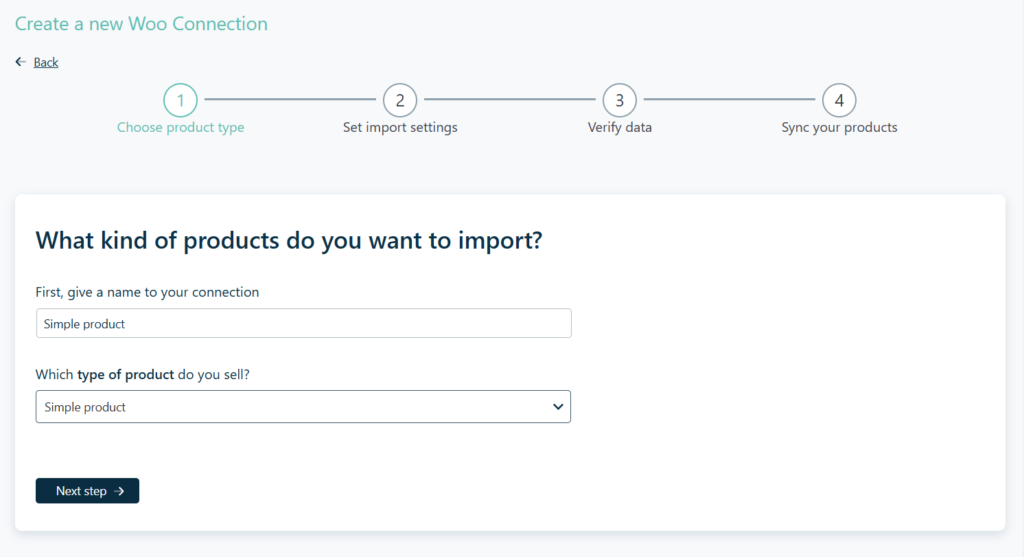
Click Create a new Woo connection and follow the wizard:
Step 1 — Kind of products:
- Give a Name to your connection
- Select the Type of product (Simple, Variable, Grouped, External, or Downloadable)
- Click Next step →
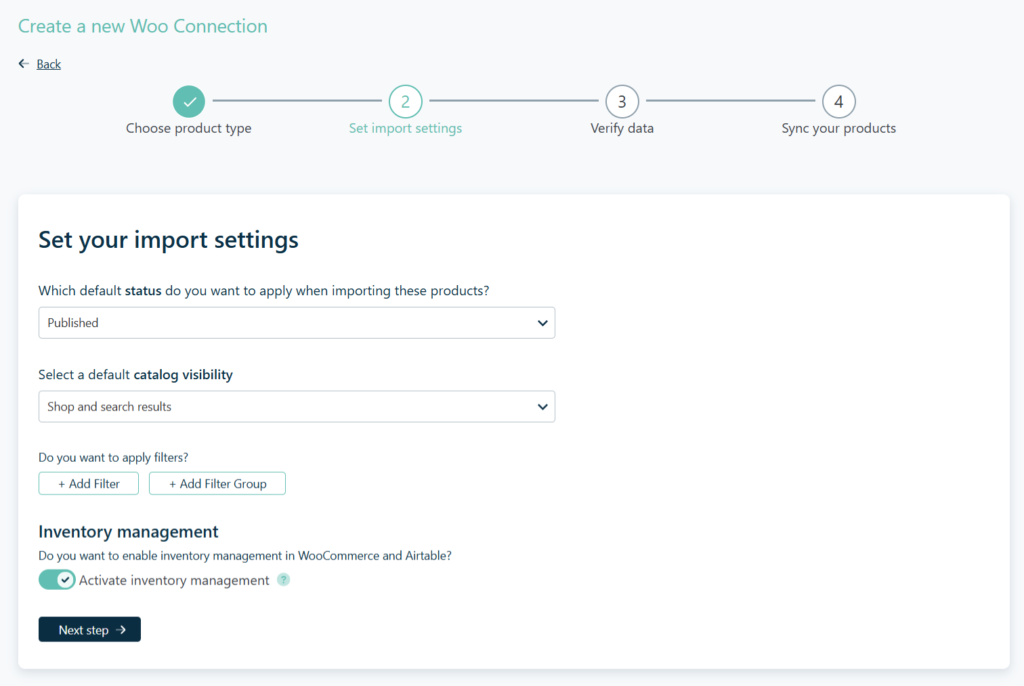
Step 2 — Import settings:
- Choose a default Status (Published, Scheduled, Draft, Pending, Private)
- Select a default Catalog visibility (Shop only, Search results only, Shop and search, Hidden)
- Optionally add filters via + Add Filter or + Add Filter Group
- Enable/disable Activate inventory management
- Click Next step →
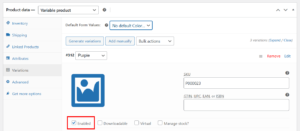
For Variable products, only "publish" and "private" statuses are supported, corresponding to enabling/disabling the "Enabled" option in the Variations tab.
- Scheduled status will have better support in a future version
- The highest synchronization frequency is currently 30 minutes
- Instant synchronization via webhook will be implemented in a future version
Step 3 — Verify the mapping: Click Verify the mapping to check correctness, then click Next step →.

You cannot modify the fields mapping of the first product connection.
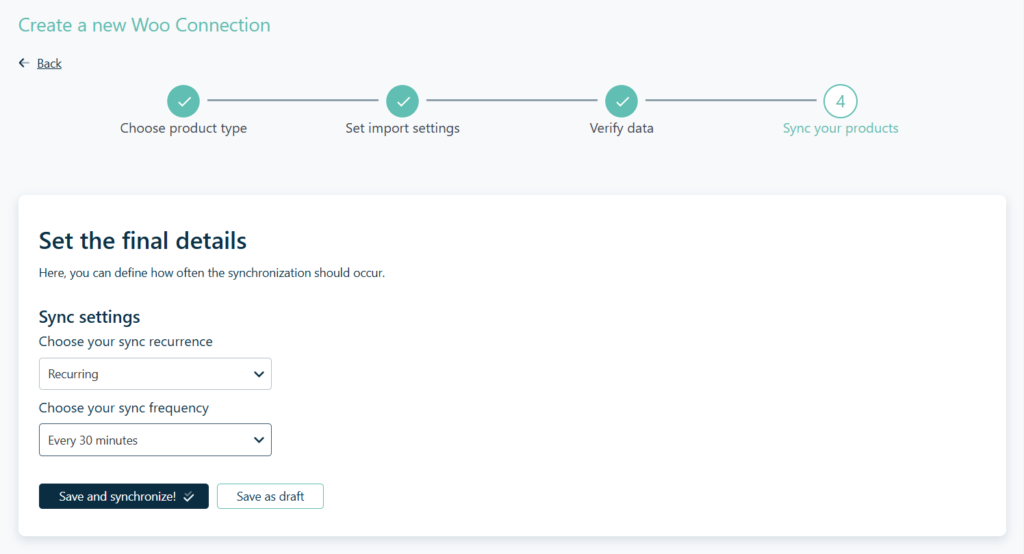
Step 4 — Final details:
- Choose Manual or Recurring sync recurrence
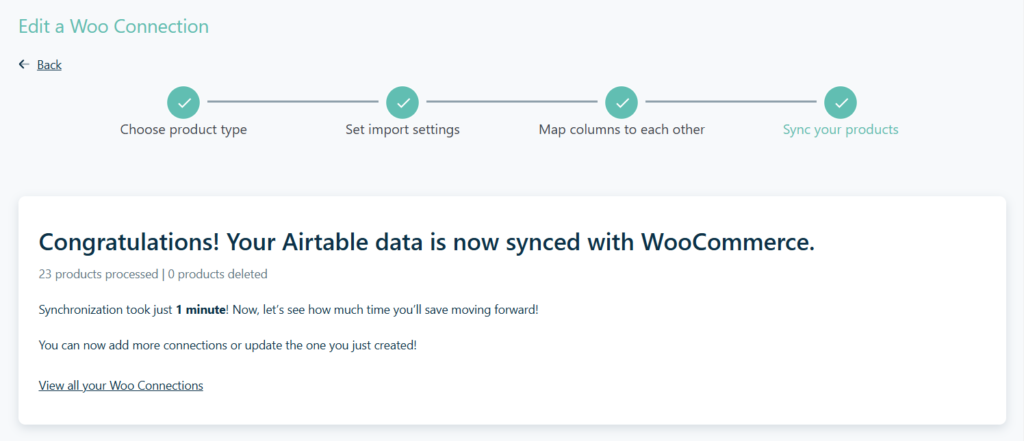
- Click Save and Synchronize! or Save as draft
Add a New Woo Connection
Use Air WP Sync for WooCommerce > Woo Connections > Add New or click Create a new Woo Connection from the connections screen.
Modify a Woo Connection
- Go to Air WP Sync for WooCommerce > Woo Connections
- Hover over a connection and click Edit
- Use ← Back links to reach the desired screen, edit settings, and click through to the end
- Click Save modifications and Sync! or Save modifications
Add Filters to Woo Connections
In step 2, click + Add Filter to define a filter: select an Airtable field, an operator, and a value. Combine multiple filters with AND/OR logic. Use + Add Filter Group for complex filter structures.
Regular Connections
If you've activated the Air WP Sync option in settings, you can use Regular Connections to import pages, posts, CPTs, users, and taxonomy terms. See the Air WP Sync documentation.
Inventory Management
When Activate inventory management is enabled: each order modifies the product stock, adding a row to the Stock transactions table in Airtable, and the Stock / Quantity field in the Products table is updated.
When disabled: stock is only managed in WooCommerce, not in Airtable.
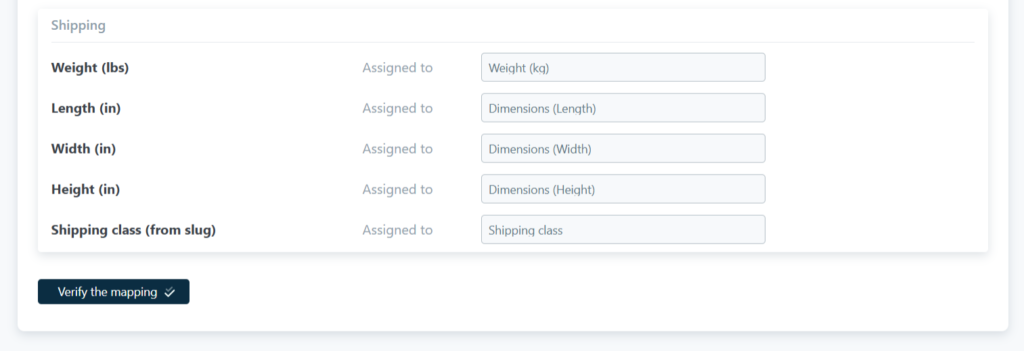
Mapping
Fields are grouped into sets:
- Main — Name, Description, Status, Categories, Tags, Product Image, etc.
- General — Regular price, Sale price, Tax status, Tax class, etc.
- Inventory — SKU, Stock quantity, Low stock threshold, etc.
- Linked Products — Upsells, Cross-sells
- Shipping — Weight, Length, Width, Height, etc.
- Added fields — fields you add manually
Mapping fields differ depending on the Type of product and whether Activate inventory management is enabled.
Modify the Mapping
After the first synchronization, you can add or delete fields by opening the Woo connection and navigating to the mapping step.
Required fields like Product Name, Regular Price, SKU cannot be deleted.
Manage Your Woo Connections
Go to Air WP Sync for WooCommerce > Woo Connections to see all connections with their type, last sync date, trigger, and available actions. You can sync, download logs, filter, search, sort, edit, or trash connections.
Airtable Database
Access — Go to Woo Connections, scroll to Your synchronized Airtable base, and click Check on Airtable.
Disconnect — Click Disconnect the base and confirm. All connections to this database are deleted, but imported products are preserved.
Plugin Settings
Go to Air WP Sync for WooCommerce > Settings to manage license, Airtable token, Air WP Sync activation, and cache.
Air WP Sync Activation
By default, Air WP Sync is deactivated. Activate it to use Air WP Sync Pro/Pro+ features (pages, posts, CPTs, users, taxonomy terms). If you're already using Air WP Sync Pro, you'll get Pro+ at no extra cost.
License
View or update your License Key in the License section.
Airtable
If you modify your Airtable token, paste the new token here and click Save →. Your connections will be automatically updated.
Cache
Click Clear Cache → if you've modified your Airtable table structure and don't see the changes in the plugin.
Limitations
These third-party plugins are not supported: WooCommerce Bookings, WooCommerce Shipping, WooCommerce Subscriptions, WooCommerce Product Add-Ons, WooCommerce Tax, WooCommerce Box Office, WooCommerce Memberships, Product Recommendations, Composite Products, Bundle Products, Extra Custom Product Options for WooCommerce.
Troubleshooting
If you've modified the Airtable template structure but don't see changes: this is normal — the structure is cached for 15 minutes. Use Clear Cache → in Settings to force a reload.
Logs are accessible via FTP at: /wp-content/uploads/airwpsync-logs
You can also download the last sync logs directly from the Woo Connections screen by clicking Download logs.