Manual data entry from WordPress forms is hurting your productivity. Every submission requires copying, pasting, and reformatting information across multiple tools. Or handling multiple exports and imports between CSV and Excel files. Your team wastes hours on repetitive tasks instead of focusing on business growth.
The solution? Direct integration between Gravity Forms and Airtable for enhanced flexibility and efficiency.
This powerful connection automatically transforms form submissions into organized, actionable data. It creates an optimized workflow that frees up your team to focus on what matters most.
Ready to automate your Gravity Forms entry management?
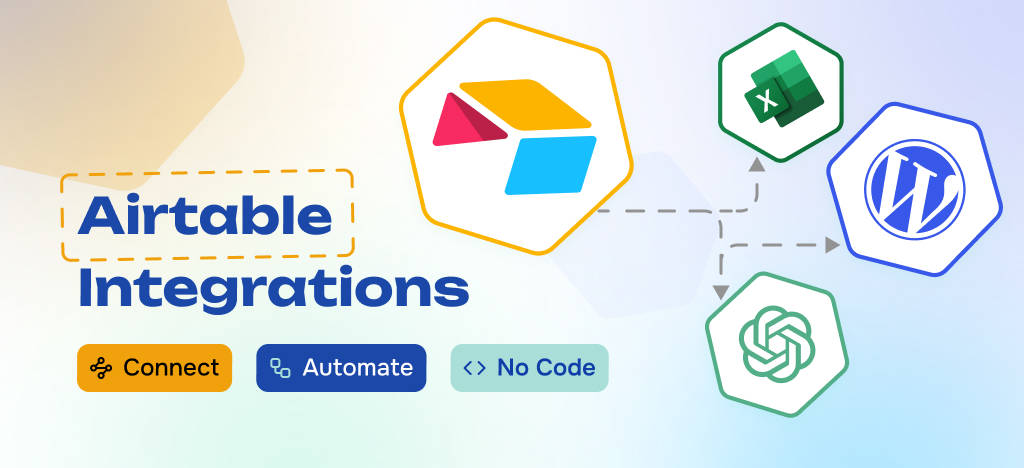
An overview of Airtable: your smart data management solution
Airtable transforms the way businesses handle data by combining intuitive design with powerful database features.
This no-code and open source platform allows you to create interactive tables and robust databases that teams can manage together seamlessly.
Beyond simple data storage, Airtable lets you connect multiple databases and build custom management systems from scratch. Whether you need a CRM to track leads, a project management hub, or a comprehensive WooCommerce store managed from Airtable, the platform adapts to your specific needs.
- Airtable stands out for its versatile features:
- Multiple display options: Kanban boards, Gantt charts, calendar layouts, and custom forms.
- Real-time collaboration capabilities.
- Extensive third-party integrations.
- Workflow automation tools.
The platform offers a free version with interesting features, as well as premium plans that unlock advanced features for growing businesses.
Why connect your Gravity Forms to Airtable?
Smart businesses know that collecting data is just the first step. The real challenge begins after someone hits “submit” on your WordPress forms. What happens to that valuable information?
Most companies struggle with the same data management bottlenecks:
- Form submissions pile up in WordPress with limited organization options
- Team members can’t access or collaborate on lead data efficiently
- Manual data entry creates delays and introduces costly errors
- Following up on leads requires constant tool switching
- Turning raw submissions into actionable insights becomes nearly impossible
Airtable transforms this chaos into clarity. By connecting your Gravity Forms directly to Airtable, you create a streamlined data pipeline where submissions automatically organize themselves, become instantly accessible to your team, and turn into powerful business intelligence.
Ready to eliminate manual data handling? Here’s how to set up this game-changing integration.
Connect Gravity Forms to Airtable without coding
Transform your web form submissions into organized, actionable data with Airtable, the flexible platform for databases, project management, and collaboration.
Your 5-Step guide to integrating Gravity Forms with Airtable
Here’s our straightforward process to integrate Gravity Forms with Airtable. No Zapier, no Make, and no coding required. Follow these five steps to automate your data flow directly.
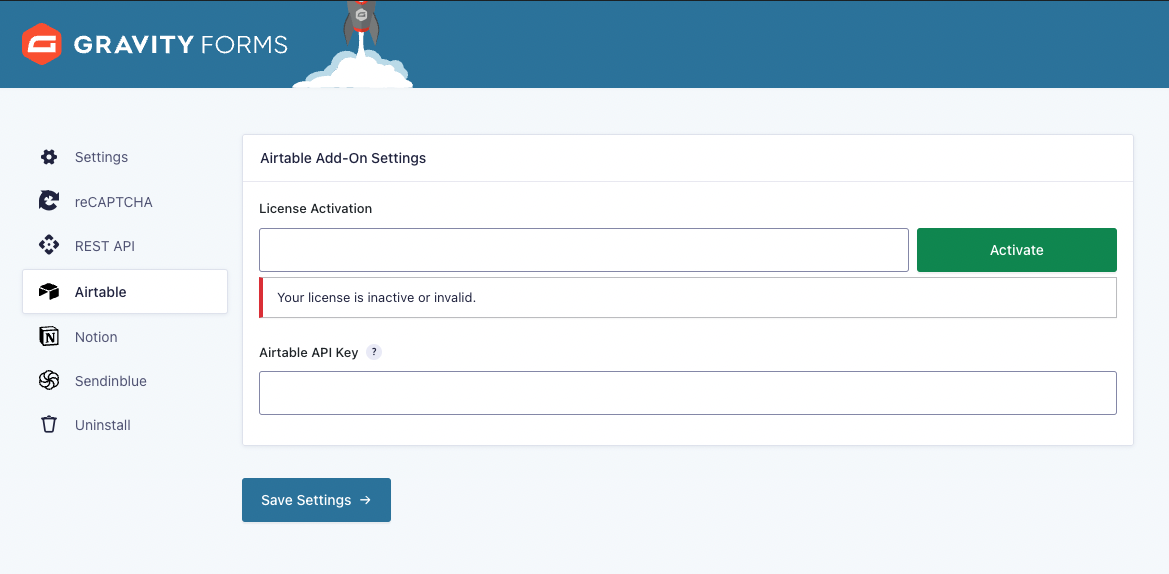
Step1 : Install Gravity Forms to Airtable Add-On and activate license
First, purchase and install the Airtable for Gravity Forms Add-On directly on your WordPress site.
After successful installation, activate your license through the WordPress admin panel. Your license key arrives via email or can be retrieved from your WP connect account dashboard.
Navigate to Forms > Settings in your WordPress dashboard, then select the Airtable option from the menu. Paste your license key in the license activation field and click Activate.
Your Gravity Forms Airtable connection is now ready for API configuration.
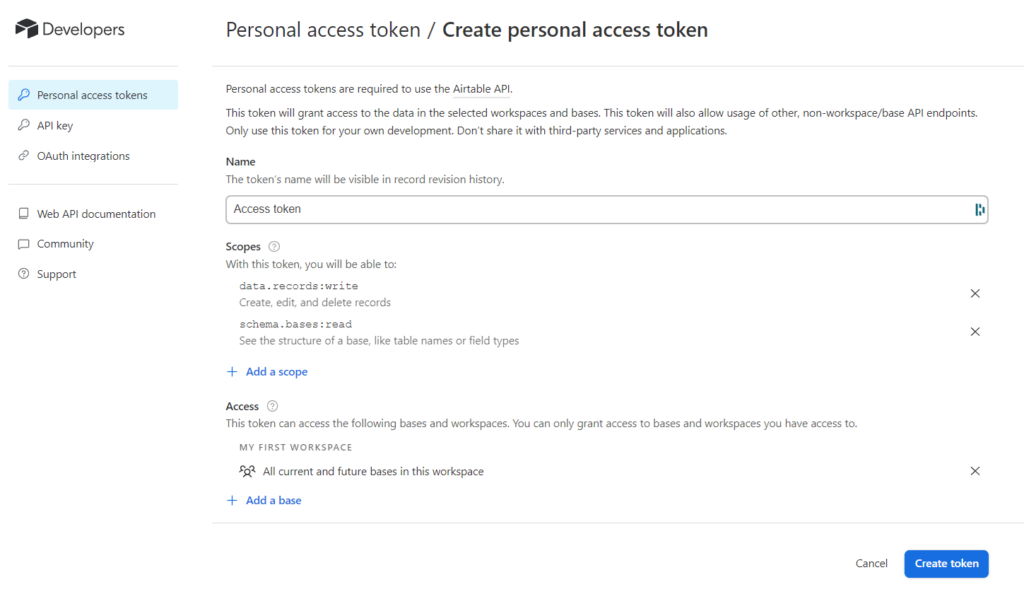
Step 2: Configure Airtable API access
You need to create a personal access token that allows your WordPress site to communicate securely with your Airtable databases.
Log into your Airtable account and navigate to the developer settings page to generate your access token. During token creation, add these two essential scopes:
- “data.records:write” – Enables form submissions to create new records in your Airtable tables
- “schema.bases:read” – Allows the plugin to read your database structure and available fields
Copy your generated access token and return to your WordPress admin panel. Navigate to Forms > Settings > Airtable and paste the token in the Airtable access token field. Click Save Settings to establish the secure API connection.
Your Gravity Forms can now communicate directly with your Airtable databases.
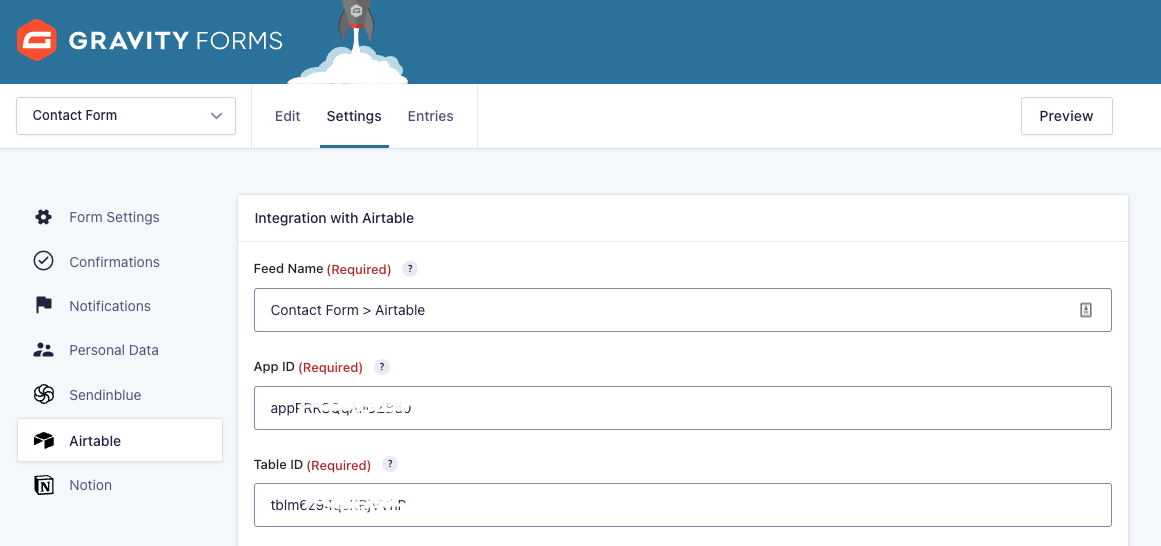
Step 3: Set up your Airtable database and create connection feed
Create your Airtable database with columns matching each Gravity Forms field you want to connect. Not sure how to structure your forms? Our guide to building advanced forms with Gravity Forms covers the best practices.
In WordPress, navigate to your form settings and select Airtable. Click Add New to create your connection feed.
Name your feed, then enter your Airtable app ID and table ID (found in your database URL).
Connect Gravity Forms to Airtable without coding
Transform your web form submissions into organized, actionable data with Airtable, the flexible platform for databases, project management, and collaboration.
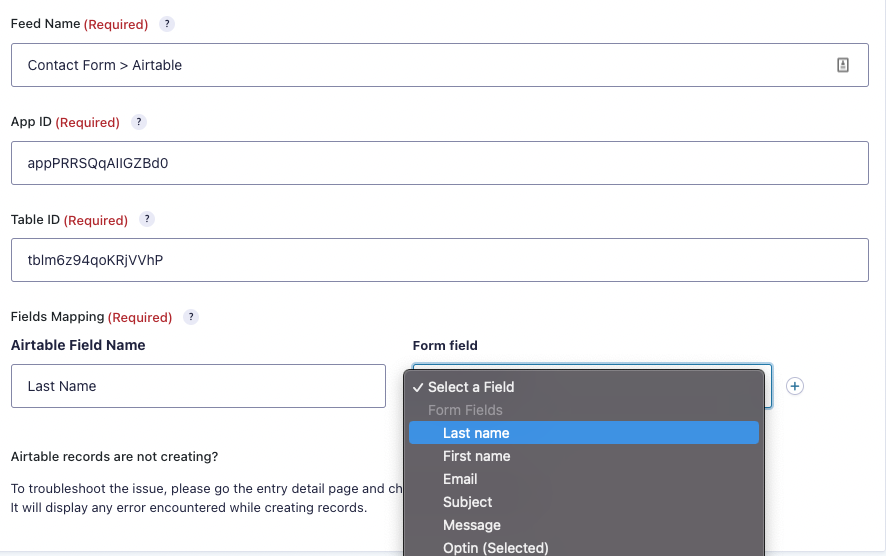
Step 4: Get your fields mapped and enable conditional logic
Map your form fields to Airtable columns by entering the exact column name and selecting the corresponding form field from the dropdown. Use the + button to add more field mappings.
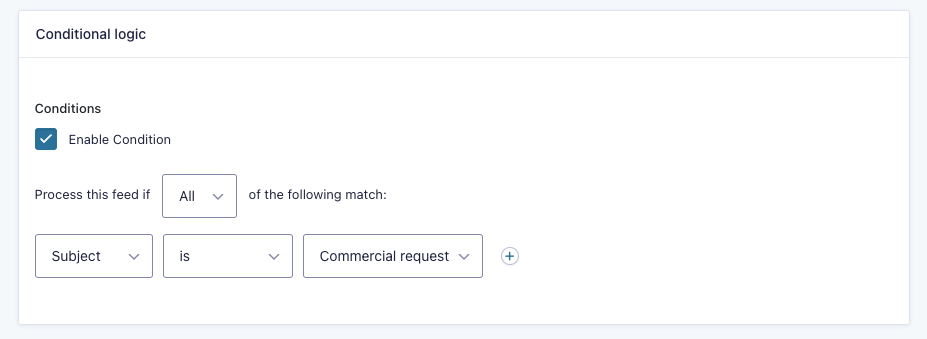
Optional Conditional Logic: Filter which submissions sync to Airtable based on specific criteria. For example, only sync contacts who agree to follow-up communication, or route different request types to separate databases.
Enable conditions by clicking Enable Condition, then set your criteria (example: Subject IS “Sales Inquiry”).
Step 5: Test your Gravity Forms integration with Airtable
Validate your setup by submitting a test entry through your Gravity Form. Check your Airtable database within moments. Your data should appear automatically.
If everything syncs correctly, your integration is live and ready to streamline your data workflow.
Connect Gravity Forms to Airtable without coding
Transform your web form submissions into organized, actionable data with Airtable, the flexible platform for databases, project management, and collaboration.
Final Thoughts
Connecting Gravity Forms to Airtable eliminates manual data entry that slows down your business operations. With this direct integration, every submitted form is automatically transferred to your organized Airtable workspace, where your team can collaborate, analyze, and act on the information immediately.
No more data silos. No more manual exports. No more missed opportunities because information was buried in WordPress. Your forms now work more efficiently for your business, turning every visitor interaction into structured, actionable data that drives real results.