
Would you like to send your Gravity Forms entries to SendGrid automatically? You’ve come to the right place.
In this tutorial, we’ll show you how to integrate your Gravity Forms with SendGrid in just a few minutes. And all without using Zapier, Make, or any other complex automation platform.
Let’s get started.
Gravity Forms and SendGrid: A winning combo for effective email marketing
The world of digital marketing is dynamic and constantly evolving. To keep your business growing and thriving, you need to attract valuable leads and maintain strong relationships with your customers. Data automation plays a key role in making this possible.
SendGrid and Gravity Forms are two powerful tools that shine in this field. They help streamline data collection and optimize your email marketing campaigns. Let’s dive into this a bit deeper.
SendGrid: World leader in email marketing platform
Twilio SendGrid, or simply SendGrid, is a global leader in email marketing services for businesses. Its products and solutions cater to all sizes of enterprises: small, medium, large, e-commerce, or startups.
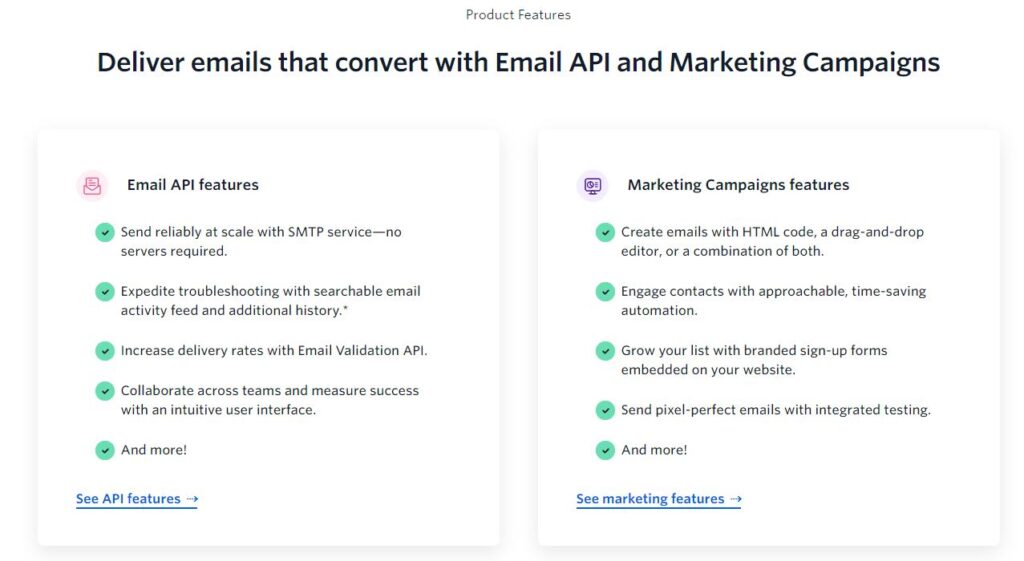
Indeed, SendGrid reigns supreme as the email delivery platform. With SendGrid, you’re assured that your email marketing campaigns land in your recipients’ inboxes, not in their spam folders. Among its standout features are:
- Reliable email deliverability
- Templates and email campaign design functionalities
- Segmentation and A/B testing
- Marketing automation
- Advanced analytics and statistics for your email campaigns
- Integration API with other tools

Connect Gravity Forms to SendGrid in minutes without coding
Unlock the full potential of your web form data by syncing Gravity Forms with SendGrid, the powerful email and automation platform.
- Add your contacts to one or multiple SendGrid lists
- Trigger automation workflows
- Track your business opportunities
- Enable double opt-in verification
- And much more
Gravity Forms: A Giant in WordPress form builder plugins
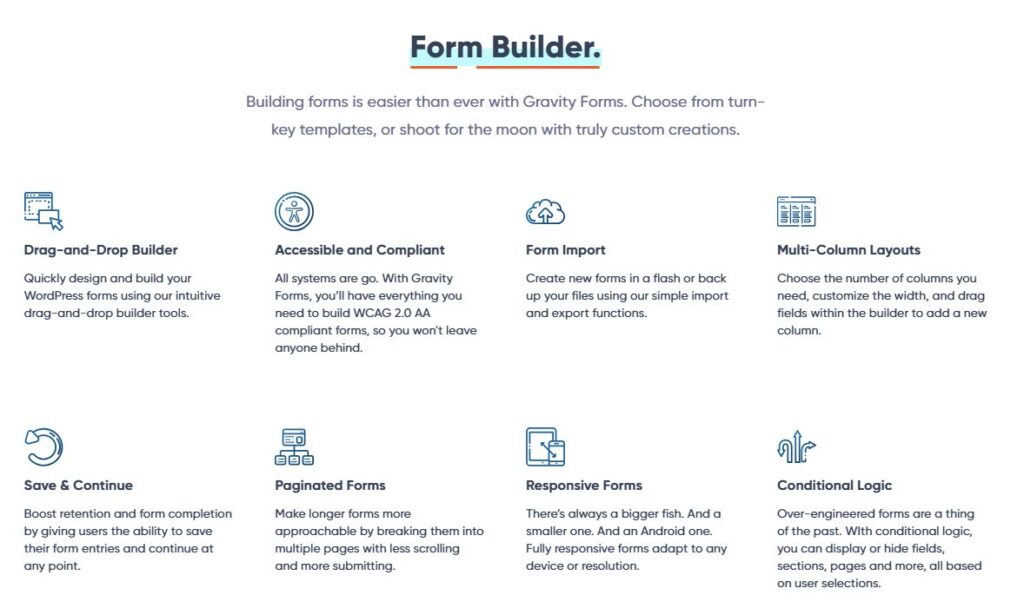
Gravity Forms holds a prominent position in the WordPress ecosystem as a form creation plugin. With its intuitive and easy-to-use interface, Gravity Forms allows you to collect various data and enhance the power of your WordPress site. Read our complete guide on Gravity Forms for WordPress to explore all its capabilities.
Moreover, with its conditional logic feature, you can create dynamic forms based on user data. What could be better than a glimpse into Gravity Forms’ features?
Here are a few:
- User-friendly design interface with simple drag-and-drop functionality
- Workflow automation
- Creation of dynamic contact forms with advanced features like conditional logic
- Transaction forms: donation collection, payments, products, subscriptions, etc.
- Data collection: surveys, quizzes, digital signatures, etc.
SendGrid and Gravity Forms: the dynamic Duo for elevating your email marketing
Combining SendGrid and Gravity Forms creates a marketing powerhouse to propel your business to success. Indeed, the possibilities for data collection, customization, automation, and email delivery are multiplied.
Here are some magical things you can achieve by integrating Gravity Forms with SendGrid:
- Simplified data transfer between the two platforms
- Automation of both marketing and transactional emails
- Improved email deliverability rates thanks to the power of SendGrid
- Easy organization and management of leads, from capture on your site to follow-up via SendGrid
- Automatic creation and addition of contacts to your SendGrid lists from data entries on Gravity Forms
- Obtaining insights and statistics on your prospects and clients
- And much more!
For a similar setup with Brevo, see our guide on how to connect Gravity Forms to Brevo.
Make the difference between the two main Gravity Forms SendGrid Add-ons
There are two main add-ons to connect Gravity Forms and SendGrid: the add-on developed by Gravity Forms and ours, Gravity Forms to SendGrid Add-On.
In this section, we’ll help you differentiate between the two and choose what suits your needs.
Official SendGrid add-on by Gravity Forms
The add-on developed by Gravity Forms primarily allows you to send pull notifications directly to the SendGrid API. Otherwise, the notification after a Gravity Forms form submission is sent to your recipients via SendGrid.
This allows you to achieve better deliverability. By default, your notifications are sent by your server. This can result in spam emails.
Thanks to the Gravity Forms add-on, you can now send notifications of important emails via SendGrid. This includes, for example, your transactional emails.
Gravity Forms SendGrid add-on by WP connect
The add-on developed by our team at WP connect opens up greater possibilities beyond sending notifications. It is a tool that enhances your data and marketing flow. It helps you combine the power of Gravity Forms and SendGrid.
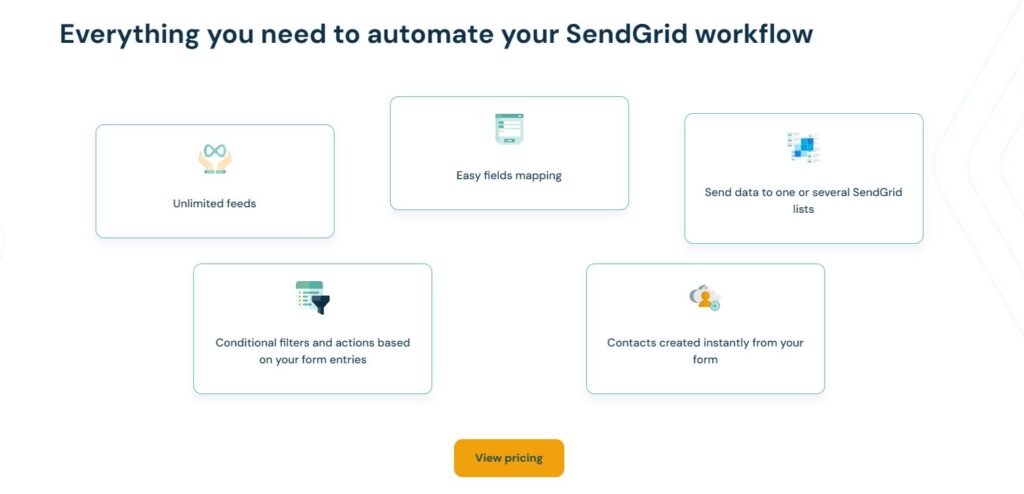
Our add-on offers features for both transactional emails and your email marketing campaigns. These include:
- Automatically sending entries from Gravity Forms to one or more SendGrid lists
- Automating marketing email sequences by combining Gravity Forms and SendGrid
- Sending a double opt-in email and automatically adding those who confirm to your SendGrid list after a Gravity Forms submission
- Tracking and managing leads you’ve recruited from your site in SendGrid
- Dynamically managing segmentation of your database based on data collected via Gravity Forms
Note: Our add-on is also published in the Gravity Forms add-on repository. Be assured that it’s the same module developed by our team at WP connect. Therefore, the process of purchase, installation, and integration with SendGrid remains the same.
Connect Gravity Forms to SendGrid: how to choose the right plugin for your needs?
Confused about which add-on to use to connect Gravity Forms to SendGrid? Here’s a quick guide to help you.
Choose the module developed by Gravity Forms if you want :
- basic integration of Gravity Forms and SendGrid
- Send simple notifications after form submission (confirmation email, order update, password change, etc.).
Choose the Gravity Forms to SendGrid integration developed by WP connect if you want to :
- Create complete workflows from Gravity Forms submissions
- Map your Gravity Forms fields to SendGrid contact attributes
- Segment and personalize your SendGrid emails based on Gravity Forms data
- Sending web form data to Airtable for deeper analysis
- Implement advanced automation to enrich your email campaigns
- Integrate leads captured by Gravity Forms with your SendGrid CRM
It’s important to note that both add-on modules offer simple, seamless integration of Gravity Forms and SendGrid. The choice therefore depends on your feature needs.
Send data from Gravity Forms to SendGrid: a step-by-step guide
Follow our step-by-step guide to integrating Gravity Forms and SendGrid with our great Gravity Forms to Airtable add-on.
To implement this tutorial, you’ll need :
- An instance of Gravity Forms installed on your website
- A license for the Gravity Forms to SendGrid add-on module
- A free or paid SendGrid account
Of course, our add-on works very well even with a free SendGrid account.
Step 1: Install and activate the Gravity Forms to SendGrid add-on
To install our add-on on your site, follow these steps :
- Go to WP connect website and the Gravity Forms to SendGrid page
- Choose your plan and proceed to purchase the add-on
- Download the add-on file to your computer
- Go to your WordPress dashboard
- Navigate to the plugins section and click on “Add a new plugin”.
- Upload the add-on file you downloaded earlier
- Then click on “Install now”.
- Once installation is complete, click on “Activate plugin
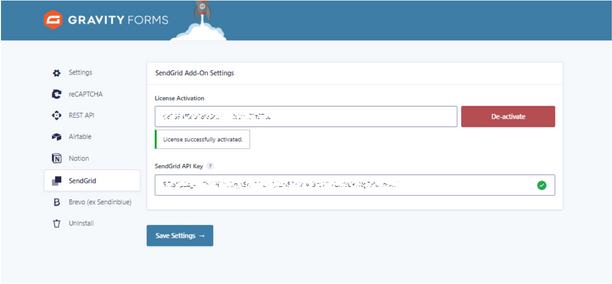
Next, you’ll need to activate the add-on’s license. Here’s how to do it:
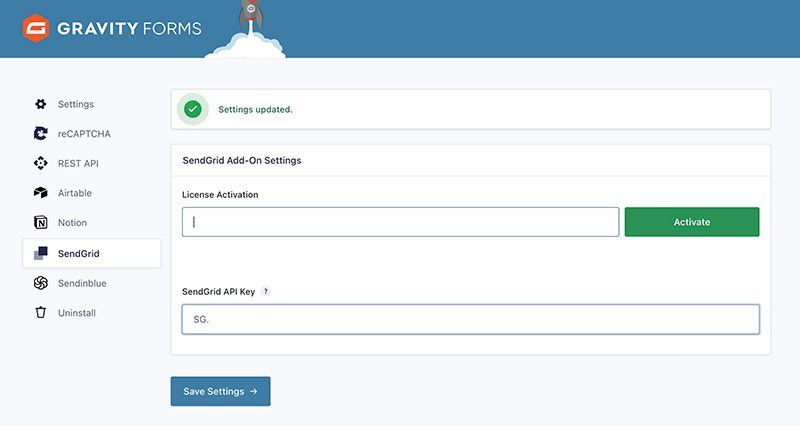
- Go to Gravity Forms settings and click on SendGrid
- Add your license key in the “License Activation” field.
- Click on Activate to complete the process.
Step 2: Generate your SendGrid API keys
Gravity Forms integration with SendGrid is made possible by the SendGrid API. To create a SendGrid API key, follow these steps:
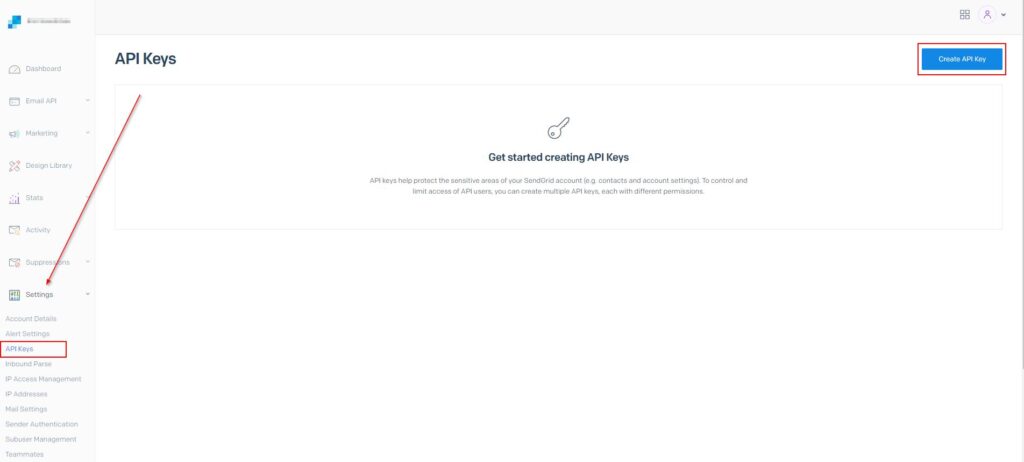
- Log in to your SendGrid account
- In the left-hand menu, access the “Settings” section and click on “API Keys”.
- Select “Create API Key” to start the creation process.
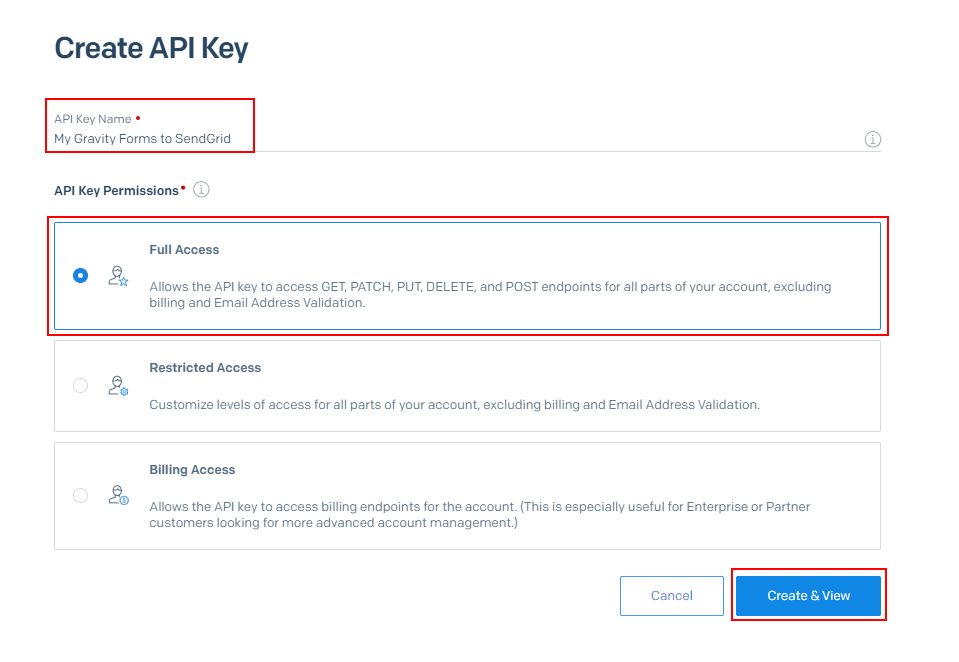
- Assign a clear, descriptive name to your API key to make it easier to identify.
- In your API key’s access authorizations, select the “Full access” option.
- Click on “Save”.
- Your API key will be automatically generated and displayed on the screen. Copy your API key to the clipboard and/or save it in a safe place.

Step 3: Add your SendGrid API key to Gravity Forms
Your API key acts as a security key between Gravity Forms and SendGrid. It authorizes Gravity Forms to transfer data to SendGrid and to access and manage your contacts and lists.
Here’s how to add your SendGrid API key to Gravity Forms:
- Access your WordPress admin panel
- In the left-hand menu, access Gravity Forms settings
- Paste the SendGrid API key you created in the previous step
- Click Save Settings to save the configuration
Step 4: Create a feed between Gravity Forms and SendGrid
A feed between Gravity Forms and SendGrid acts like a bridge connecting the two platforms. It’s the feed that enables the automated exchange of data and streamlined workflows between Gravity Forms and SendGrid.
Here’s how to create your first feed using Gravity Forms to SendGrid:
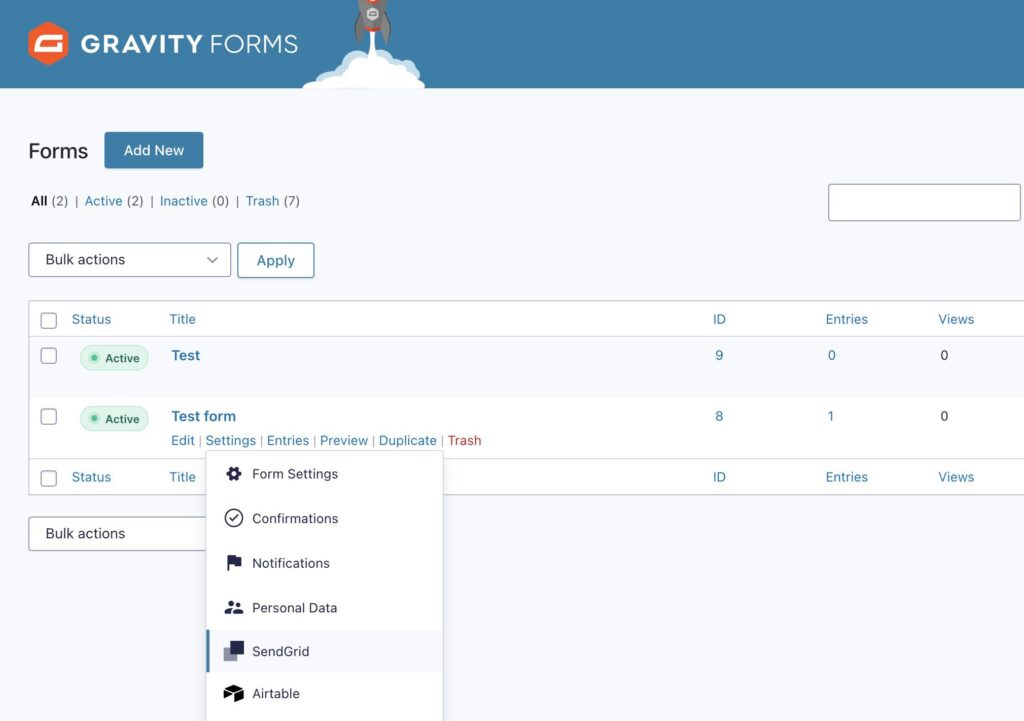
- In your WordPress dashboard, navigate to the Gravity Forms form you want to connect to SendGrid
- Access the form settings
- Click on SendGrid
- In the SendGrid feed, click on “Add New”
- Give your feed a meaningful name
- Save your feed
Step 5: Map fields and contact attributes
Field mapping is a crucial step in transferring data between Gravity Forms and SendGrid. It allows you to establish the correspondence between the information collected via Gravity Forms and the attributes in your SendGrid account.
This ensures flawless transfer and enables you to exploit the power of your data fully. Here’s how to map your fields:
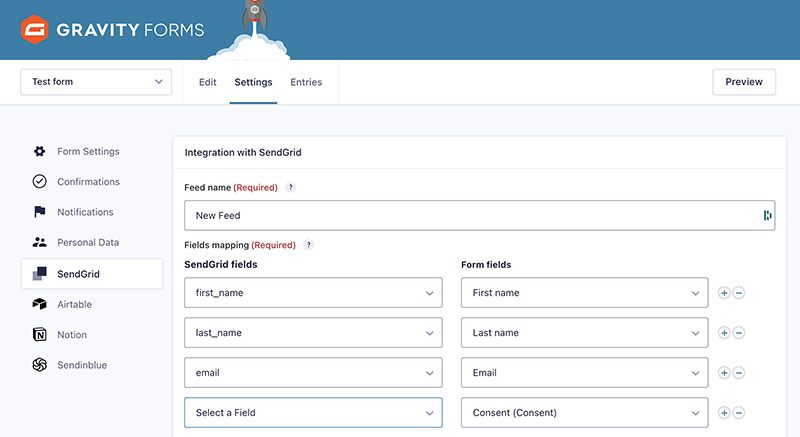
- Select a SendGrid field (where the data goes).
- Select the corresponding form field (where the data comes from).
- To add additional fields, click on the + button on the right.
- Repeat steps 1, 2, and 3 for all the fields you wish to send to SendGrid.
- Then click on “Save settings” to finalize the connections.
Step 6: Choose the destination SendGrid list
With the Gravity Forms to SendGrid add-on, you can choose which SendGrid list will receive the data collected via Gravity Forms.
- On the feed configuration page, navigate to the “Add to list” section.
- All available lists on your SendGrid account will be displayed at this point.
- Check the box next to each list to which you want to add the form data.
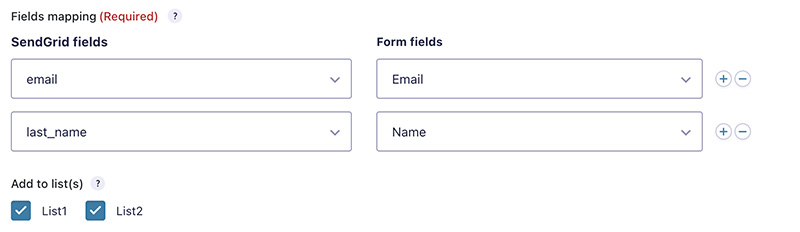
Note that you can choose multiple lists at once.
Congratulations! You’ve successfully integrated Gravity Forms with SendGrid. However, we still offer two additional optional steps if you want to take it further.
Step 7 (optional): Activate double opt-in
Want to ensure the validity of your email list and comply with GDPR? Enable double opt-in!
Here’s what it does:
- Upon form submission, users receive an email with a confirmation link.
- Only those who click the link are added to your SendGrid list, verifying their email address.
To activate double opt-in:
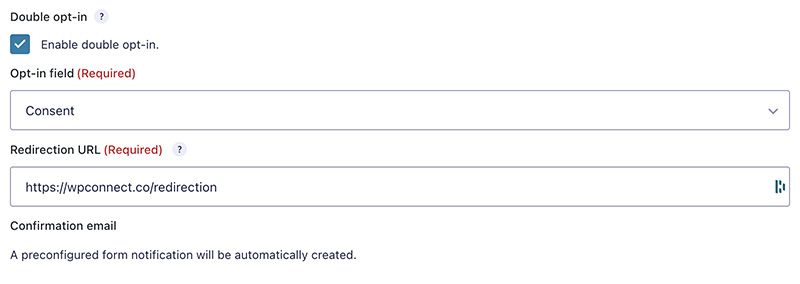
- Check the “Enable double opt-in” box.
- Choose a pre-made “Double opt-in template” from SendGrid (or create one if needed). This template explains the verification process and includes the confirmation link.
- Enter a “Redirection URL” – the web page users will be directed to after clicking the confirmation link (e.g., a thank you page).
Step 8 (optional): Add conditional logic
The SendGrid to Gravity Forms add-on offers an optional feature called “Conditional Logic.” This allows you to better control form submissions that are sent to your SendGrid lists.
Here’s how it works:
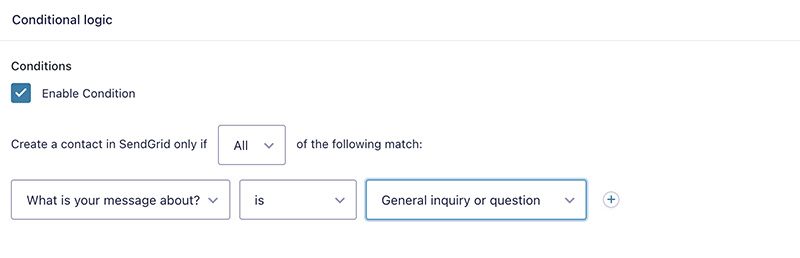
- Activate conditional logic
- In the menu that appears, select a field on your form to be used as a trigger for sending data to SendGrid.
- Define the condition. For example, you could select a checkbox field entitled “Consent” and define the criteria as “Checked”. This ensures that only submissions for which users have opted to receive emails are sent to SendGrid.
- Once you’ve configured your condition, click on “Save settings”.
You’re now at the end of this tutorial.
Before putting your configuration live, make sure to test that everything is working as expected.
To test, nothing could be simpler:
- Fill out your Gravity Forms form and submit it.
- Log in to your SendGrid account.
- Go to the “Contacts” section under “Marketing” and verify if the data is indeed transmitted according to the configured settings.
Connect Gravity Forms to SendGrid in minutes without coding
Unlock the full potential of your web form data by syncing Gravity Forms with SendGrid, the powerful email and automation platform.
- Add your contacts to one or multiple SendGrid lists
- Trigger automation workflows
- Track your business opportunities
- Enable double opt-in verification
- And much more
Final thoughts
By combining Gravity Forms and SendGrid, you have a powerful tool for optimizing data collection, automating communication workflows and efficiently managing your email lists.
With our Gravity Forms to SendGrid add-on, you can connect your Gravity Forms to your SendGrid lists in just a few minutes. Additionally, the integration of Gravity Forms and SendGrid with the add-on is very simple and seamless. Say goodbye to complex integrations and extra costs from Zapier or Make!
Avec notre module complémentaire Gravity Forms to SendGrid, vous pouvez connecter vos formulaires Gravity Forms à vos listes SendGrid en quelques minutes seulement.
Discover our other extensions to enhance your experience with Gravity Forms:
- Gravity Forms to Airtable: Effortlessly transform your data into actionable insights with our intuitive integration, perfect for organizing orders, products, and customer information.
- Gravity Forms to Notion: Seamlessly sync form submissions with Notion databases, providing your team with a centralized platform for project management and collaboration.
- Gravity Forms to Brevo: Streamline your workflow by seamlessly integrating form submissions with Brevo (ex Sendinblue). This allows for efficient data management, automation, and increased productivity.
FAQ
Why use Gravity Forms in WordPress?
Gravity Forms is a leading plugin for creating all kinds of forms on WordPress. Highly versatile and easy to use, it lets you :
- collect data: surveys, payments, donations, etc.
- capture leads
- automate tasks
- automatically transfer data to other platforms
Can I send a confirmation email from Gravity Forms?
Of course, there are different ways of sending confirmation e-mails with Gravity Forms. You can use Gravity Forms’ built-in functionality for this task.
If you’re looking for more flexibility and advanced automation, consider our Gravity Forms to SendGrid add-on.
How do I import data from Gravity Forms?
Gravity Forms includes a feature that lets you import data very easily. However, the data must be in .json format. Note that this won’t work if you want to import forms from other formats.
However, there are third-party extensions available in the WordPress directory to do this. Using these extensions, you can import data from CSV files or other external data sources into Gravity Forms.
How do I export Gravity Forms from one site to another?
Like importing, exporting Gravity Forms data can be done in just a few clicks. Note that this functionality allows you to export your Gravity Forms forms in .json format, either to move them or to make a backup.
Can I connect Gravity Forms to SendGrid without Zapier or Make?
Yes, you can connect Gravity Forms to SendGrid without using Zapier or Make.
Two main add-ons allow you to do it easily:
- Graviy Forms SendGrid add-on created by Gravity Forms
- Gravity Forms to SendGrid by WP connect
That’s the subject of this tutorial. Go back a little further to understand the difference between the two extensions and learn more about the features of each.