Are you looking for a way to export data from an Airtable database to your WordPress website?
Our game-changing plugin will allow you to display data from Airtable on WordPress.
The resulting applications are aplenty: you can now import any database on WordPress (product catalogue, job offers, contacts, events, projects, etc.) while benefiting from a user-friendly dashboard to manage data via Airtable. You can also publish articles and pages directly from Airtable to feed a blog or a whole ecosystem of websites. It’s even possible to import your SEO data from Airtable to your website!
Air WP Sync enables you to import data from Airtable to WordPress in various formats: pages, posts, custom post types and custom fields (in the Pro version). You can also sync all the data manually or automatically. With the Air WP Sync Pro+, you can even create WordPress accounts (users) from an Airtable database.
In this short tutorial, we show you how to set up Air WP Sync.
Download Air WP Sync
Download the Air WP sync free version from the official WordPress library. This free version allows you to import any Airtable database in the following formats: posts or WordPress pages.
The Pro version offers you additional functionalities.
The extension is available in French and English.
Airtable to WordPress integration Tutorial Summary
- Create a new connection
- Collect your Airtable API key
- Create your Airtable database
- Get your app ID and table ID
- Select content type to import, status and author
- Fields mapping between WordPress and Airtable
- Define sync settings
- Publish and sync

Streamline your workflow with Airtable and WordPress
Easily manage your WordPress site from Airtable: publish and update blog content and pages, manage users, job offers, SEO and much more. Simple and effortless integration with no coding required.
Installation and settings
1. Create a new connection
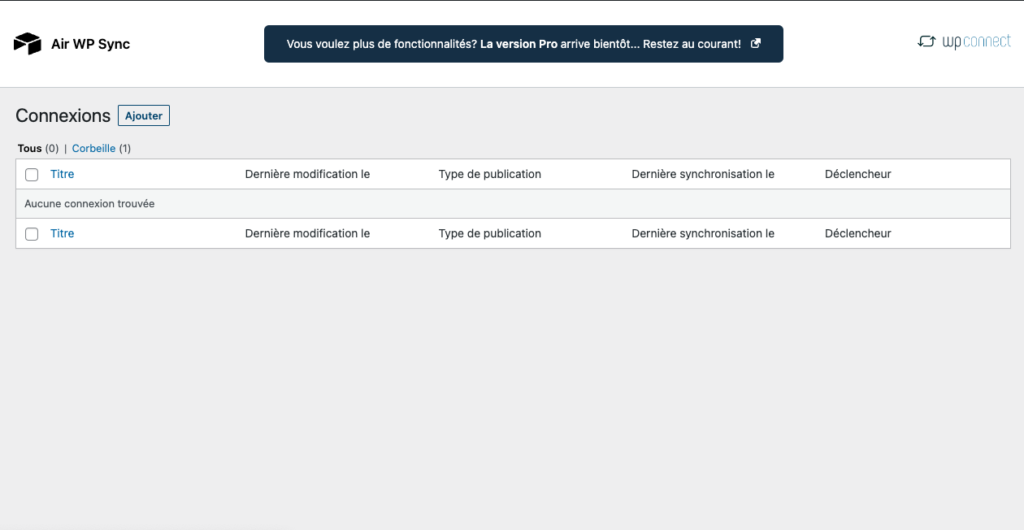
Once the plugin is set up and activated, a new Air WP Sync menu appears on your WordPress dashboard.
You can create as many connections as you want between Airtable and WordPress.
Create your first connection by clicking on Add. Don’t forget to name that first connection!
2. Collect your Airtable API key
Now then, please get hold of your API key on your Airtable account. You’ll find it right here. Your API key is masked, but you can view it and copy paste it by clicking on the right field (in mauve).
Go back to the settings of your Air WP Sync connection and paste your key in the correct field “API key”.
3. Create your Airtable database
You’ll now be able to create an Airtable database from scratch or from an existing one with the data you wish to import from WordPress.
For this tutorial, we’re going to create a brand new Airtable database, with an articles table including four columns (Title, Category, Content, Tags) and three savings in this table.
4. Get your app ID and table ID
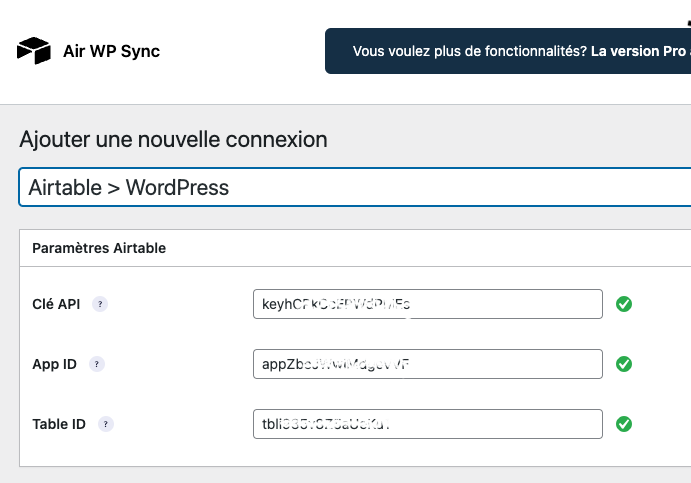
You will now need to tell Air WP Sync your Airtable database and table credentials. You will find them in the URL of your Airtable table, which looks like this: https://airtable.com/**appZbeJWwIdgeVF**/**tbli9358Z5aeKu1**/viwd0LfnNOcND
The string that begins with “app” is your app ID; the line that begins “tbl” is your table ID (in bold).
In the configuration page of your Air WP Sync connection on WordPress, paste this string of characters in the relevant areas.
5. Select content type to import, status and author
You will then be able to determine the format in which you want to import your data into WordPress.
The Free version of Air WP Sync allows you to import your data as a post or a page. The Pro version lets you sync your data in templates and custom post types. The Pro+ version allow you to import Airtable data to create WordPress users.
Finally, you can choose the status of the imported content (published, planned, draft, etc.) and its author.
6. Fields mapping between WordPress and Airtable
You can now associate the columns of your Airtable table with the fields of WordPress.
On the left column of your connection configuration screen, enter the exact name of the columns of your Airtable table, and opposite, choose the associated WordPress field, as in the example below.
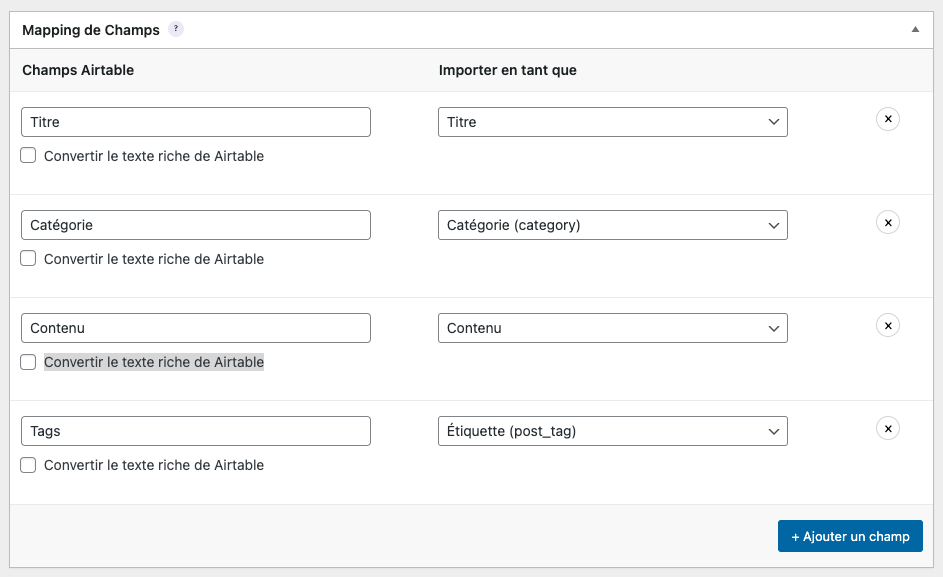
Repeat for each column.
Here are the WordPress field types available in the free version of Air WP Sync for import from Airtable:
– Title
– Content (of the page, of the article, etc.)
– Extract
– Slug
– Publication date
– Featured image
– Category
– Tags
Custom fields and Yoast SEO fields are available in the Pro version.
Note that if an Airtable column contains rich text (bold, italics, links, titles, etc.), you can check the “Convert Airtable rich text” option, which converts the text to fit WordPress perfectly.
7. Define sync settings
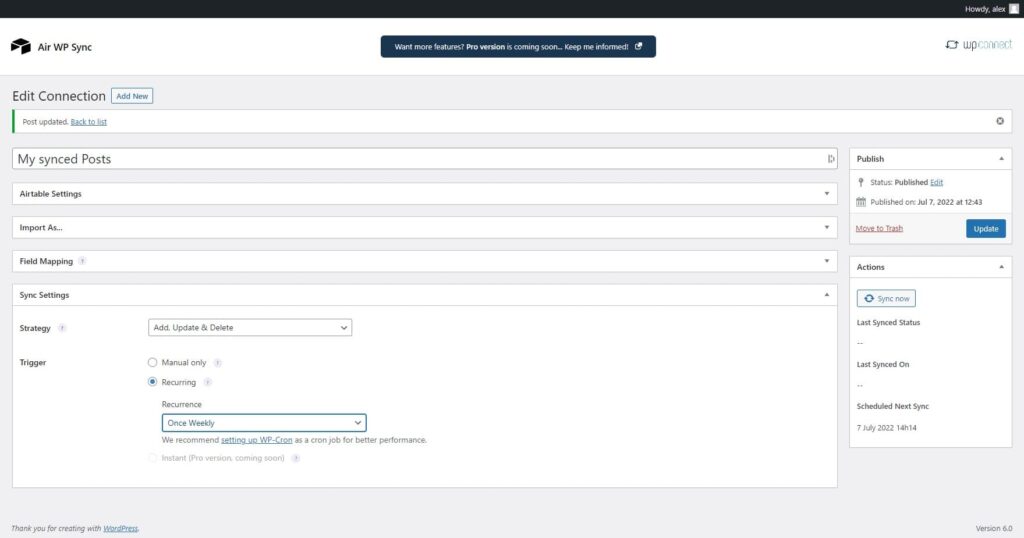
All that remains is to choose the desired synchronization parameters.
You can define the strategy or synchronization method:
– Add
– Add and update
– Add, update and delete
It would be best if you also chose the synchronization triggering criterion:
– Manual (on request)
– Recurring (every week, every day, etc.)
– Snapshot (in real time, available in Pro version of the plugin)
8. Publish and sync
All you have to do now is publish the connection before starting it.
Once published, a Synchronize button will appear at the top right of your connection page.
The data has been successfully imported into WordPress!
In our example, we can see our articles in the list of articles.
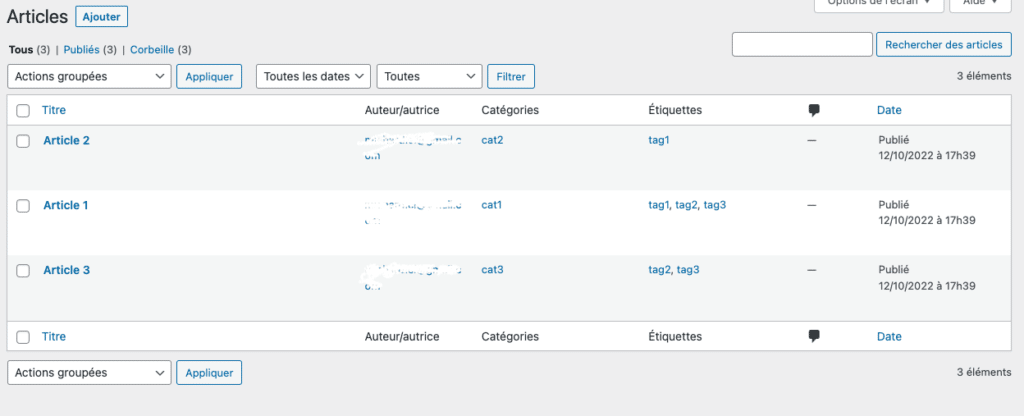
Categories and tags that still needed to be created were created on the fly.
The formatting entered in rich text in Airtable will be fully respected.
That’s it, now you can use our fantastic plugin and start importing Airtable data to WordPress!

Streamline your workflow with Airtable and WordPress
Easily manage your WordPress site from Airtable: publish and update blog content and pages, manage users, job offers, SEO and much more. Simple and effortless integration with no coding required.
Learn more about Air WP Sync & WP connect
To learn more about Air WP Sync and the integration of Airtable with WordPress, visit this page.
Your can also read the full documentation that explains how to connect Airtable to WordPress with Air WP Sync.
For your information, we also propose add-ons to send data from your WordPress forms to Airtable:
Gravity Forms to Airtable
WPForms to Airtable
Contact Form 7 to Airtable


