WordPress is powerful, but its default email system isn’t necessarily so. Typically, WordPress sends emails via the PHP mail() function, a basic method that lacks proper authentication. As a result, order confirmations, password resets, and contact form notifications regularly end up in spam folders or never reach their destination.
Beyond deliverability, the automation and workflow capabilities of WordPress default emails are limited. That is where combining WordPress with a platform like Brevo becomes a real advantage.
Brevo, formerly known as Sendinblue, is a professional email and marketing platform. The company claims over 600,000 businesses worldwide use its platform. Connecting it to WordPress gives you reliable email delivery, contact management, and marketing automation, all from one platform.
This guide provides a step-by-step guide to setting up Brevo (Sendinblue) for WordPress.
Key takeaways
In this guide, you will find:
- A brief introduction to Brevo and what it offers for WordPress users
- Three methods to set up Brevo for WordPress
- The pros and cons of each method to help you choose the right one
- Some concrete use cases to enrich your automation workflows
To follow this guide, you will need a Brevo account and a WordPress site. No technical skills required. The first method requires that you have Gravity Forms installed on your website.
What Is Brevo (Formerly Sendinblue)?
Brevo is an all-in-one marketing platform. It combines email marketing, transactional emails, SMS campaigns, marketing automation, and CRM tools. It is designed for businesses that need reliable communication tools without enterprise-level complexity.
In 2023, Sendinblue rebranded as Brevo. Since then, the platform, its features, integrations, and API have continued to evolve to offer more to its users.
Brevo is recognized as one of the leading players in email marketing and automation. It stands out for its value for money. For basic needs, the free plan includes the essential features you need to get started.
What Brevo offers for WordPress users ?
Brevo is a complete and versatile platform, covering everything from email marketing to SMS campaigns and CRM features. For WordPress users, here are four key Brevo features that will directly benefit your business.
- Email marketing: sync your contact forms with Brevo to automatically add new contacts to your lists and send newsletters and campaigns without manual work.
- Transactional emails: order confirmations, password resets, and form notifications sent via Brevo SMTP, with real inbox deliverability instead of spam folders.
- Subscription forms: build opt-in forms and embed them anywhere on your site. Contacts are synced to Brevo automatically.
- Marketing automation: leverage data automation to trigger personalized email sequences based on user behaviour and form conditions.
Now, we’re going to show you three different ways to connect Brevo to WordPress.
Method 1: Set up Brevo for WordPress using the Gravity Forms to Brevo Add-On from WP connect
Gravity Forms is one of the most widely used form builders for WordPress. It covers a wide range of use cases: digital signatures, file uploads, payments, GDPR compliance, and more.
The WP connect Gravity Forms to Brevo Add-On connects both platforms in a few simple steps, with no code required.
Note: This solution requires Gravity Forms to be installed and active on your site. It is specifically designed for Gravity Forms users.If you are looking for a more general solution, skip to Method 2.
Step 1: Get a License and Install the Add-On

Get your license at wpconnect.co. A free version is available to get started, with basic email field mapping only. For advanced features, the Pro plan starts at $40/year per site.
From your WordPress dashboard, go to Plugins > Add New, upload the file you downloaded or received by email after purchase, then install and activate the Add-On.
Step 2: Connect Your Brevo Account
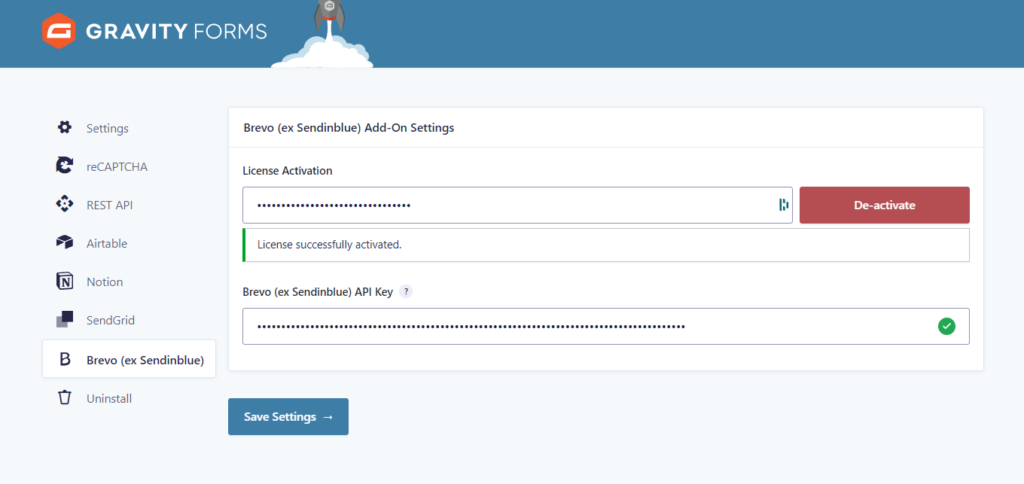
In your Brevo account, click on your company name in the top-right corner, go to Settings, and select “SMTP & API.” Go to the API Keys tab and click “Generate a new API key.” Name it and copy it. You will only see it once.
Return to the back office of your WordPress site. Go to the Gravity Forms > Settings > Brevo menu. Enter your Brevo API key in the designated field. This links your Gravity Forms submissions directly to your Brevo account.
Step 3: Create a flow and map the fields in your form
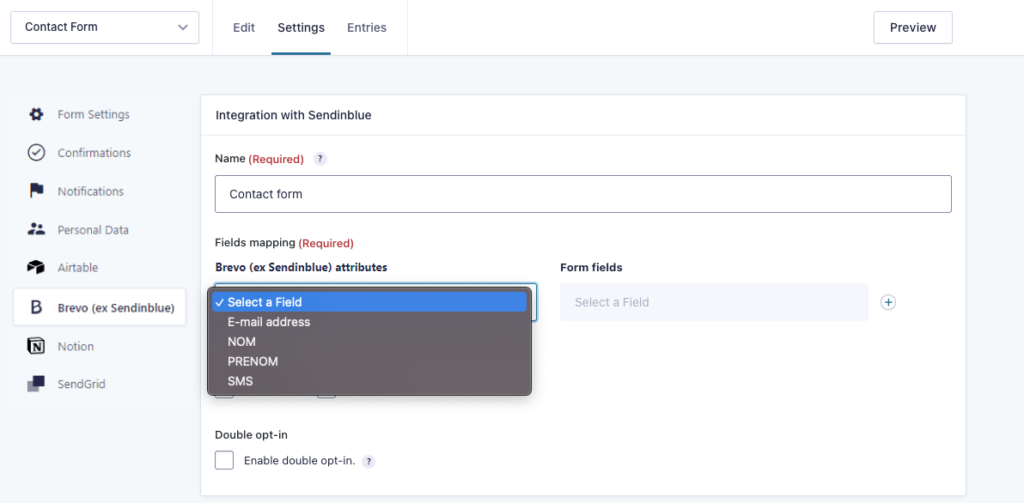
In WordPress, select the form you want to connect to Brevo and go to Settings > Brevo. Click Add New to create an integration, give it a clear name, configure the basic settings, and save.
Then, in the Brevo feed settings, map your form fields to Brevo contact attributes (email, first name, last name, etc.), adding multiple mappings if needed. Make sure the data types match.
Select one or more Brevo lists where submissions will be added. Optionally, enable double opt-in to send a confirmation email, choose a template, and set a redirect URL after confirmation.
Step 4: Test the integration
Submit a test entry through your form. Go to your Brevo account and check that the contact has been created in the correct list with the right attributes.
Pros and Cons of WP connect Add-On
Pros:
- No-code solution built for advanced Gravity Forms and Brevo use cases
- Conditional logic to create automated workflows based on form responses
- Sync submissions to one or multiple Brevo lists simultaneously
- Responsive support from No-code and WordPress experts
Cons:
- Compatible with Gravity Forms only
- The free version is limited to basic email field mapping and one feed per form
Using SendGrid instead of Brevo? WP connect also offers a Gravity Forms to SendGrid Add-On to connect your forms to Sendgrid platform. Discover all our Gravity Forms integrations to extend its capabilities.
Method 2 : Connect Brevo to WordPress with the official Brevo plugin
One of the simplest ways to connect Brevo to WordPress is to use the official plugin, developed by the Brevo team and available directly in the WordPress plugin directory.
Step 1: Create a Brevo Account
If you do not have a Brevo account yet, you can create one for free at brevo.com. The free plan allows up to 300 emails per day and 9,000 per month, which covers most small businesses getting started.
Once signed up, verify your email address and complete your business profile.
Step 2: Install the Plugin
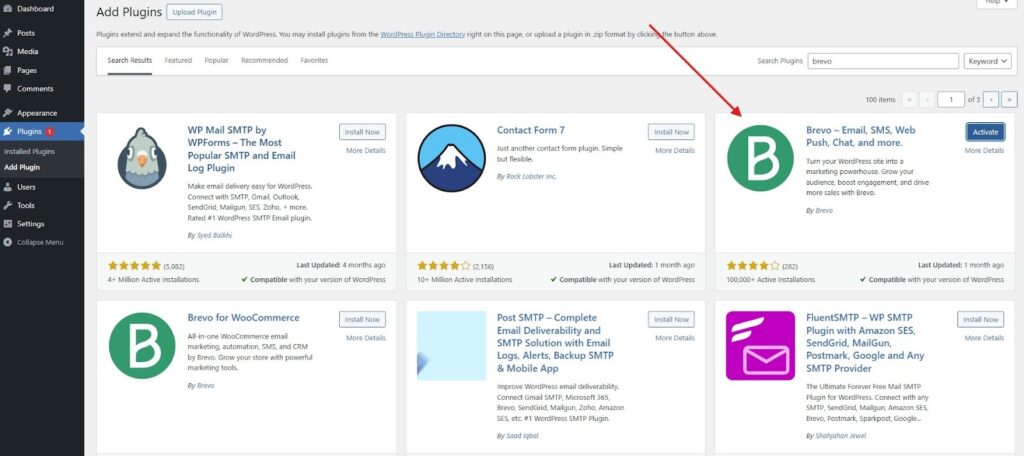
From your WordPress dashboard, go to Plugins > Add New. Search for “Brevo.” The official plugin is listed as “Brevo – Email, SMS, Web Push, Chat, and more.” Install and activate it. A new Brevo menu will appear in your WordPress sidebar.
Step 3: Connect with Your API Key
In your Brevo account, click on your company name in the top-right corner and go to Settings, then select “SMTP & API”. Go to the API Keys tab and click Generate a new API key. Name it and copy it. You will only see it once.
Back in WordPress, go to Brevo > Home, paste your API key in the Access Key field and click Save. Your site is now connected to Brevo.
Step 4: Configure Your Settings
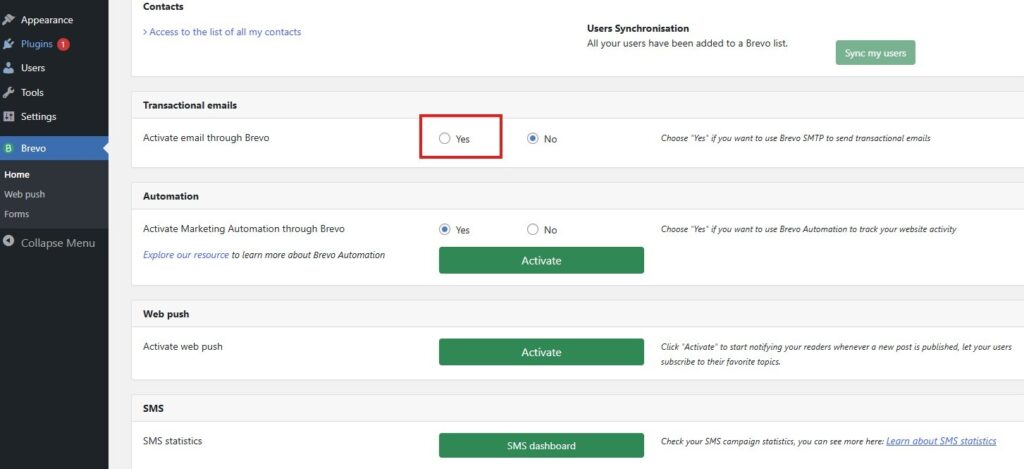
From the Brevo plugin homepage in WordPress, you can activate SMTP for transactional emails in one click, sync your existing WordPress users to a Brevo contact list, and enable the Brevo tracker to power your automation workflows.
Official Brevo plugin : Pros & cons
The official plugin covers the essential needs for most WordPress and Brevo users. Here is what you get out of the box:
Pros:
- Custom forms and popups
- GDPR compliance tools
- Contact list management and segmentation
- Omnichannel campaigns (email, SMS, push notifications)
- Marketing automation and campaign analytics
- Compatible with most major form builders and WooCommerce
For straightforward use cases, it is a solid and sufficient option.
Cons:
- Support is limited and mostly self-service on free and starter plans
- Limited for Gravity Forms power users with advanced needs
Method 3 : Set Up Brevo as Your WordPress SMTP Mailer
If you already use an SMTP plugin like WP Mail SMTP or Easy WP SMTP, you can configure Brevo as the mailer directly, without installing the official Brevo plugin. This method focuses on maximum email deliverability for transactional emails.
Step 1: Authenticate Your Domain in Brevo
Domain authentication is essential. It adds a DKIM signature to your emails, which proves to inbox providers that your messages are legitimate. Without it, your emails are more likely to land in spam.
In your Brevo account, go to your company name > Senders, Domains & IPs > Domains. Click Add a domain and enter your site’s domain (e.g., example.com).
Brevo will generate DNS records, specifically TXT records, that you need to add to your domain’s DNS settings via your hosting provider.
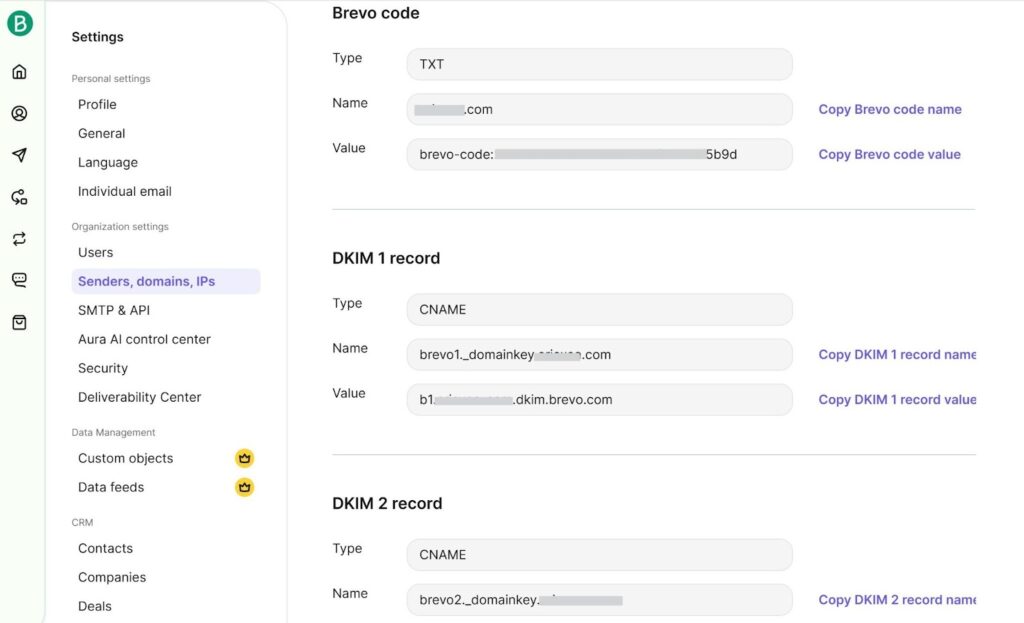
Once added, click Authenticate in Brevo to verify. DNS propagation can take up to 48 hours.
Step 2: Generate Your API Key
Follow the same procedure as for the previous methods to generate your Brevo API key.
Step 3: Configure your SMTP plugin
In WP Mail SMTP (or Easy WP SMTP), go to the Settings page. Select Brevo as your mailer. Paste your API key. Set your From Email to an address on your authenticated domain (e.g., hello@example.com). Enable Force From Email to ensure all emails from your site use this address consistently.
Step 4: Send a Test Email
Go to WP Mail SMTP > Tools > Email Test and send a test email to confirm everything is working. Check both the inbox and the spam folder to verify delivery.
WordPress and Brevo in Action: 3 common use cases
As mentioned above, the combination of WordPress and Brevo offers a wide range of automation possibilities. From lead generation to personalized communication, here are some common use cases that show you how to get the most out of your integration.
- Lead capture: Every form submission on your WordPress site automatically creates a contact in Brevo. No manual import, no missed leads. Your follow-up campaigns start immediately.
- Smart segmentation: Use Gravity Forms conditional logic to sort contacts into the right Brevo lists based on their responses. Send the right message to the right audience, every time.
- E-commerce follow-up: Connect your WooCommerce store with Brevo to automate post-purchase emails, abandoned cart recovery, and targeted promotions based on order history.
FAQ
Why should I choose Brevo as my SMTP provider?
Brevo provides a reliable way to send emails directly from your site, improving deliverability and reducing the risk of messages landing in spam. It integrates easily with WordPress plugins, supports transactional emails, and offers tracking and automation features to better manage your communications.
Is Brevo free for WordPress?
Yes. Brevo offers a free plan that includes up to 300 emails per day, unlimited contact storage, and access to the core WordPress plugin features. Paid plans start when you need to send more than 300 emails per day or access features like A/B testing, advanced segmentation, or dedicated IP addresses.
How do I set up Brevo to send my WordPress emails?
If you use Gravity Forms on your WordPress site, the WP connect Gravity Forms to Brevo Add-On is a robust and reliable solution. It lets you sync your WordPress contacts to Brevo, trigger automated workflows, and use conditional logic to build advanced processes.
For other use cases, the official Brevo plugin or configuring Brevo as your WordPress SMTP mailer are both solid options to consider.