Gravity Forms to SendGrid Documentation
Start taking control of your communication workflows by connecting your SendGrid with your Gravity Forms using our add-on.
Simply determine the SendGrid lists you want to associate with a Gravity form, align the relevant fields, and you're all set. From then on, all responses from your forms will go directly into your SendGrid lists, making your email collection and organization more straightforward. It's a practical, easy solution for better data management.
Installation & Settings
To install our Gravity Forms to SendGrid add-on in WordPress, follow the steps below:
-
Download the plugin file to your computer.
-
Log in to your WordPress dashboard.
-
On the left-hand side menu, click on "Plugins" and then "Add New".
-
Click the "Upload Plugin" button at the top of the page.
-
Click the "Choose File" button and select the plugin file you downloaded in step 1.
-
Click the "Install Now" button.
-
Wait for the plugin to be installed, and then click the "Activate" button.
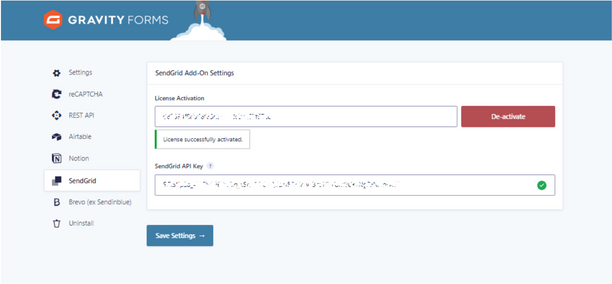
To activate the Gravity Forms to SendGrid add-on, follow the steps below:
-
Move to "settings" of Gravity Forms and then click on "SendGrid".
-
Now, Add your license key in "License Activation" and click on "Activate".
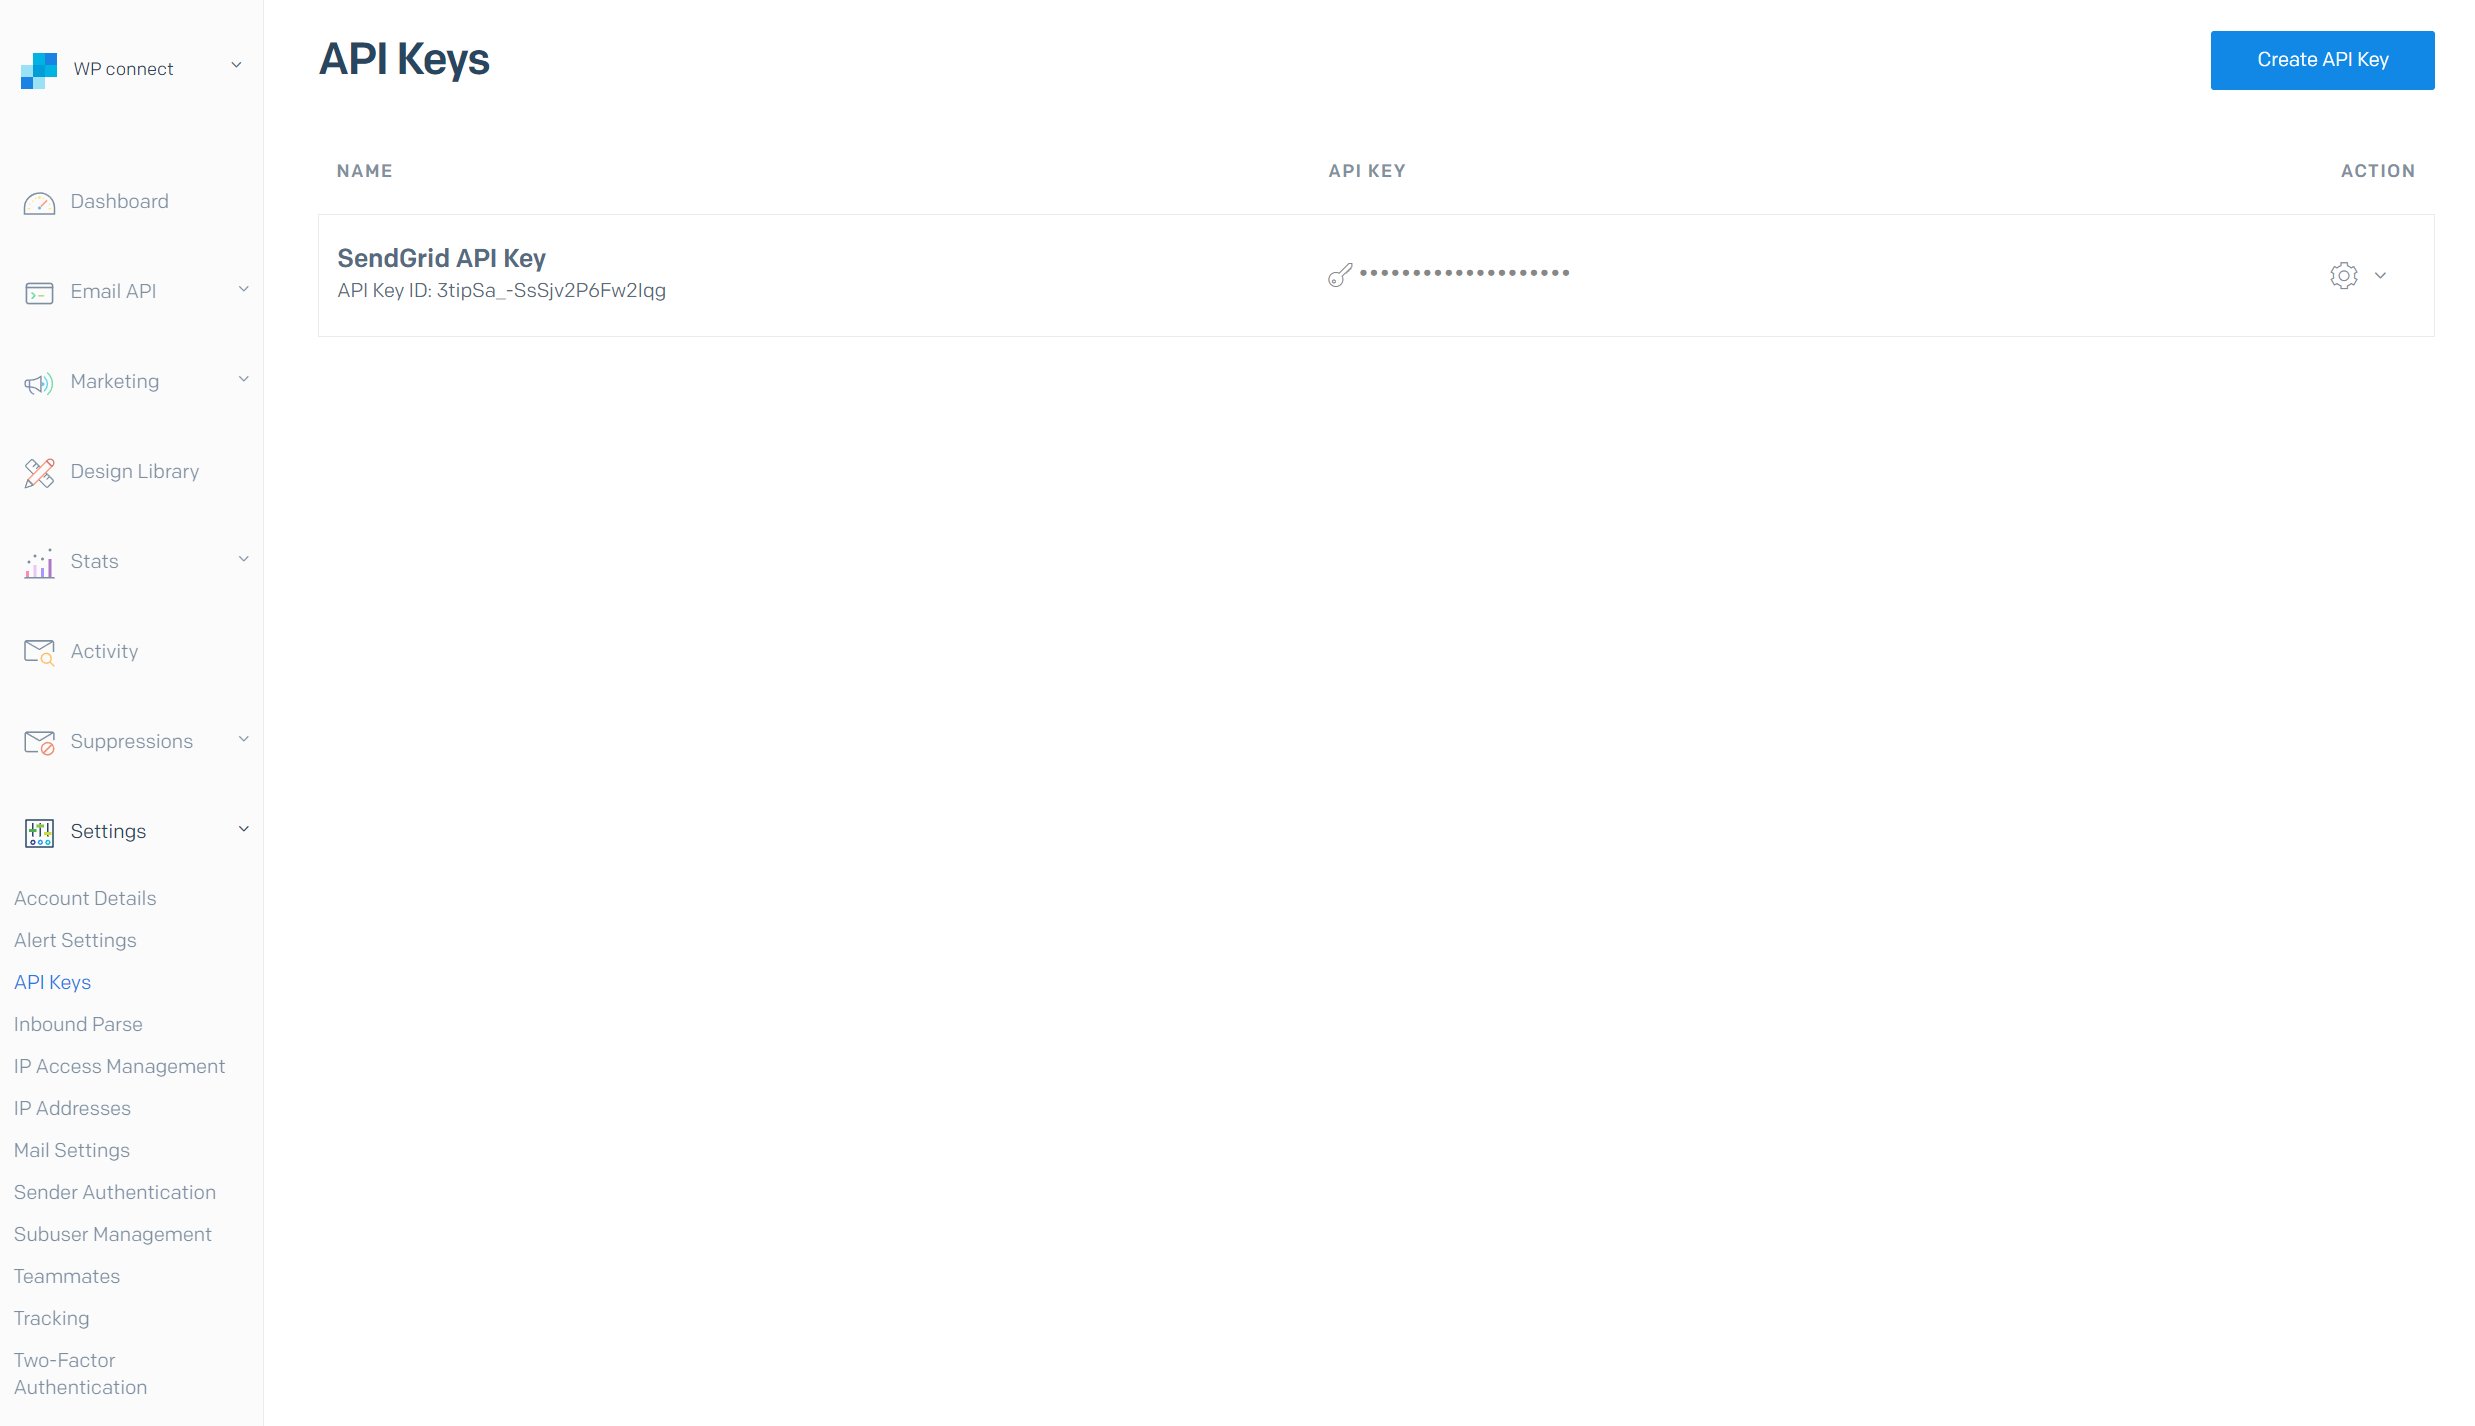
Generate SendGrid API key
-
In SendGrid, In the left hand-menu click on "Settings".
-
Click on "API Keys".
-
Click on "Create API key".
-
Name your API key.
-
Select "Full Access" for API Key permissions.
-
Click on "Create & View".
-
Copy your API key to clipboard.
Add API Key to Gravity Forms plugin
-
In the left-hand menu section of Gravity Forms, click on "Settings".
-
Click on "SendGrid".
-
Paste your API key from SendGrid in "SendGrid API Key" section then click on "Save settings".
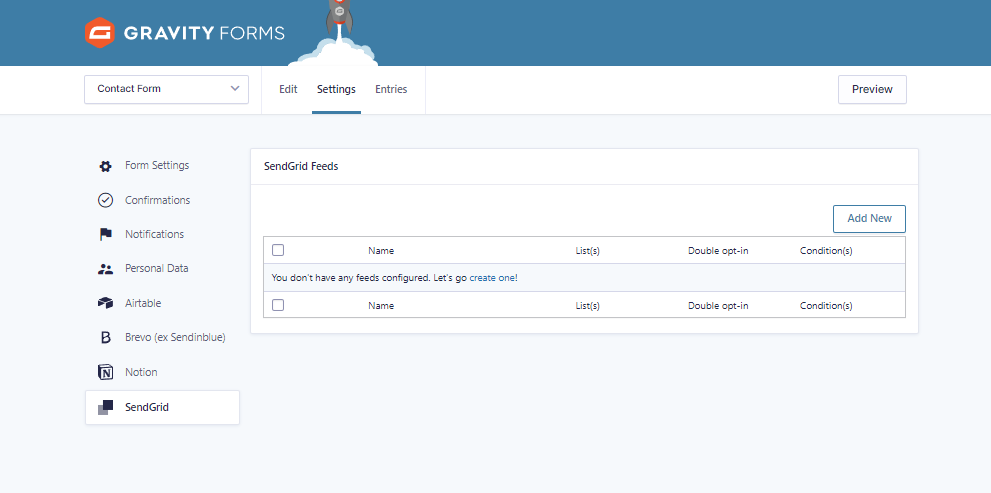
Create a Feed
-
Open the form you want to connect with SendGrid.
-
In the top, click on "Settings".
-
Click on "SendGrid".
-
In SendGrid feeds, click on "Add new".
-
Enter a feed name.
Fields Mapping
-
In "Fields mapping", select a SendGrid fields.
-
In "Form fields", select a form field present in your form.
-
Click on the "+" button on the right to connect other "SendGrid fields name" with "Form field".
-
Repeat step 2 & 3.
-
Click on "Save setting".
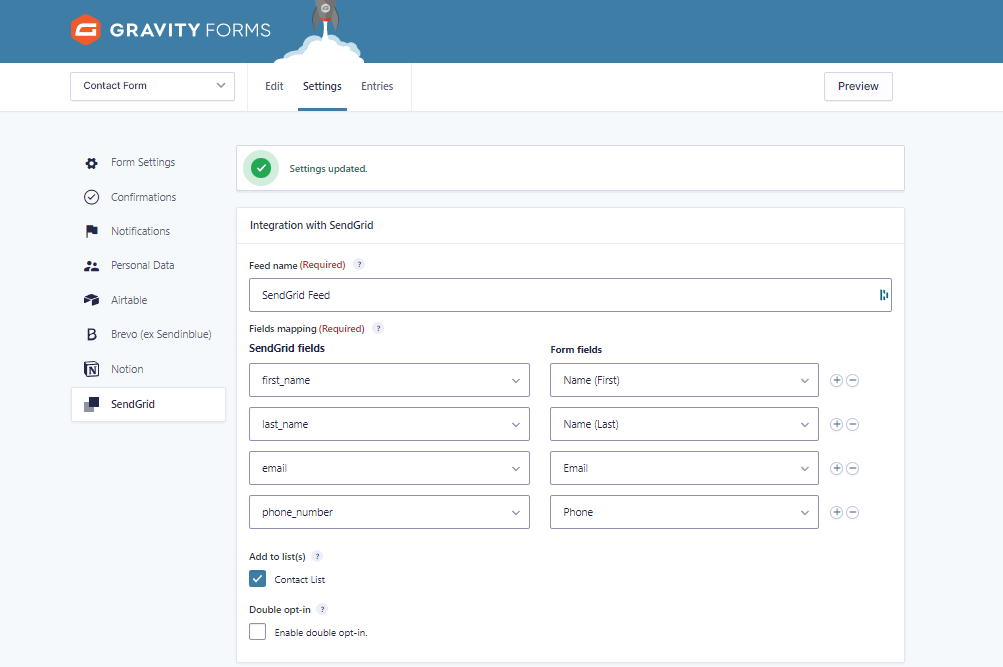
Choosing the SendGrid list
Below Add to list, you'll find all the contact lists created in your SendGrid account.
You just have to check the list or lists to which you want to send your contacts.
Enable Double Opt-In (Optional)
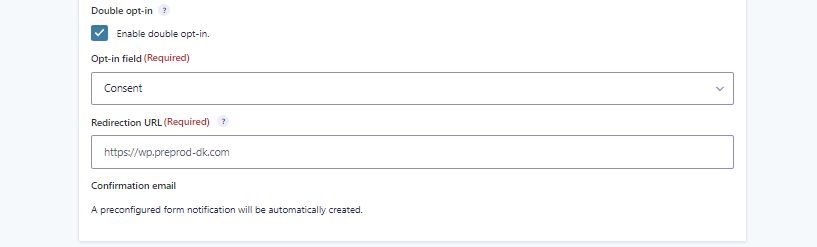
Upon form submission, an email containing a confirmation link will be sent to your contacts. Only those who click this link will be registered in your SendGrid list.
-
Activate it by checking the 'Enable Double Opt-In' checkbox, then additional fields will appear.
-
Select a double opt-in template from SendGrid.
-
Enter a redirection URL.
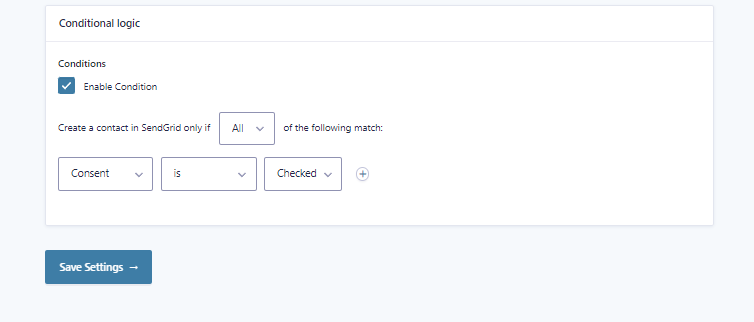
Add Conditional Logic (Optional)
You can finally add conditional logic, so only the contact information of those who meet specific conditions will be sent in SendGrid list.
To create a condition, click Enable Condition.
On the left, you can choose a field from your form and select the criteria that will activate sending to SendGrid, for example:
→ Consent IS "Checked".
Once you configurated your condition, click on "Save Settings".
Supported Fields
Gravity Forms fields:
- Single Line Text
- Paragraph
- Text
- Drop Down
- Number
- Checkboxes
- Radio Buttons
- Name
- Date
- Time
- Phone
- Address
- Website
- File
- List
- Multi select
- Consent
SendGrid attributes:
- Text
- Date
- Number