Gravity Forms to Notion Documentation
Start managing your data more effectively by linking your Notion database to your Gravity Forms using our add-on.
Simply identify the Notion tables you want to connect to a Gravity form, map the relevant fields, and you're all set. From then on, all responses from your forms will go straight to your Notion database, simplifying your data collection and organization. It's an easy, practical solution for better data handling.
Installation & Settings
To install our Gravity Forms to Notion add-on in WordPress, follow the steps below:
-
Download the plugin file to your computer.
-
Log in to your WordPress dashboard.
-
On the left-hand side menu, click on "Plugins" and then "Add New".
-
Click the "Upload Plugin" button at the top of the page.
-
Click the "Choose File" button and select the plugin file you downloaded in step 1.
-
Click the "Install Now" button.
-
Wait for the plugin to be installed, and then click the "Activate" button.
To activate the Gravity Forms to Notion add-on, follow the steps below:
-
Click on "settings" of Gravity Forms and then click on "Notion".
-
Finally, Add your license key in "License Activation" and click on "Activate".
Generate Notion Secret token
-
In Notion, click on "Settings" in the top-left section.
-
Click on "Connections".
-
click on "Develop or manage integrations".
-
Click on create on "create new integration".
-
Enter a name.
-
Select a workspace to associate with the integration.
-
Click on "Save" then "Configure integration settings".
-
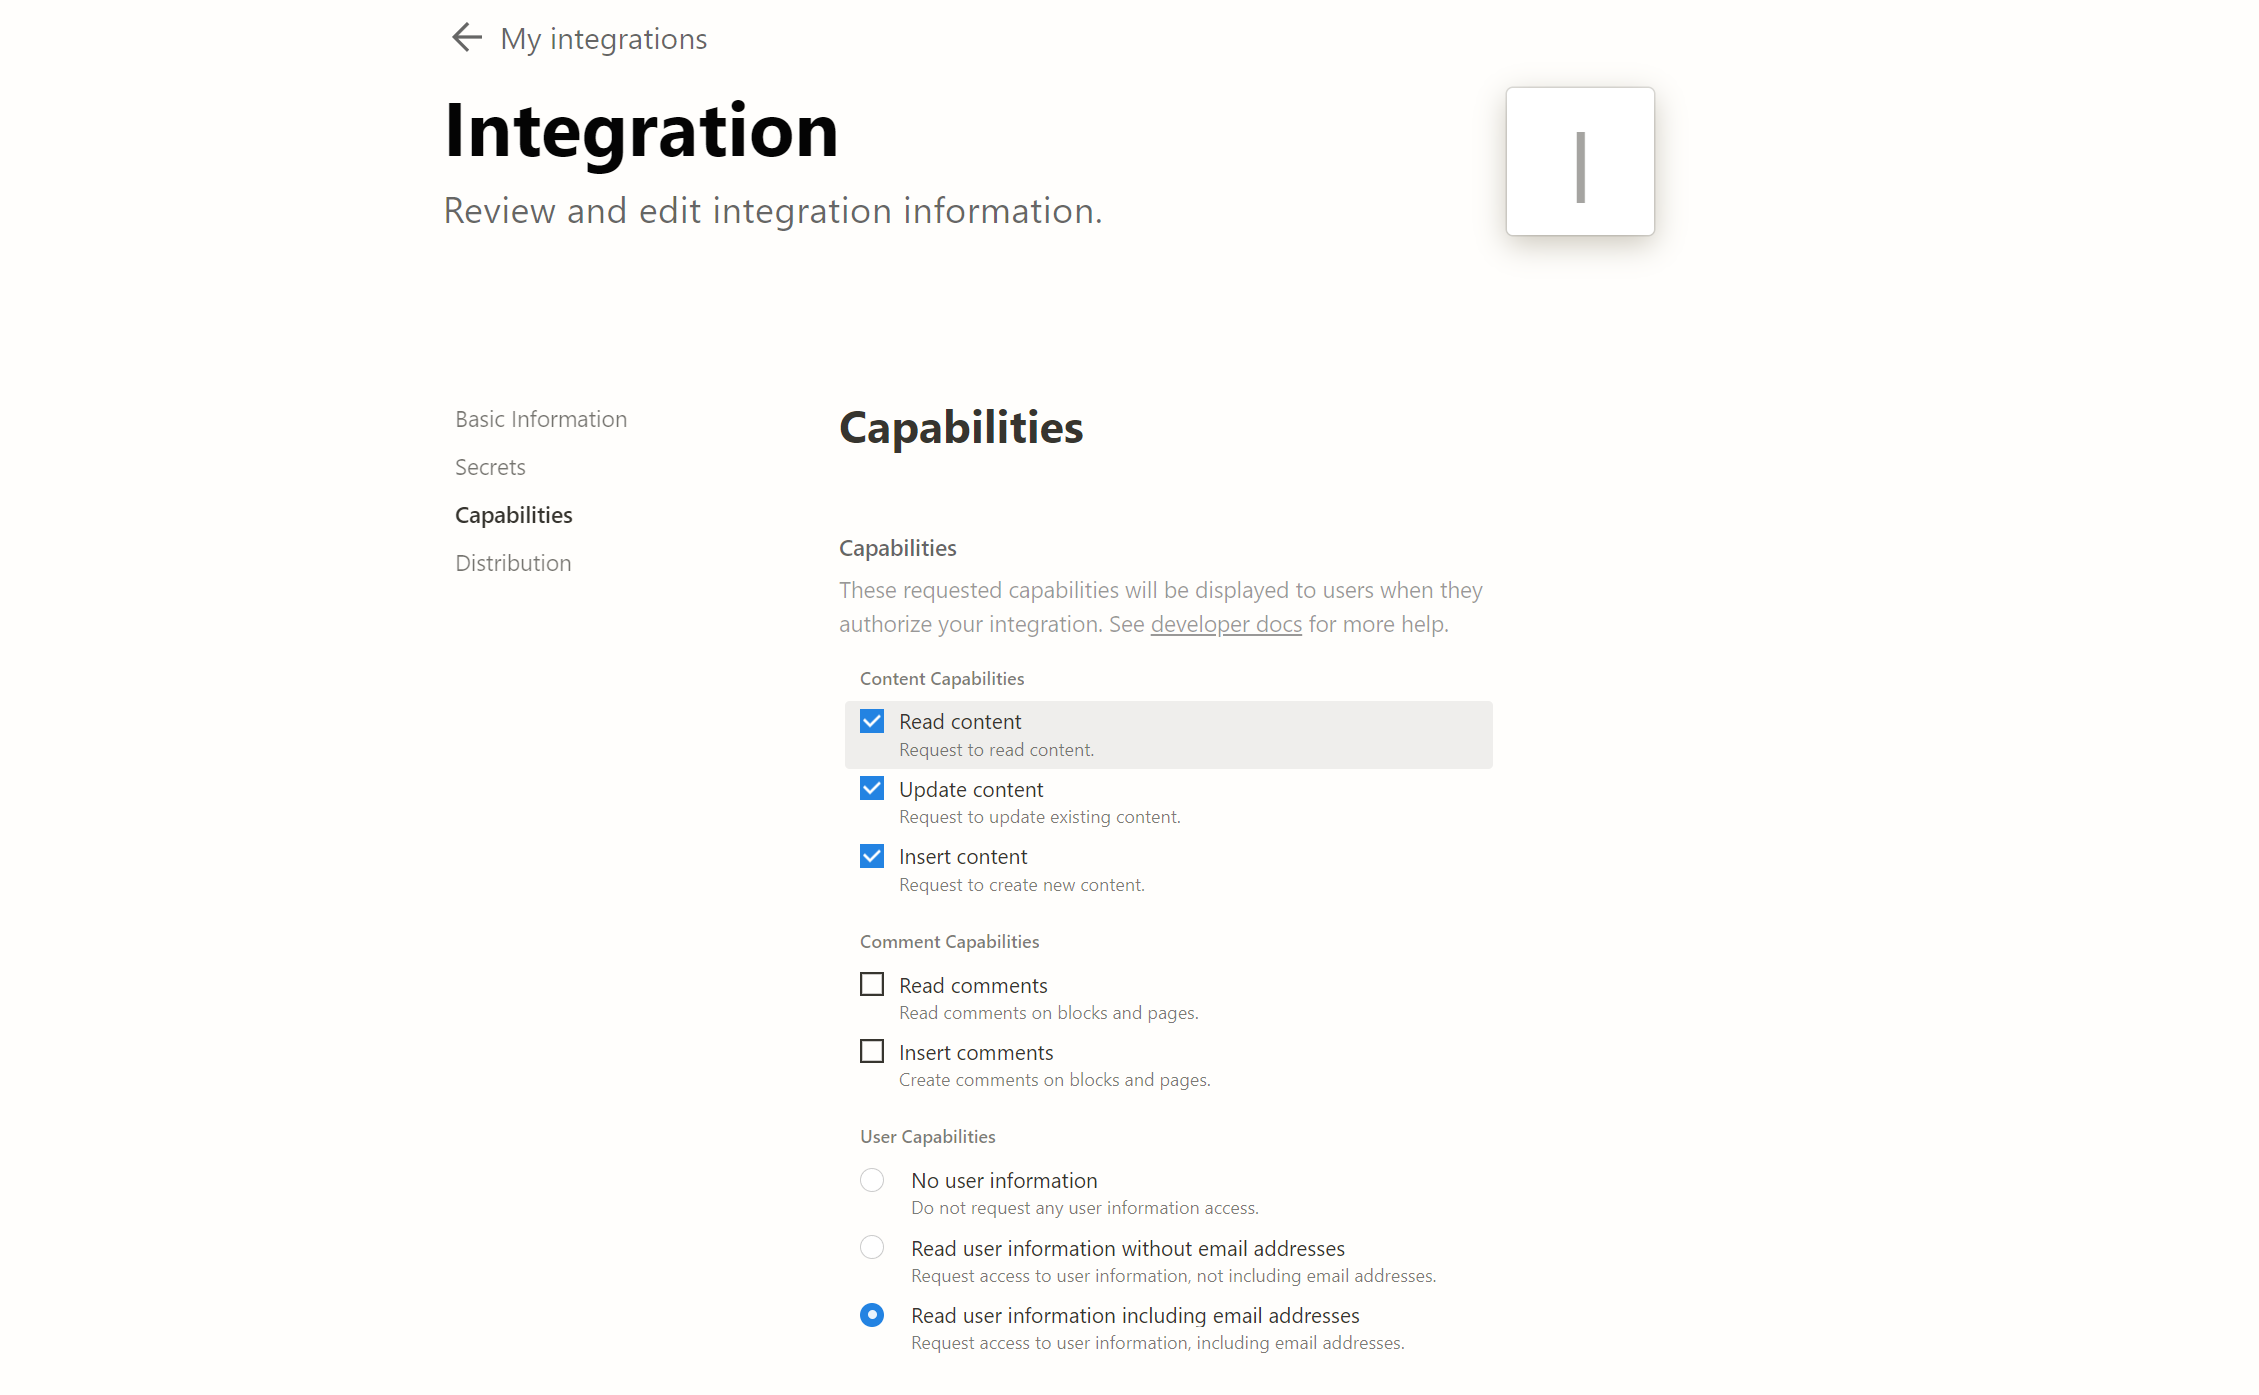
Go to "Capabilities" section.
-
In "User Capabilities" select "Read user information including email addresses".
-
Click on "Save".
-
Go to "Internal Integration Secret".
-
Click on "Show".
-
Copy the integration secret token to clip-board.
Add Notion Secret Token to Gravity Forms
-
In the left-hand menu section of Gravity Forms, click on "Settings".
-
Click on "Notion".
-
Paste your integration secret token from Notion in "Secret token" section then click on "Save settings"

Add Connection to Notion Database
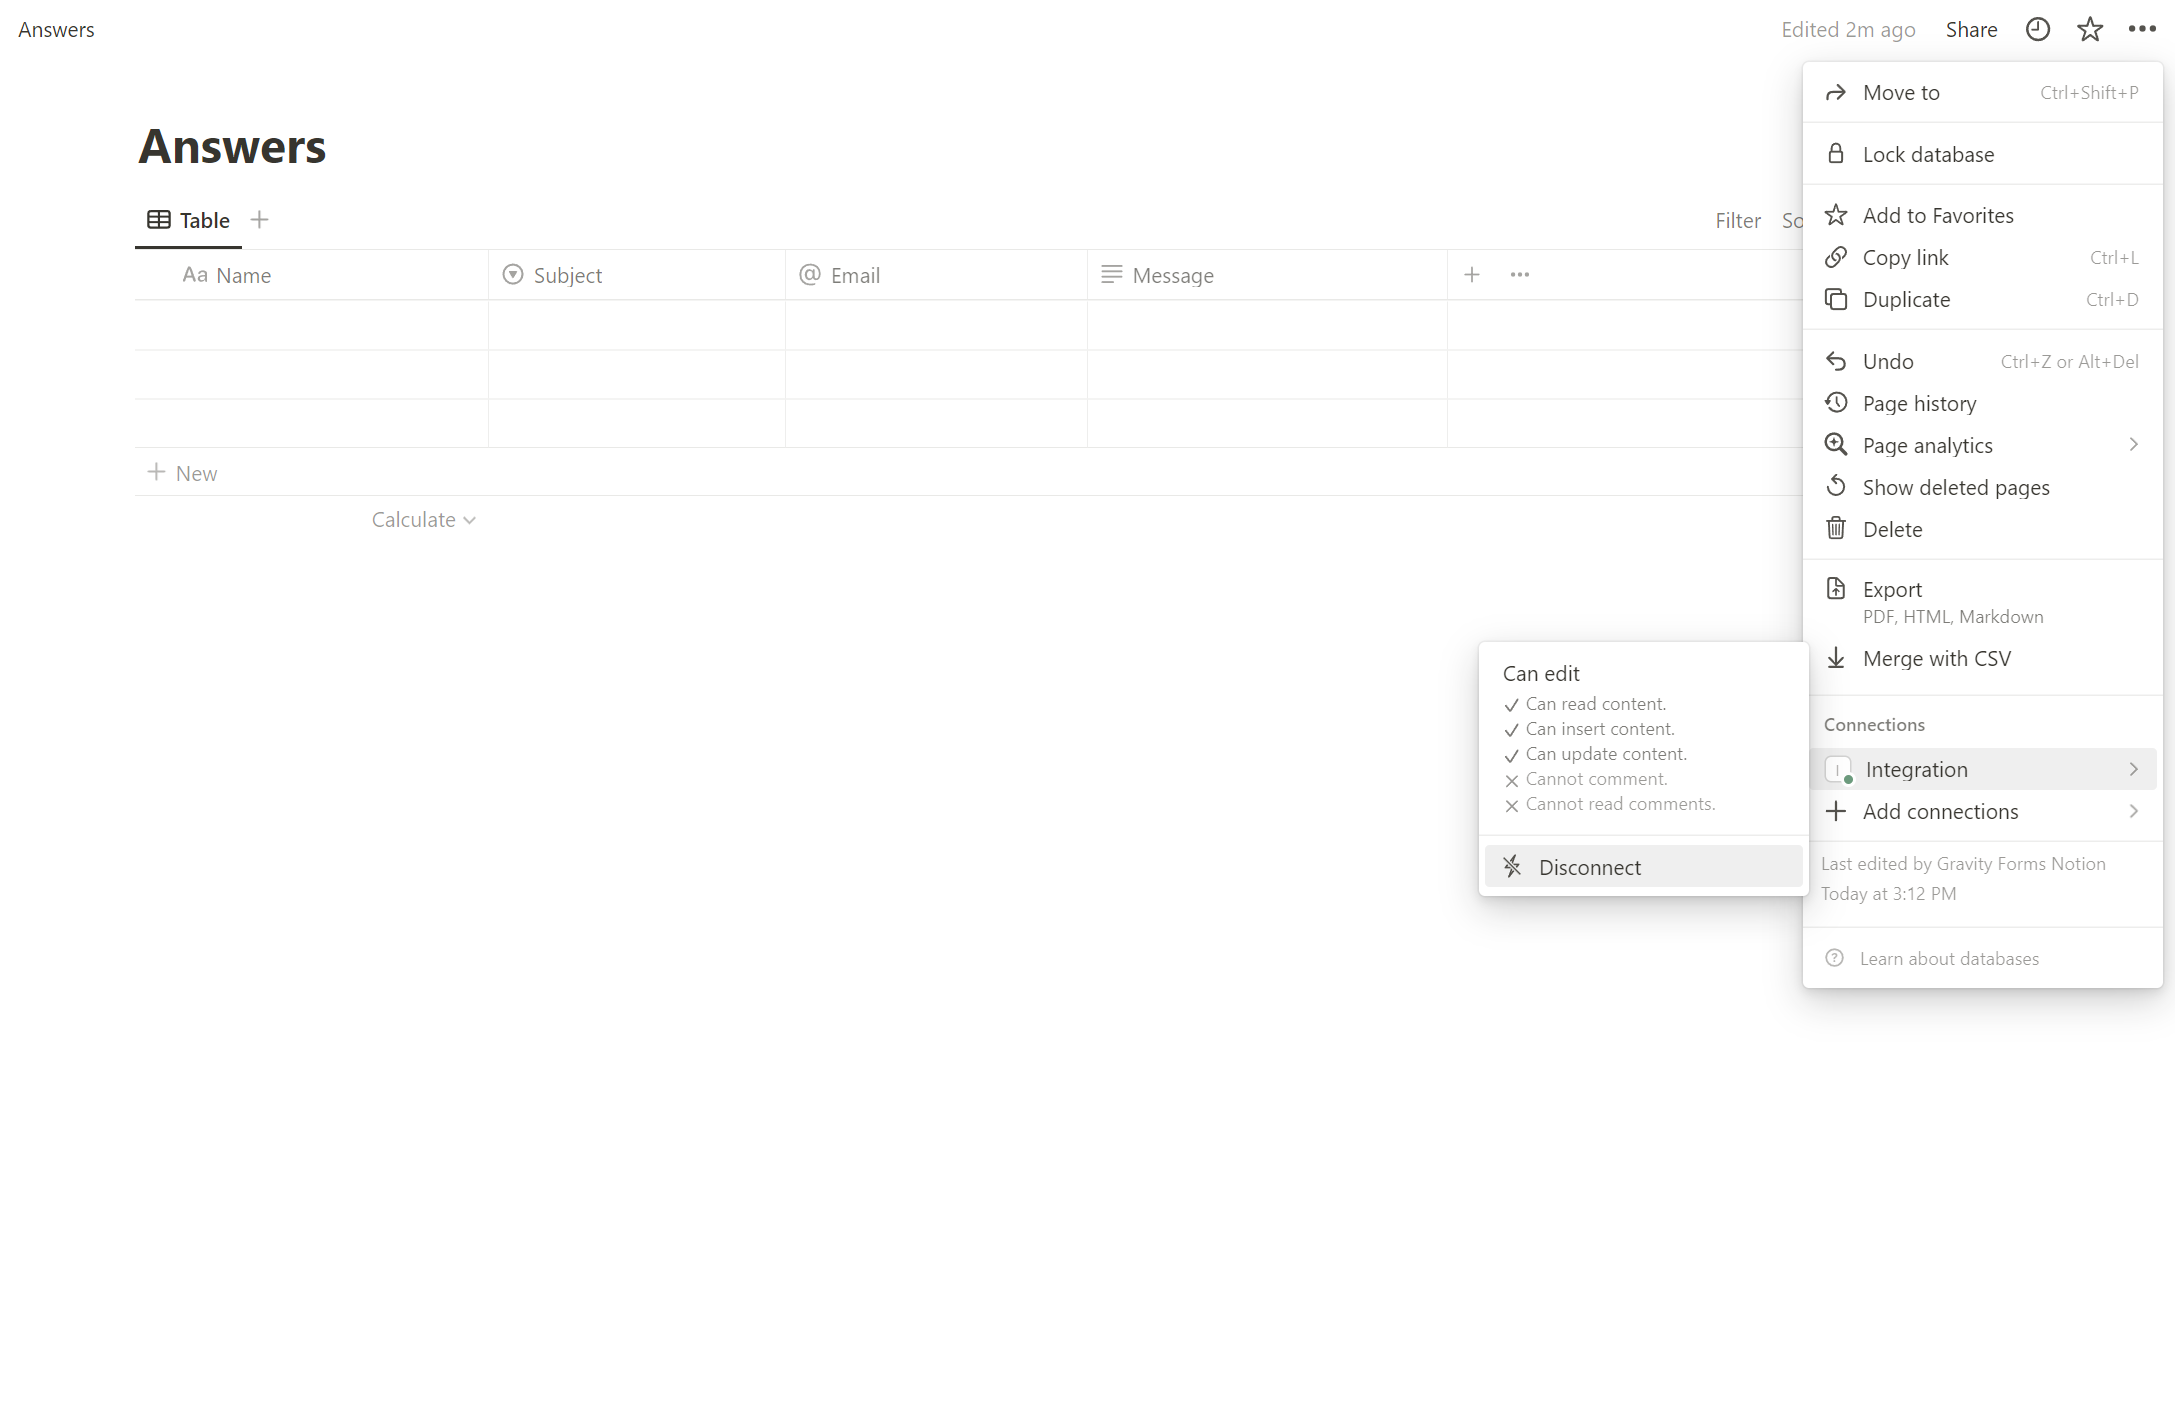
-
in the top-right corner of the Notion database you want to connect to Gravity forms, Click on the 3 black circles
-
Click on "Add connections" in "Connections" section in the bottom part on the menu
-
Search for your Integration then click on it
-
A pop-up with "'Your integration name' will have access to this and all child pages. Continue?" will show up, then click on "Confirm"
Create a Feed
-
Open the form you want to connect with your Notion base.
-
In the top, click on "Settings"
-
Click on "Notion"
-
In Notion feeds, click on "Add new"
-
Choose a feed name
-
Select the database of your choice between those present in the workspace you added while setting-up your integration
-
Select the table of your choice which will receive the data
-
Click on "Save settings"

Fields Mapping
-
Now that you have saved your settings while creating connection between Notion and your form, you will see in your feed "fields mapping"
-
In "Notion columns", select a Notion field present in your table
-
In "Form fields", select one of your form field present in your form
-
Click on the "+" button on the right to connect other "Notion columns" with "Form fields"
-
Repeat step 2 & 3.
-
Click on "Save setting".

Add Conditional Logic (Optional)
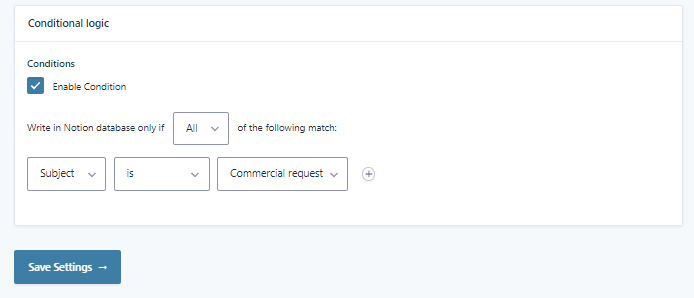
You can finally add conditional logic, so only the contact information of those who meet specific conditions will be sent in Notion list.
To create a condition, click Enable Condition.
On the left, you can choose a field from your form and select the criteria that will activate sending to Notion, for example:
→ Subject IS "Commercial request".
Once you configurated your condition, click on "Save Settings".
Supported fields
Gravity Forms fields:
-
Single Line Text
-
Paragraph
-
Text
-
Drop Down
-
Number
-
Checkboxes
-
Radio Buttons
-
Name
-
Date
-
Time
-
Phone
-
Address
-
Website
-
Email
-
File
-
List
-
Multi select
-
Consent
Notion properties:
-
Files and Media
-
Title
-
Text
-
Number
-
Select
-
Multiple Select
-
Date
-
Checkbox
-
URL
-
Email
-
Phone