How to update the Airtable Template
Version 0.2.0 to 1.0.0
To benefit from the ability to set the publication date for each product, you need to update the Airtable template.
Previously, the product publication date corresponded to the synchronization date.
With this update, you will be able to define a past or future date for the publication of your products.
This template update is optional.
To update the template:
- Go to Air WP Sync for WooCommerce > Woo Connections.
- In the Your synchronized Airtable base section, click on Check on airtable link to access the template.
For this update, you need to:
- Modify the number of version.
- Add the field “Published on” to the “Products” table.
- Add the “future” value on the “Status” field in the “Products” table.
Version of template
In the “Air WP Sync for WooCommerce Template” table:
- Replace the “Version” in the Notes column “0.2.0” with “1.0.0”.
- Click on Hide fields button (above table), switch the visibility of the Version field.
- And modifiy the value of Version column to “1.0.0”.
- Click again on Hide fields button, and click on Version.
- Click on the Hide fields button again to close the drop-down menu.
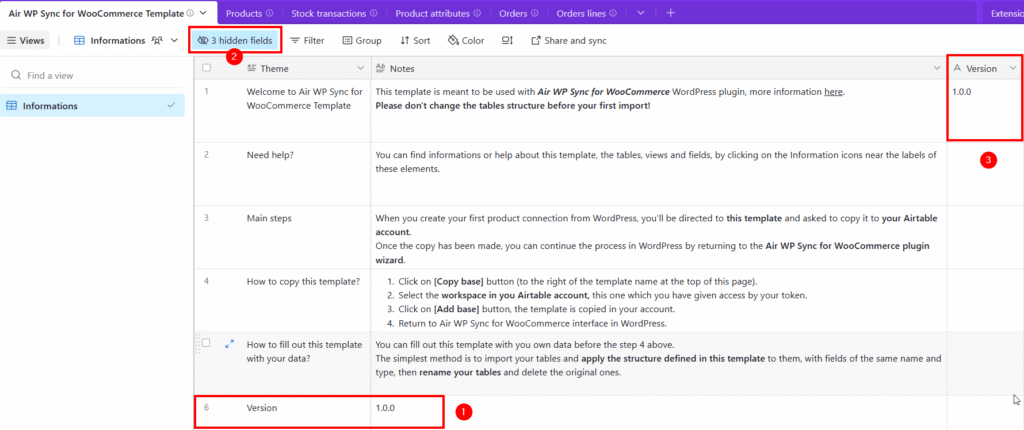
🚨 Important: The “Notes” column must be set to long text, and the “Version” column must be set to single line text. Please do not change their field types.
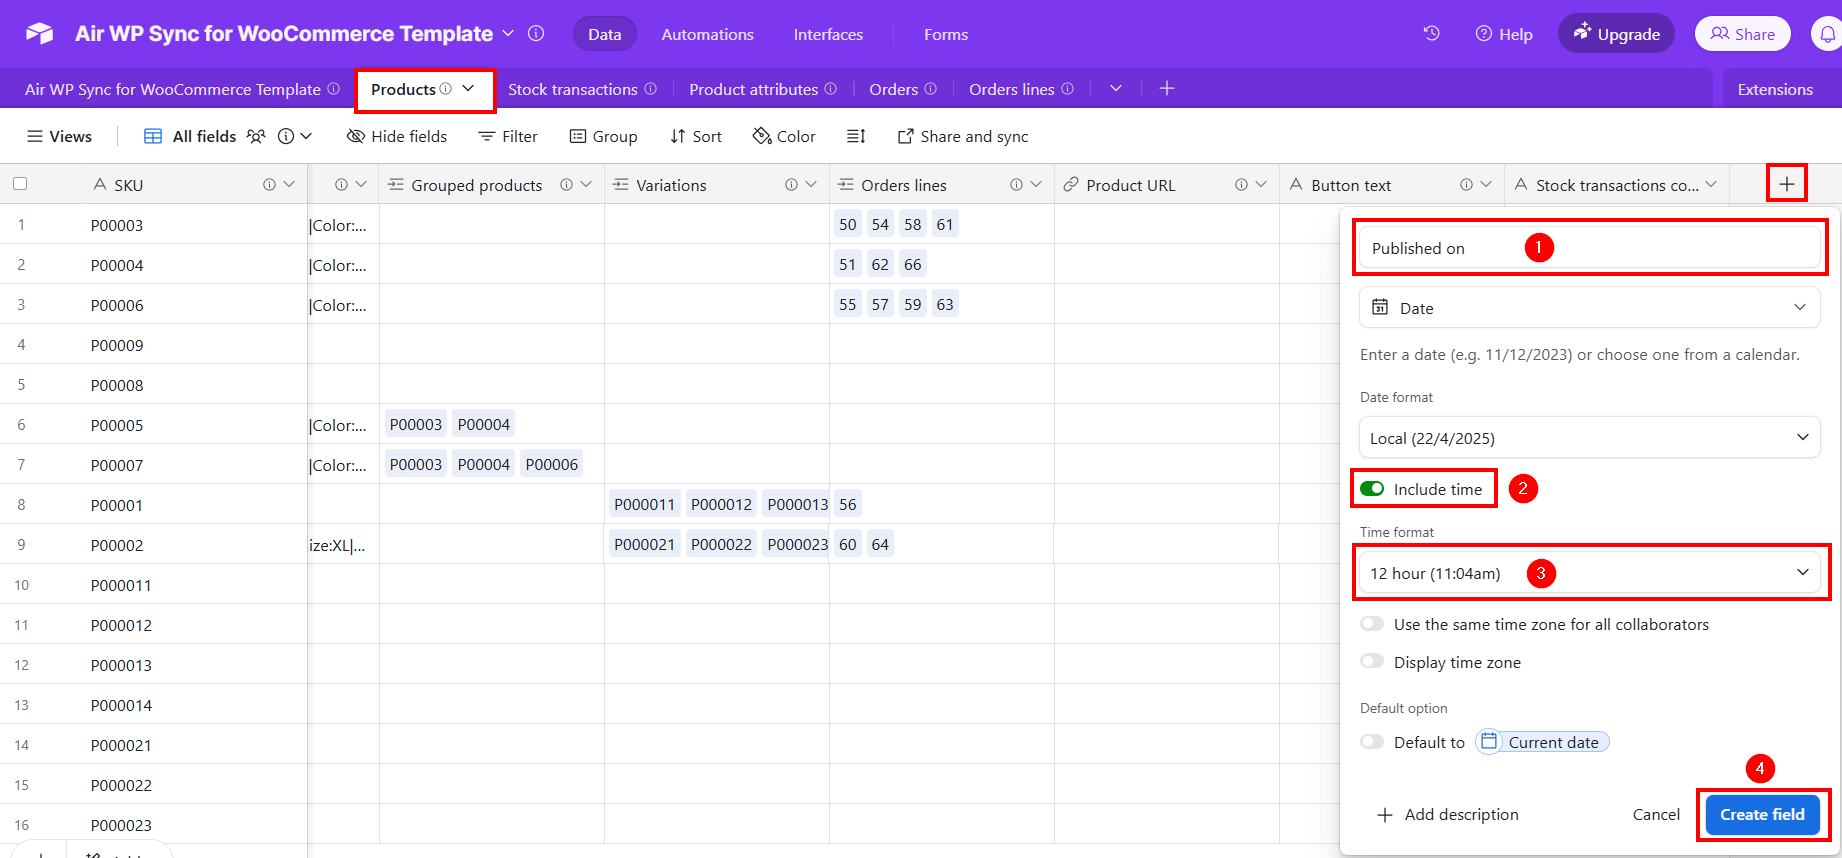
Added Published on field
In the “Products” table:
- Move to right to add a field and click on the + (Add field) button.
- Select the Date type for the field, and:
- Type the name of field: “Published on”.
- Active the Include time option.
- Choose the Time format.
- And then, click on the Create field button.
Add future option to Status field
To add “future” option to the “Status” field in the “Products” table:
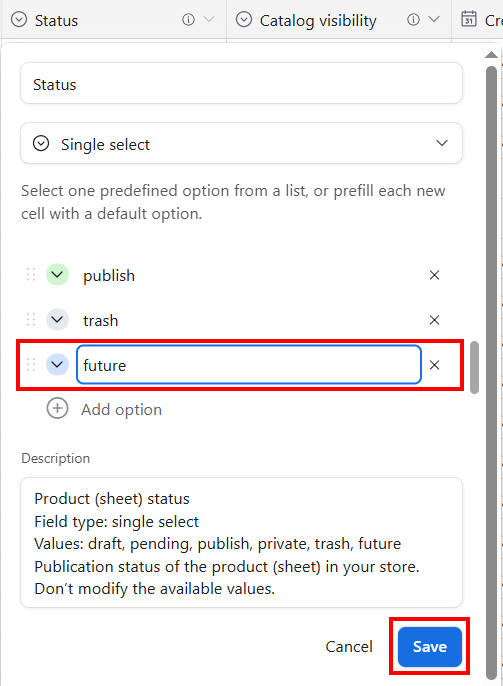
- Access to the contextual menu of the “Status” field, by a right click.
- Click on Edit field command.
- Scroll down to access to the Add option and click on it.
- Type “future” and click on Save button.
If you set a future date in the “Published on” field, it’s recommended to also set the “Status” field with the “future” value to reflect that future publication.