Create a Custom Post Type with Notion WP Sync
WordPress offers the flexibility of Custom Post Types to enrich content beyond standard posts and pages. Think of CPT as specialized content categories like events or portfolios. While they are similar to regular posts, they come with their unique features and labels. With the Notion WP Sync plugin, you can easily create these CPTs on-the-fly. Let’s explore Notion WP Sync features for CPT creation.
Features of Notion WP Sync Plugin for creating CPT
- On-the-fly CPT creation for imported content.
- Mapping capabilities for WordPress fields such as Title, Content, Slug, and Custom Field.
- Enables the creation of your custom fields.
- Compatible with ACF in Notion WP Sync Pro+
Notion settings of your connection
- Create a new connection
- Fill your Notion access token in the Access Token field.
- Select your Notion Base linked to your access token.
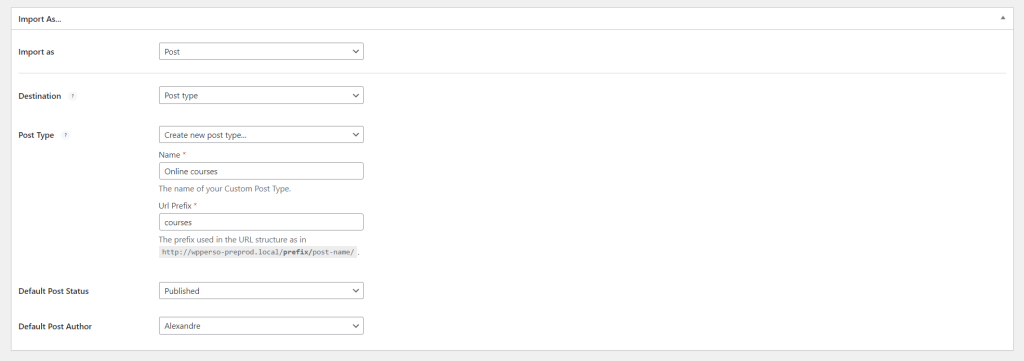
Setting-up your Import
- In the Import as drop-down select Post.
- In the Post Type drop-down select Create new post type.
- Enter a name for your Custom Post Type.
- Enter an Url Prefix which will be used in the url structure, like “http://yourwebsite.com/prefix/post-name”.
- Select the default Post status in the drop-down.
- Select the default Post author in the drop-down.
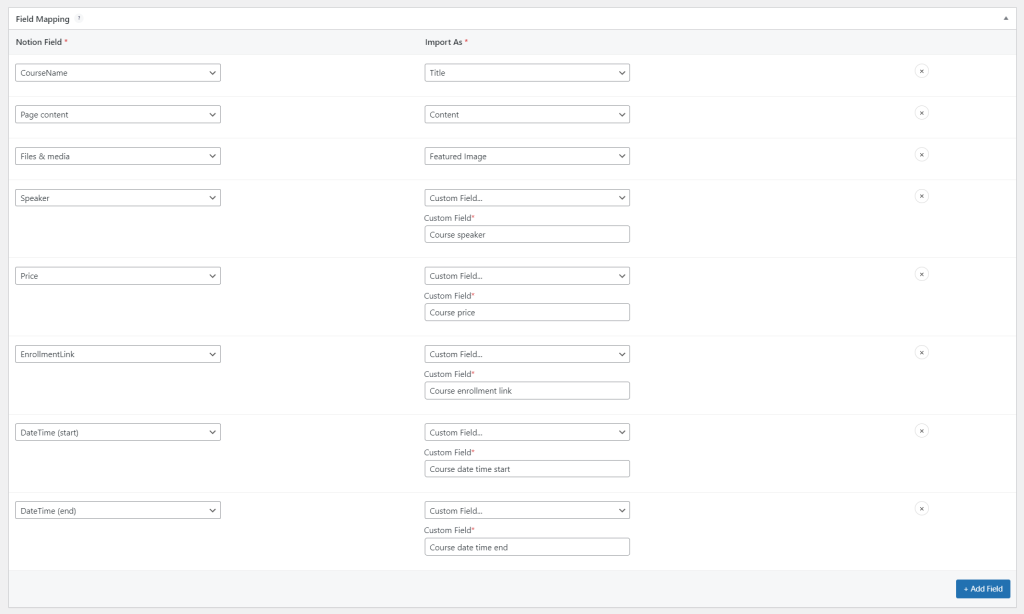
Fields mapping
In the Field Mapping section:
- Choose a Notion Field: in the Notion Field side, select your Notion fields from the dropdown menu.
- Select a WordPress Field: In the Import As drop-down menu, select the basic WordPress fields such as the “Title”, “Slug”, “Category”, “Featured Image”, “Taxonomy”.
Add Custom Fields (Optional): if you want to incorporate unique fields, select “Custom Field” and enter a custom field name to map it with your Notion field
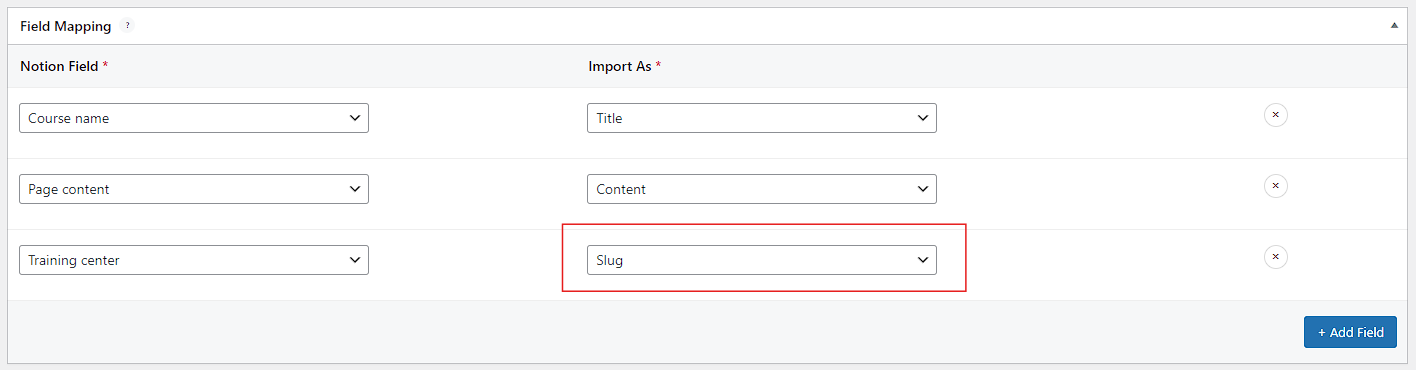
💡 Great news!! There is a way to customize the end of your URL. You can choose a field in the Notion Field section that you want to display at the end of your URL, and select Slug in the Import As section.
If the text contains special characters (such as spaces, accented characters, quotation marks, etc.), it will be automatically sanitized, so they will be deleted.
Otherwise, the end of your URL will be set by default from the title of the CPT.
Import and sync
Once all your connection settings are done:
- Click on the Publish button in the top-right of the connection.
- Click on the Sync Now button in the Actions section of your connection to import and sync all your Notion base content into your newly created Custom Post Type.
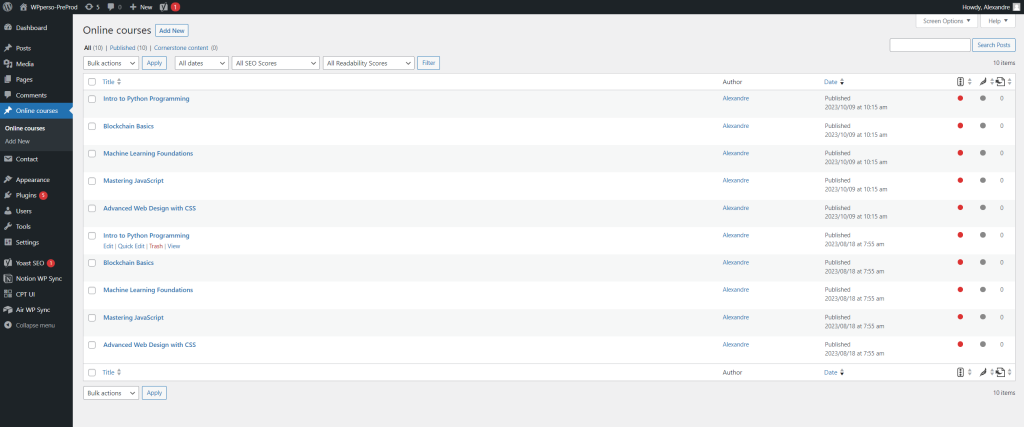
Reviewing imported posts
- In the WordPress dashboard, select your newly created Custom Post Type from the side menu.
- The list displays all posts imported from your Notion base.
Reviewing custom fields
- Click on an imported post.
- To see your custom fields inside your CPT content, you can activate the Custom Fields feature from the Editor Preferences (see this documentation) or even download the free PureDevs Any Meta Inspector plugin for WordPress. Then, you can view your custom fields below the content of your CPT.
⚠️ Important considerations
If you choose to modify the configuration or stop using the CPT made via the Notion WP Sync plugin, the on-the-fly created CPT will cease to exist in WordPress. Consequently, the associated imported content will become inaccessible.