How to create WordPress taxonomies from Notion with Notion WP Sync?
Our Notion WP Sync plugin now allows you to synchronize WordPress’s taxonomy terms directly from Notion! In this guide, we’ll walk you through the steps to import and sync taxonomy terms from your Notion base into your WordPress website using the Notion WP Sync plugin. Hierarchical taxonomies are also supported, so you can import both parent and child taxonomies.
Setting up your Notion base
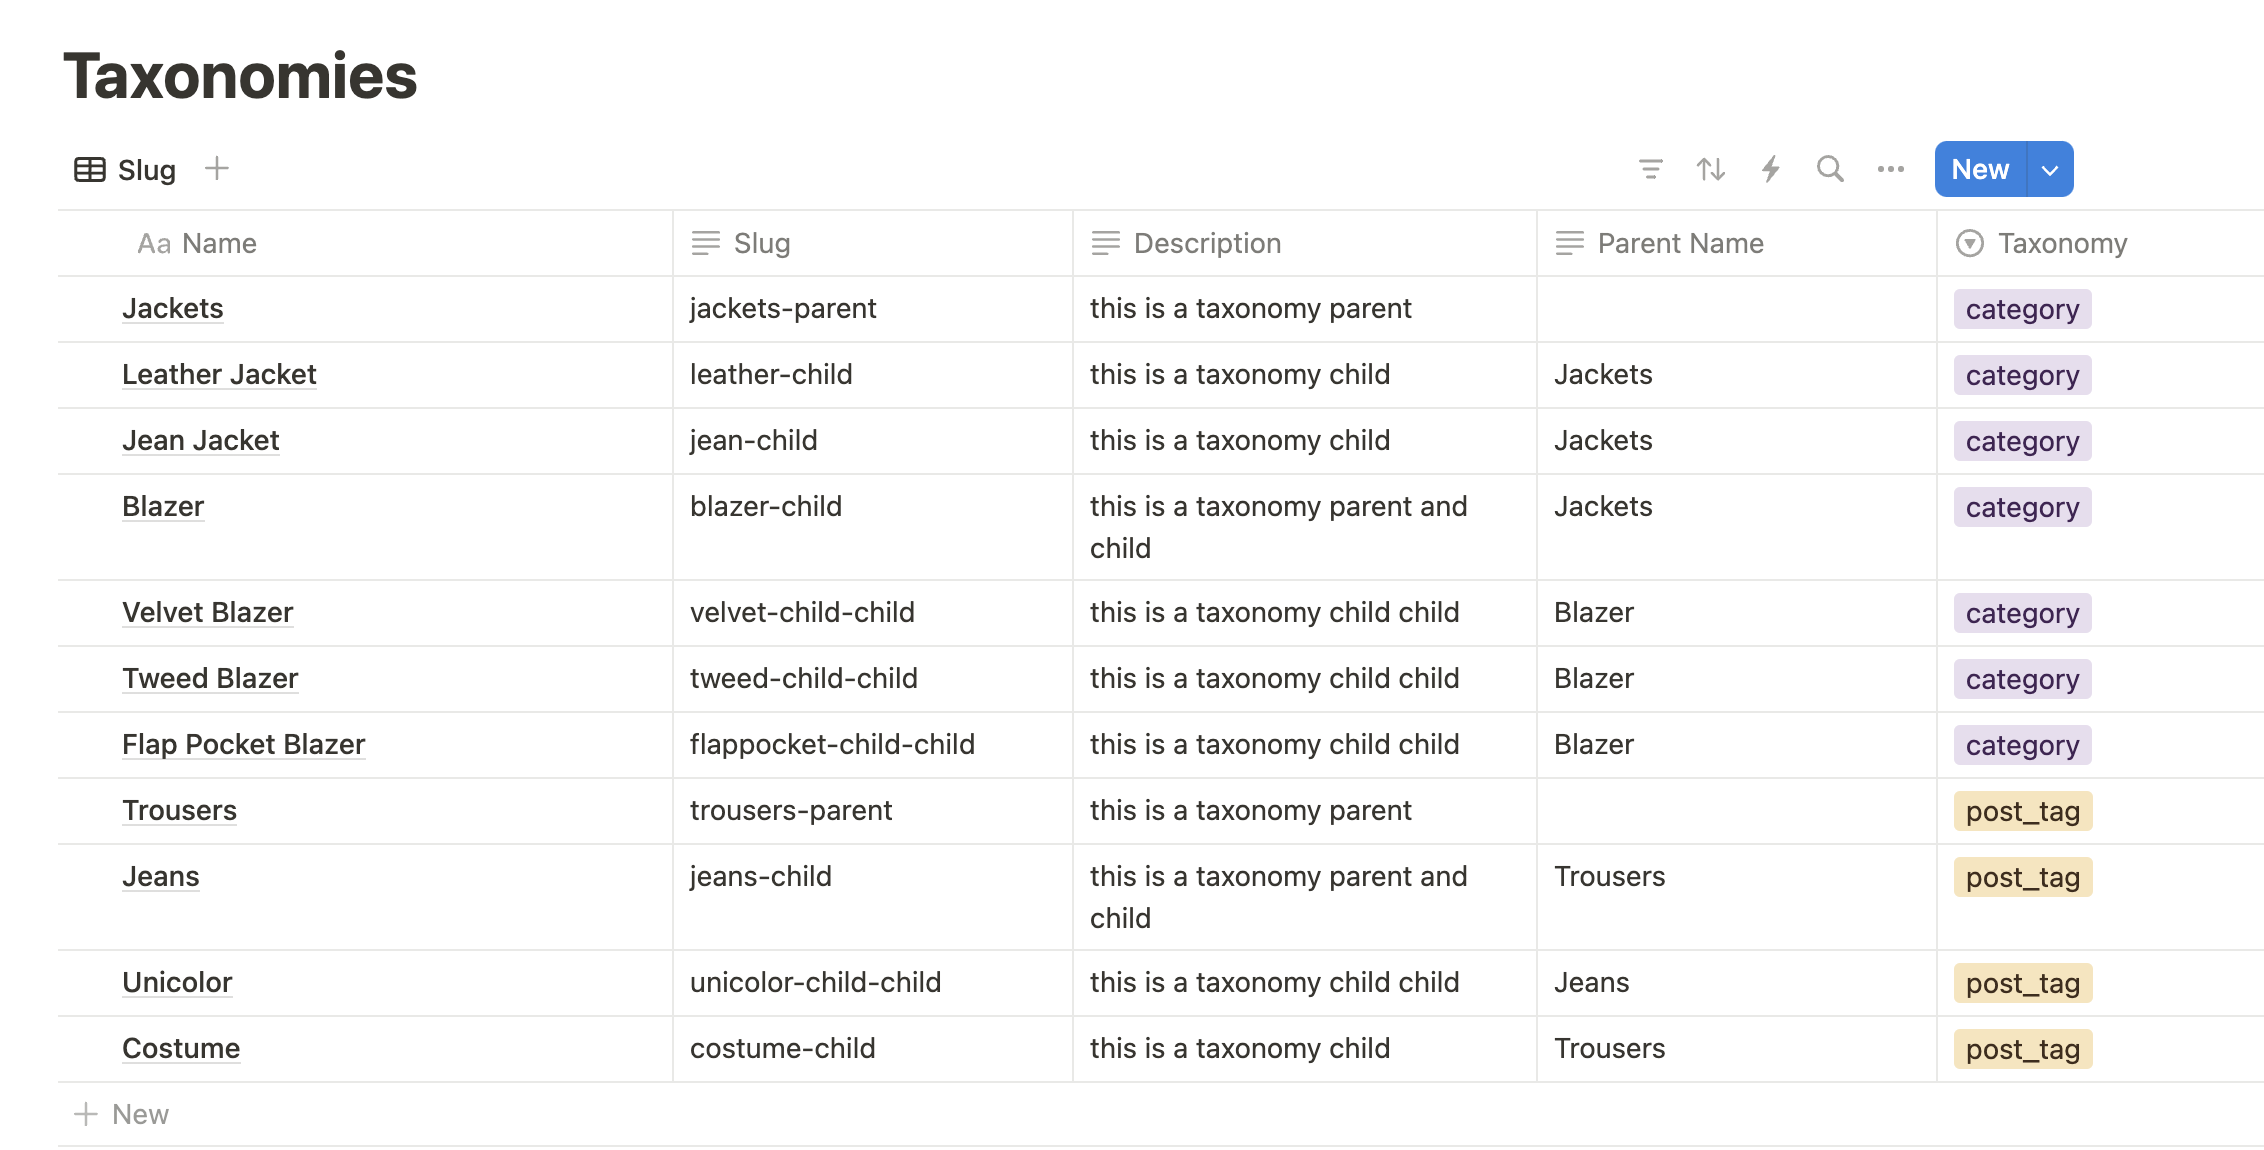
Before you can sync data, you need to prepare your Notion base. Make sure your table includes the following columns:
- “Name”: the name of the taxonomy term.
- “Slug”: an unique identifier for the taxonomy term.
- “Taxonomy”: the taxonomy to which the term belongs.
- “Description”: a description of the taxonomy term.
💡 Note: add a column for “Parent Name” if you have a hierarchical taxonomy.
Connecting Notion to WordPress
- Log in to your WordPress dashboard.
- Navigate to the Notion WP Sync menu, listed on the left-hand side menu.
- Click on the Add new menu to create a new connection.
- Enter a Title for your connection.
- Enter your Internal integration token (Notion API access token).
- Choose your Notion base in the field Choose a database.
Setting up Taxonomy import
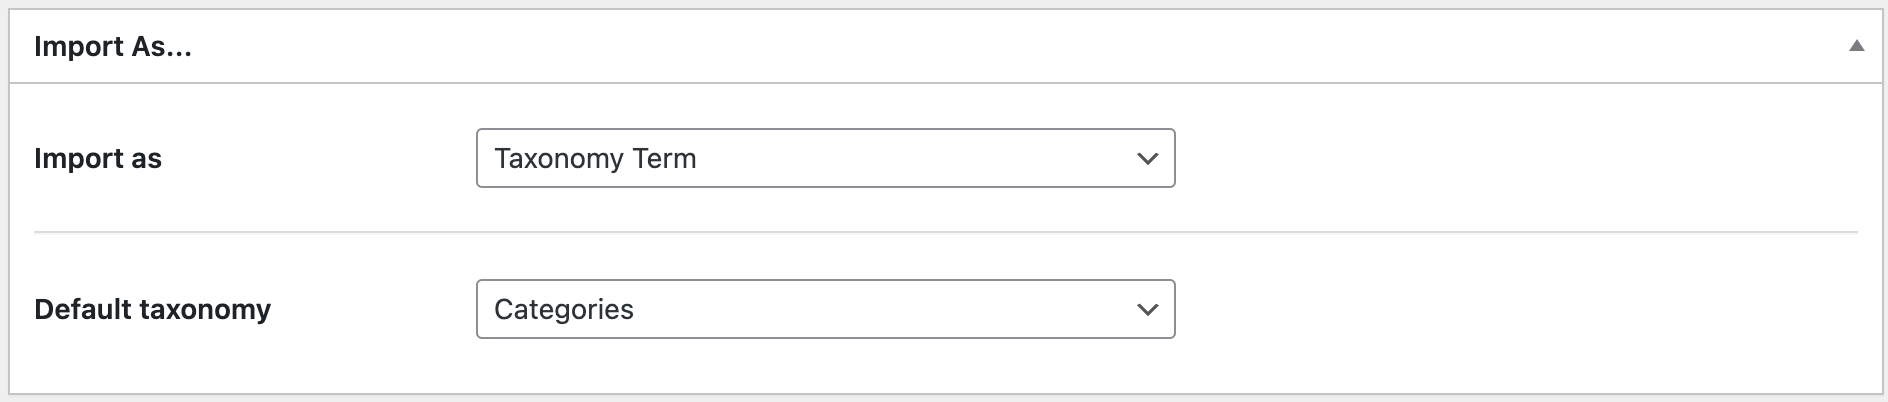
- Select Taxonomy Term in the Import as dropdown menu.
- Select the Default taxonomy (this is the one that must be written in ).
💡 If you want to import to a specific taxonomy, this must written in your column “Taxonomy” on your Notion base with the exact taxonomy slug.
For examples:
Categories is “category”
Tags is “post_tag”
You can see the examples on the previous image
Mapping Notion fields with WordPress
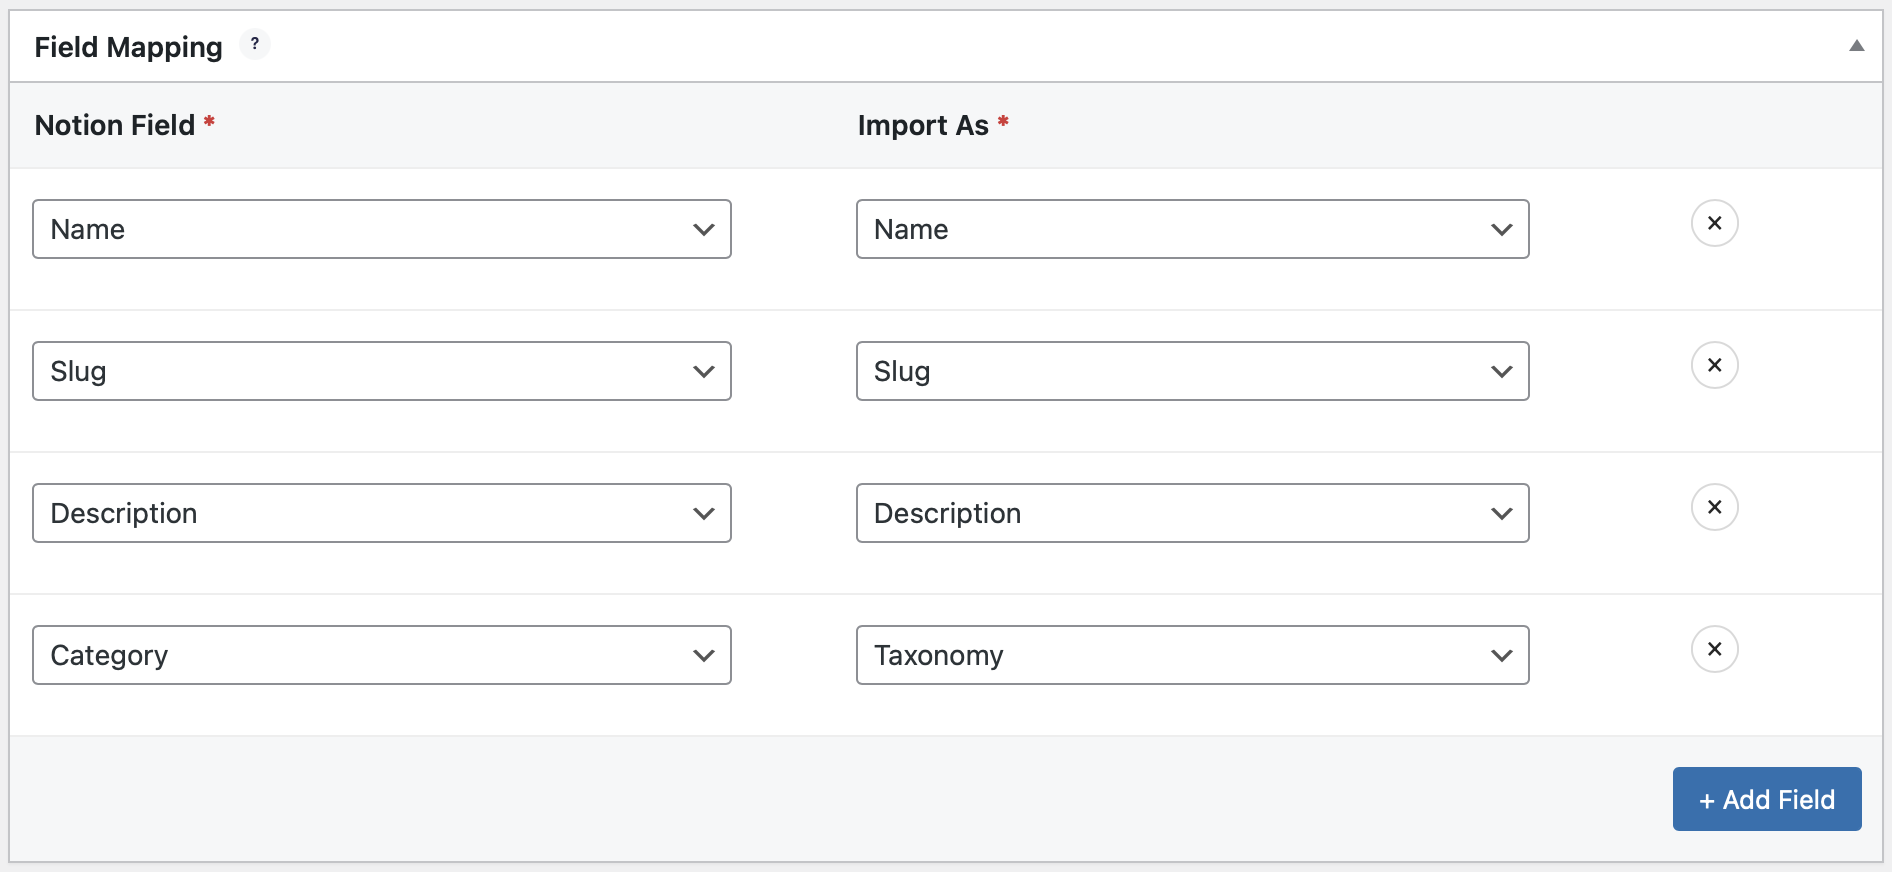
- Click on + Add Field button.
- Choose a Notion Field: from the dropdown menu, select which field in your Notion base you want to synchronize to WordPress. For instance, if you have a column named “Name” in Notion, select that.
- Select a WordPress property in Import As column: match it to a corresponding property or field in WordPress where you want that data to appear. For example, map “Name” from Notion to the “Name” field in WordPress.
- Repeat steps 1, 2 and 3 for each field: ensure you go through each field in Notion that you want to synchronize, mapping it to its corresponding WordPress property.
💡 Note: the column “Taxonomy” should not contain non-existent taxonomies, or it will result in an error. If you leave this column empty on Notion, it will be mapped with the Default Taxonomy chosen in the previous step.
The taxonomies you can import are: categories, tags, formats, and custom taxonomies.
After mapping your Notion fields to the corresponding WordPress fields, click on Publish or Update button, followed by Sync now to import taxonomy data from Notion.
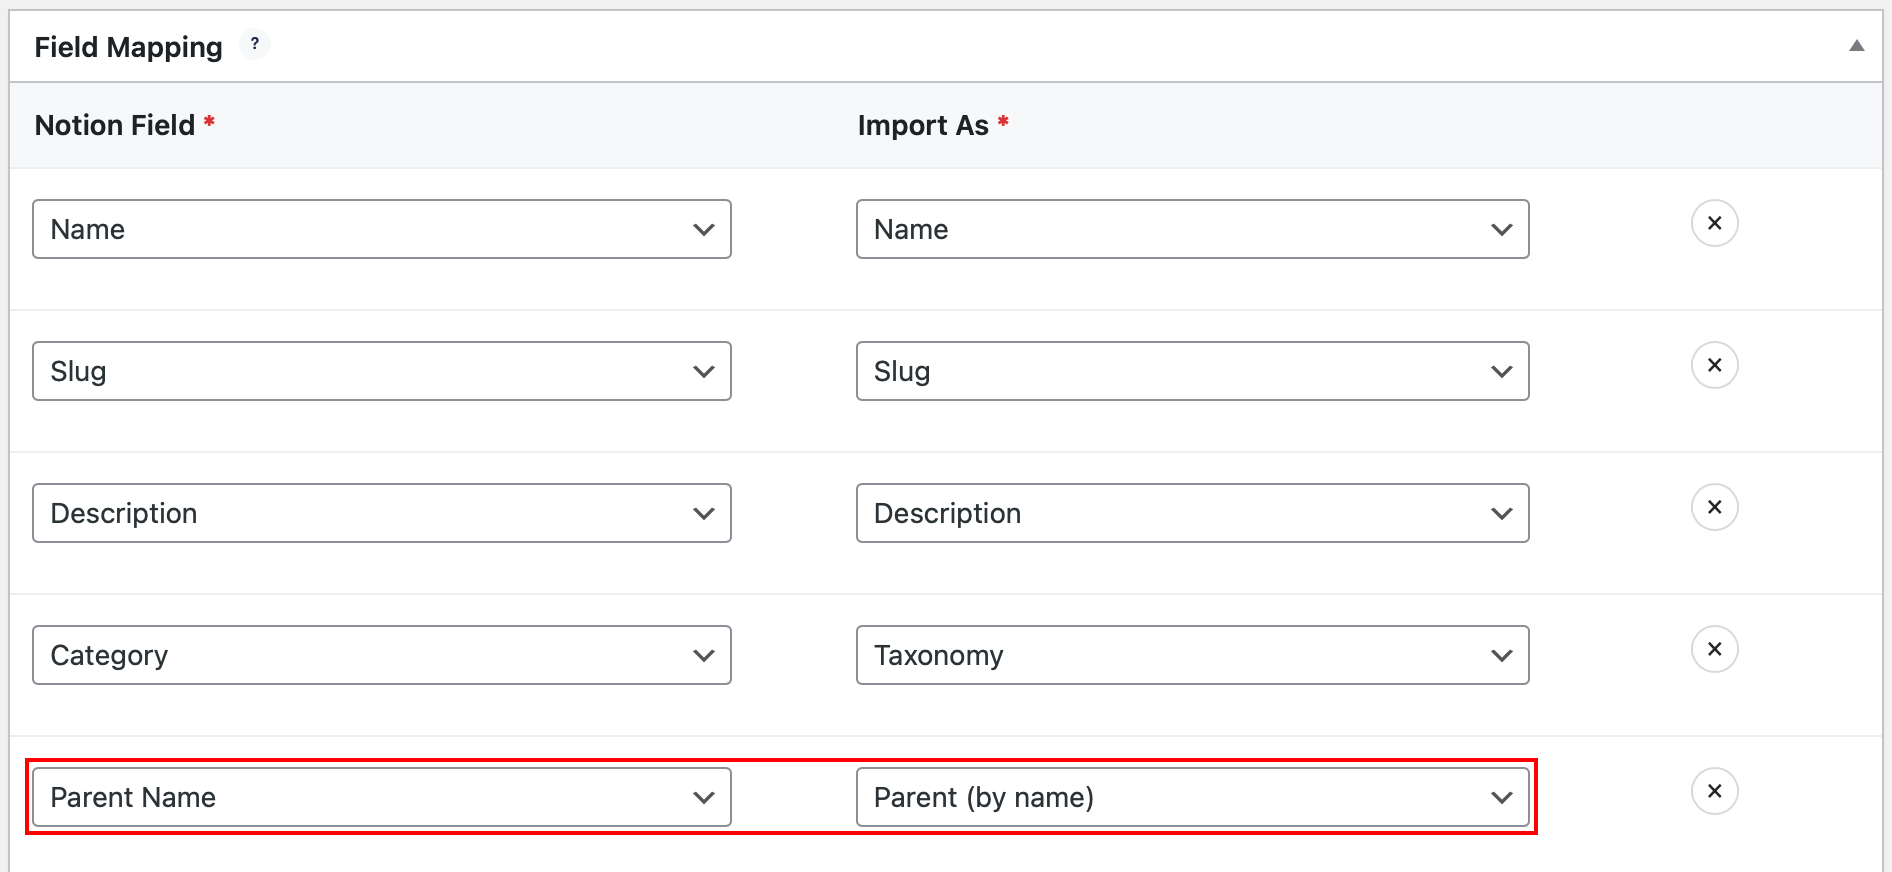
Importing Hierarchical Taxonomy Terms
By name
In your column “Parent by Name”, you can add the parent name of this term. Make sure to use the same spelling.
💡 Notes
If you are importing hierarchical taxonomy terms by name, it is recommended to synchronize twice because the child terms can be created before the parent, so they won’t have the parent-child relationship initially.
Reviewing Imported Taxonomy Terms
- In the WordPress dashboard, select your Custom Post Type (CPT) from the side menu and then the taxonomy that you want to review.
- The list displays all taxonomy terms imported from your Notion base.

By following these steps, you can efficiently synchronize your Notion taxonomy terms with your WordPress website using the Notion WP Sync plugin. This integration ensures your data is always up-to-date and managed from a single source.
If you encounter any issues or have questions, feel free to reach out to our support team for assistance. Happy syncing!