How to translate your site with Notion WP Sync and TranslatePress
In this article, we’ll walk you through how to effectively use Notion WP Sync to manage and update content from Notion and then leverage TranslatePress to create a multilingual blog or website. With Notion WP Sync, you’ll have the flexibility to manage your content in Notion, the powerful database No Code tool, and seamlessly sync it to your WordPress site. Then, TranslatePress will allow you to translate this content to make it accessible to a global audience.
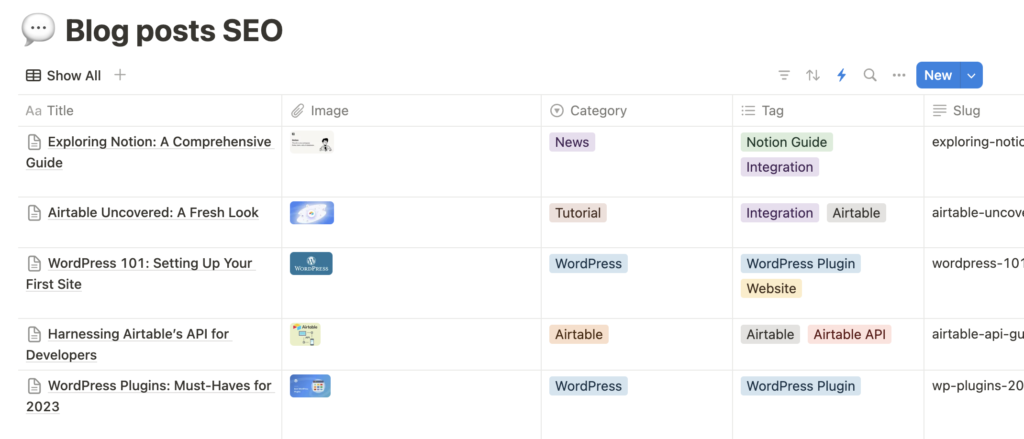
Step 1: Set Up Your Notion Base for Blog Content
To begin, create an Notion base with columns that represent key blog fields. For instance, include columns like:
- Title
- Content
- Author
- Category
- Tags
- Featured Image
- Excerpt
Step 2: Set Up Notion WP Sync for WordPress
- Install and activate Notion WP Sync.
If not already installed, download and activate the Notion WP Sync plugin on your WordPress site.

- Create a New Connection and import your posts.

Mapping your fields:
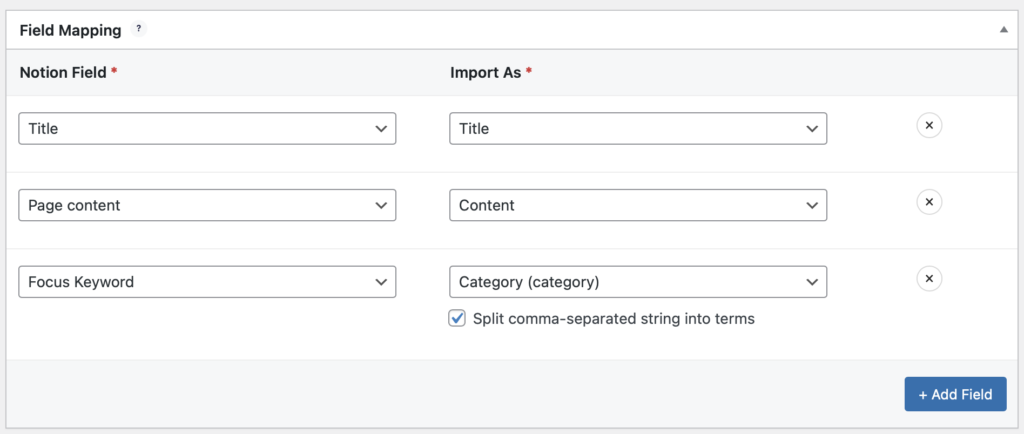
📌 If you’re using custom fields (e.g., custom excerpts, SEO fields), you can map them as well by using ACF (Advanced Custom Fields) if you have the Pro+ version of Notion WP Sync.
Synchronize your data:

Step 3: Set Up TranslatePress to Translate Your Site
With your content now live on WordPress, you can use TranslatePress to translate it into other languages.
- Install and activate TranslatePress
Install and activate TranslatePress from the WordPress plugin directory if it’s not already on your site. - Choose Your Languages:
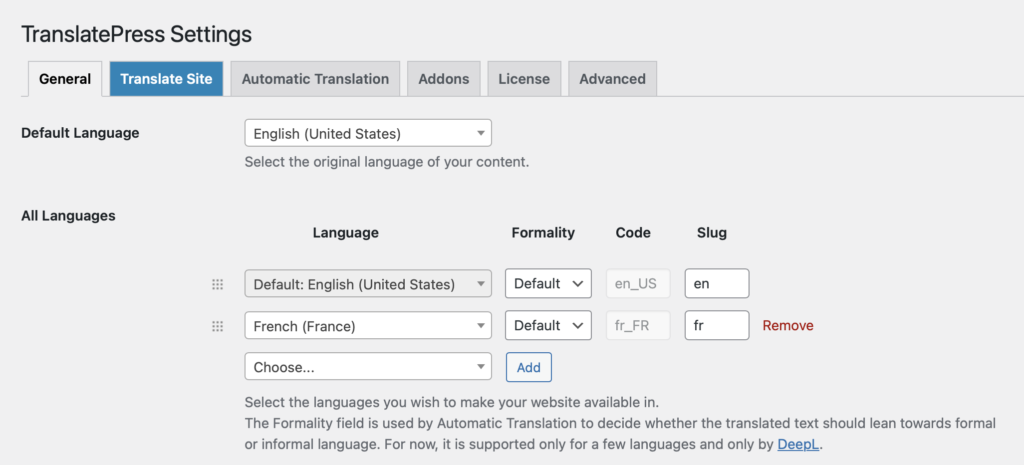
Go to Settings > TranslatePress and select the additional languages you want to make available. For example, if your blog is in English and you want to add French, add “French” in the language selection area.
 Translate content using TranslatePress editor:
Open any blog post and click on Translate Page in the admin bar at the top. This opens the TranslatePress visual editor.

- Select the language and the string to translate.
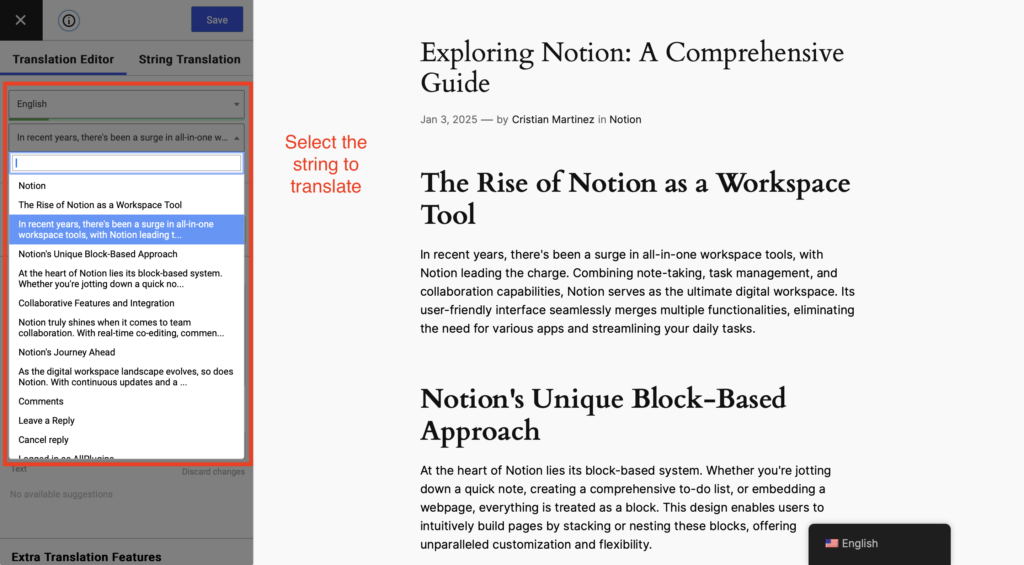
- You will see fields displaying the original text alongside a field for entering the translated string for each element on the page.
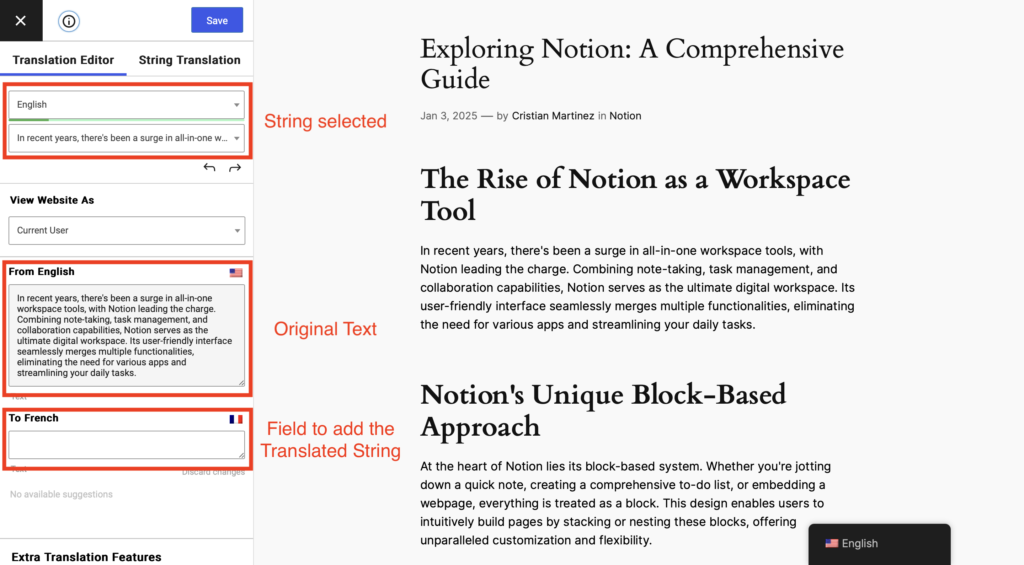
- Add an accurate translation and then click Save.
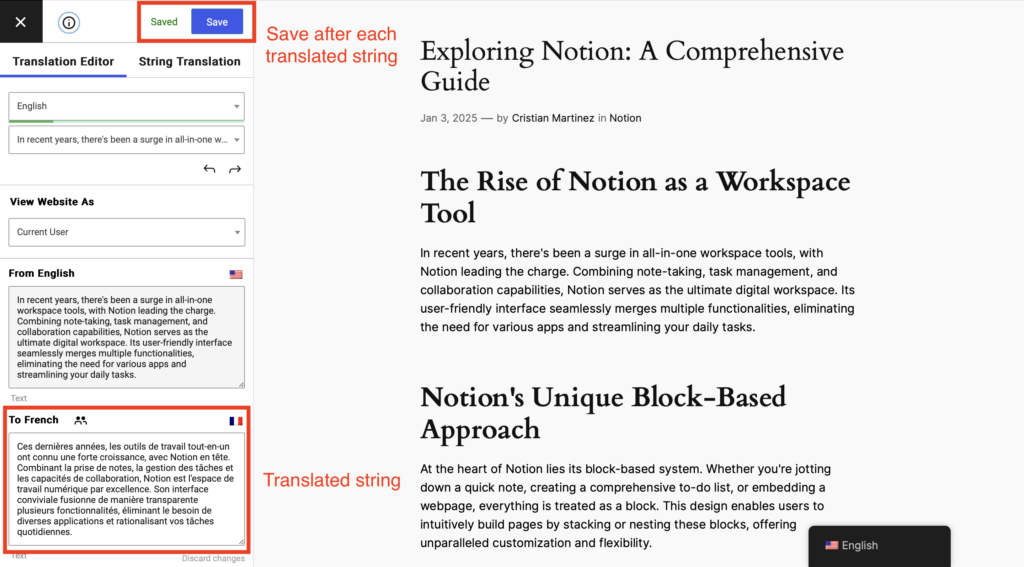
📌 Repeat this process for each string on your site. Remember to translate elements such as the title, excerpt, and even custom field content if you’ve mapped them with Notion WP Sync. Always save after translating each string.
- Translate menu and other theme elements: in TranslatePress, you can also translate your site’s navigation, widgets, and footer content to ensure a fully localized experience. Simply click on each of these elements in the visual editor and provide translations for them as needed.
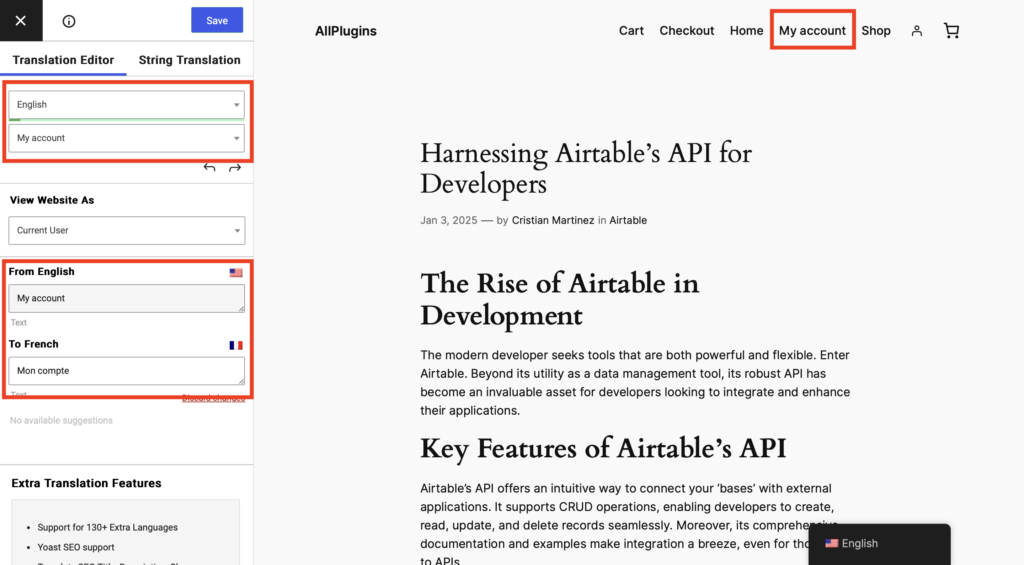
- Save Your Translations: once you’re done translating, ensure you save your changes after every translated string. The translated content will now be accessible to users based on their language preferences.
Step 4: Maintain an Updated Blog Using Notion and Notion WP Sync
To ensure your blog content is always up-to-date and consistent, keep Notion as your single source of truth. Whenever you need to update post information—like editing content, changing categories, or adding images—make these changes directly in Notion. Then, use Notion WP Sync to sync the updated content with WordPress.
📌 TranslatePress will keep your previously translated strings intact, so there’s no need to re-translate them. However, any new or modified content will require translation as explained in Step 3.
💡 Pro Tip: consider upgrading to the premium version of TranslatePress which features AI-powered instant translation. This advanced feature automatically translates new content as it is imported from Notion, streamlining the process and significantly reducing manual translation efforts. While translations are automated, you retain the ability to review and refine them to ensure accuracy and context appropriateness. For a deeper understanding of these capabilities, visit TranslatePress AI.
By adhering to these steps, you can maintain a well-organized, multilingual blog with a single source of truth, facilitating effective content management and localization throughout your WordPress site.
Step 5: Verify Translations Across All Pages
To ensure everything displays as expected, browse through the translated versions of your pages and blog posts. This will help verify that your translations are complete and no content was missed.
Additional Tips:
- Enable Automatic Sync: Set Notion WP Sync to run automatically on a schedule to keep your blog content updated with changes from Notion.
- Translate New Content: When new posts are synced from Notion to WordPress, revisit TranslatePress to translate them as needed.
- Use SEO Features: Map SEO fields in Notion WP Sync and TranslatePress for translated content, enhancing search visibility for all languages.
Conclusion
By following these steps, you can easily manage and translate your blog content on WordPress using Notion WP Sync and TranslatePress, creating a dynamic, multilingual site for your audience.