Documentation Menu
How to use the Sync settings in Notion WP Sync?
Notion WP Sync – Sync Settings
The Notion WP Sync plugin makes it easy to bring your Notion content right into WordPress.
This article gives you an overview of the plugin’s synchronization settings.
Synchronization Settings
In your connection, move to the Sync Settings section:
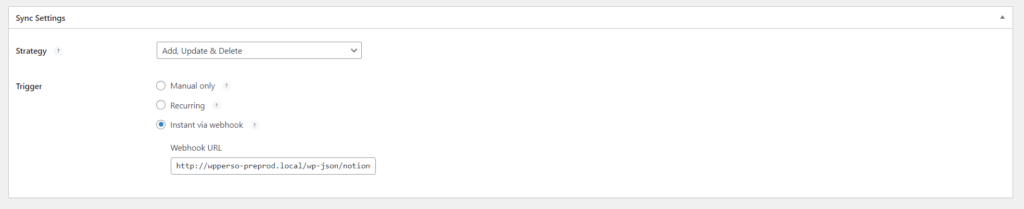
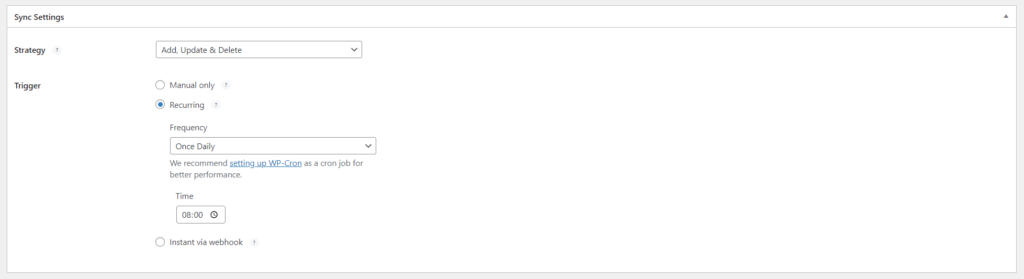
1.Select the strategy that you wish use.
2.Choose the desired trigger option.
Import Strategies
Determine how your Notion content integrates with your WordPress site with the help of three delineated import strategies:
- ADD/UPDATE/DELETE: it’s a holistic approach that allows you add new content, revise edited content and delete entries that no longer exist in Notion.
- ADD/UPDATE: as well as adding new content, this mode also updates previously imported content, reflecting any changes made in Notion.
- ADD: focuses on introducing new content to your site, leaving existing content undisturbed.

Triggers
Synchronization is optimized to match the frequency of your site’s content updates, ensuring accuracy and speed. To meet different synchronization needs, the Notion WP Sync plugin has designed three distinct triggering mechanisms:
- MANUAL ONLY:
- Click on the “Sync now” button in the side panel to orchestrate manual synchronization.
- This option is ideal for sporadic imports or for those who want more granular control.
- RECURRING:
- Automate synchronization at intervals ranging from every 10 minutes to weekly.
- INSTANT VIA WEBHOOK:
- This provides near-instantaneous synchronization, reflecting changes made in Notion almost immediately, depending on the import strategy chosen.
- While this allows your WordPress site and Notion to be perfectly synchronized, you need to be aware of the potentially large resources required, especially with a large dataset subject to frequent revisions.