How to use Notion "Relation" field with Notion WP Sync?
In Notion, the "Relation" feature allows you to establish powerful data connections. You can link fields, records, and perform calculations seamlessly. Our Notion WP Sync plugin now supports the Notion's "Relation" functionality.
This guide will walk you through the steps to set it up and use it effectively.
Setting Up the Relation Field in Notion
First, you need a "Relation" field in your Notion table. Add it using a "Relation" field on one of the two tables to be linked. For more information, see this Notion documentation.
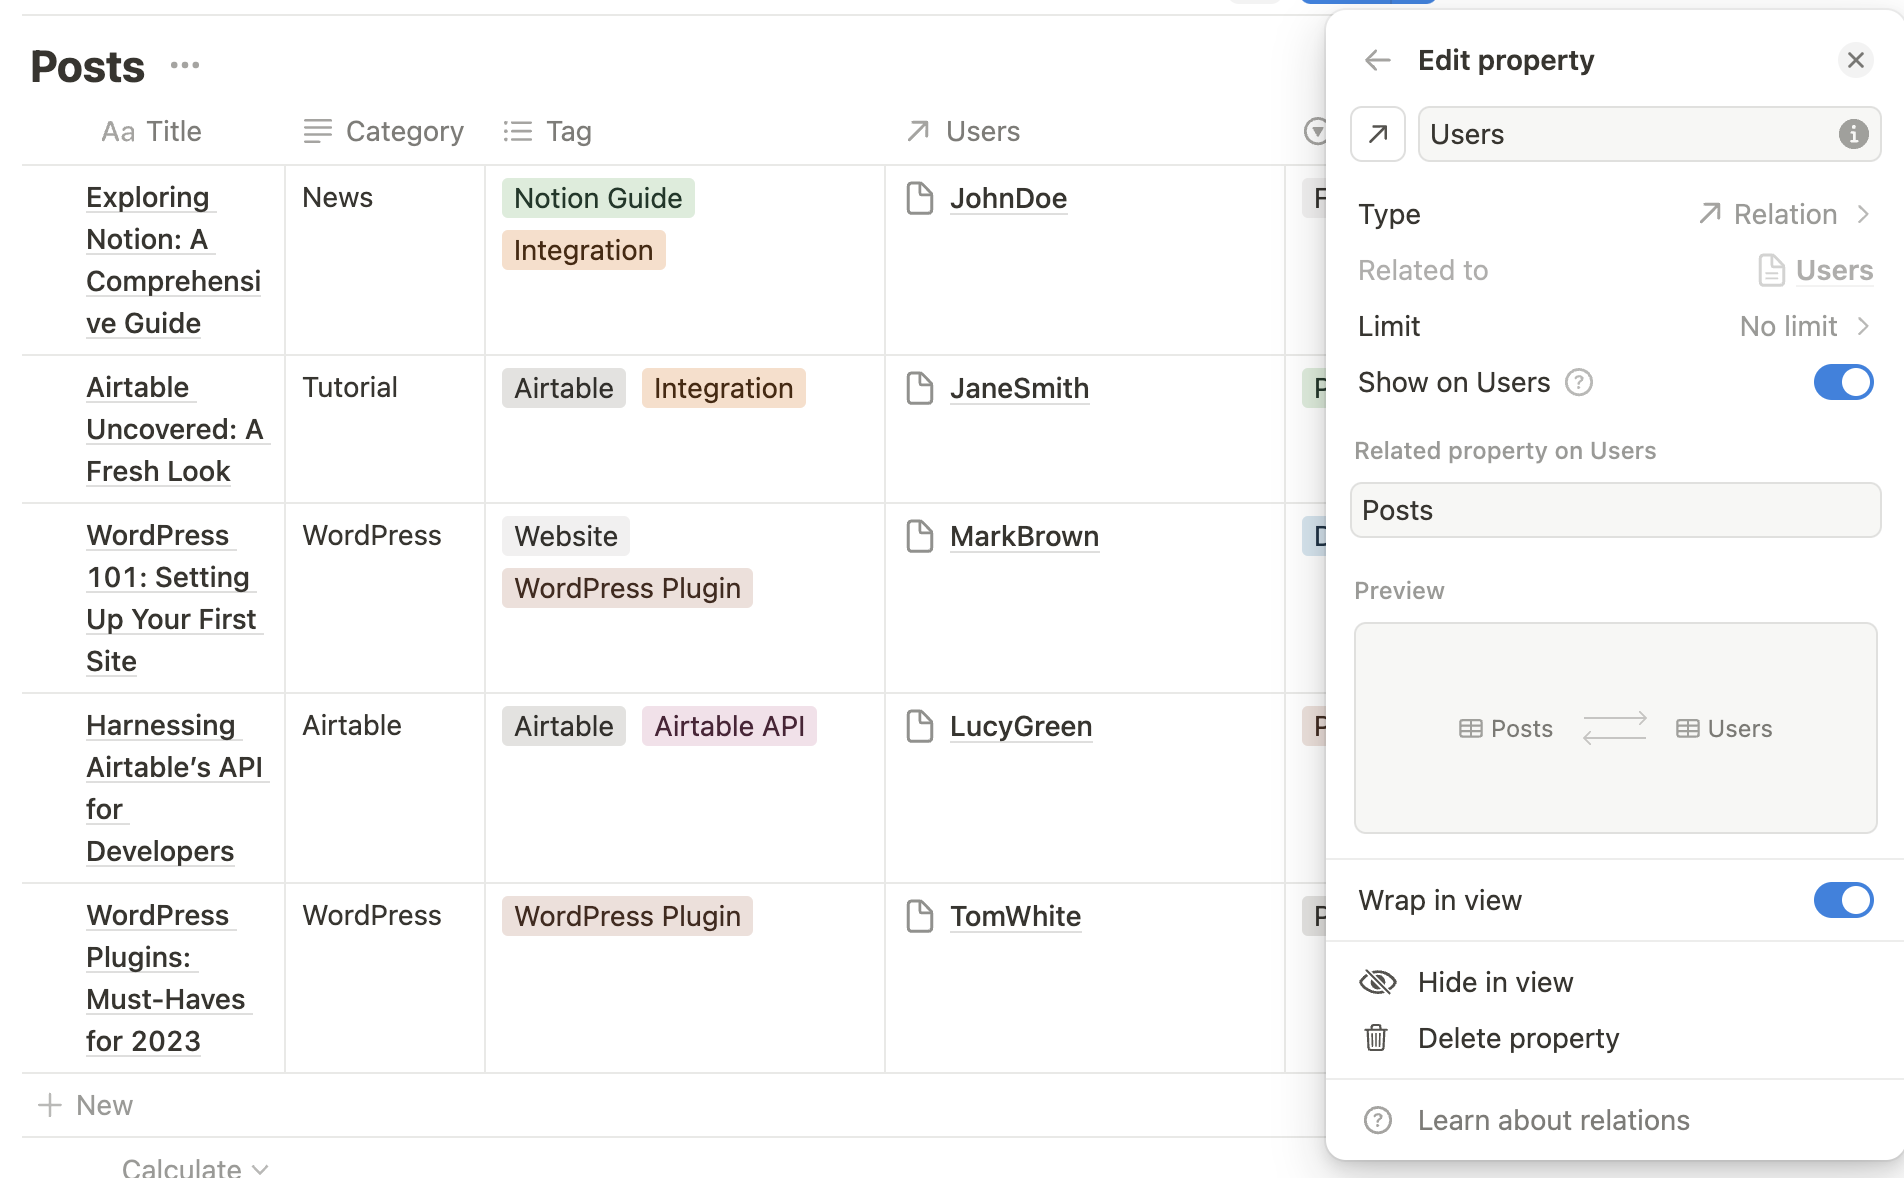
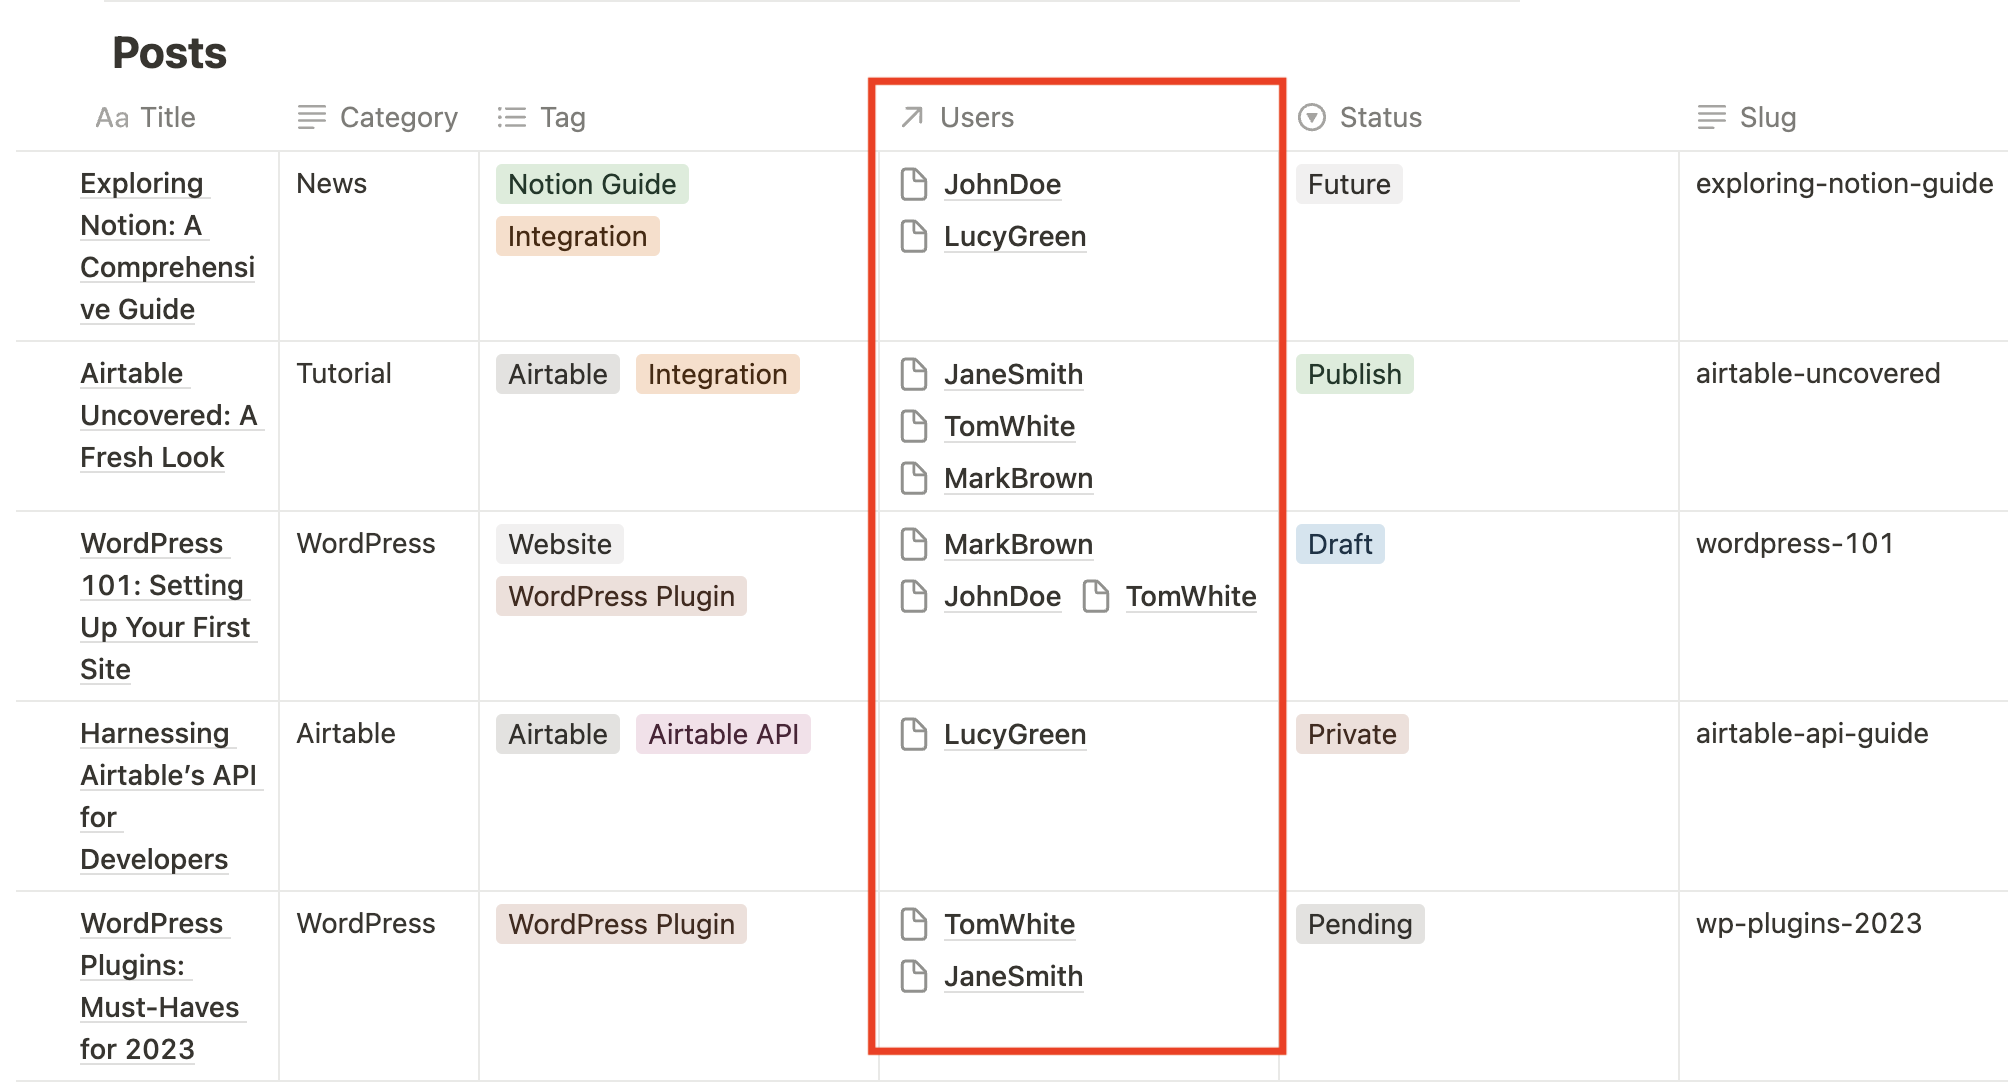
In this example, I will link a "Users" table to my "Posts" table by adding a "Relation" field named "Users" related to the "Users" table, as shown in the screenshot below:
Enabling Relation Fields in Notion WP Sync Pro
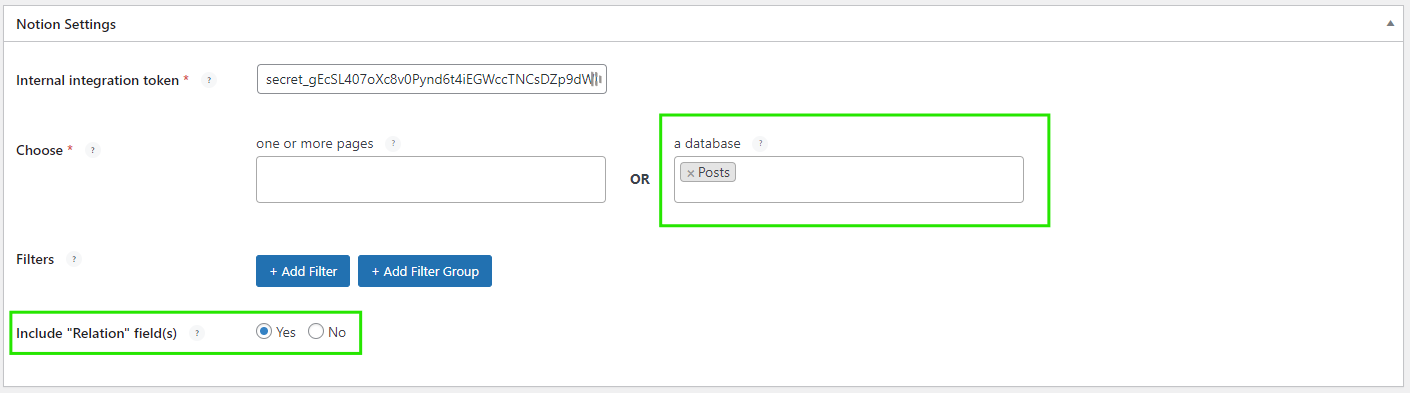
In the plugin, you will need to enable the "Relation" field(s) by selecting Yes for the Include "Relation" field(s) option in the Notion Settings section:

Using the Field in the mapping
Once enabled, each "Relation" field creates a group in the selection list ("→ Relationship field name") that you can use in your mapping.
To help you get started, here are two examples of how to use this feature.
Synchronize Posts with Users
Have you ever wanted to import multiple posts into WordPress while assigning them to different Authors? Our plugin now allows you to do that.
In this example, we'll see how to synchronize posts from Notion, assign them to users, and set their status.
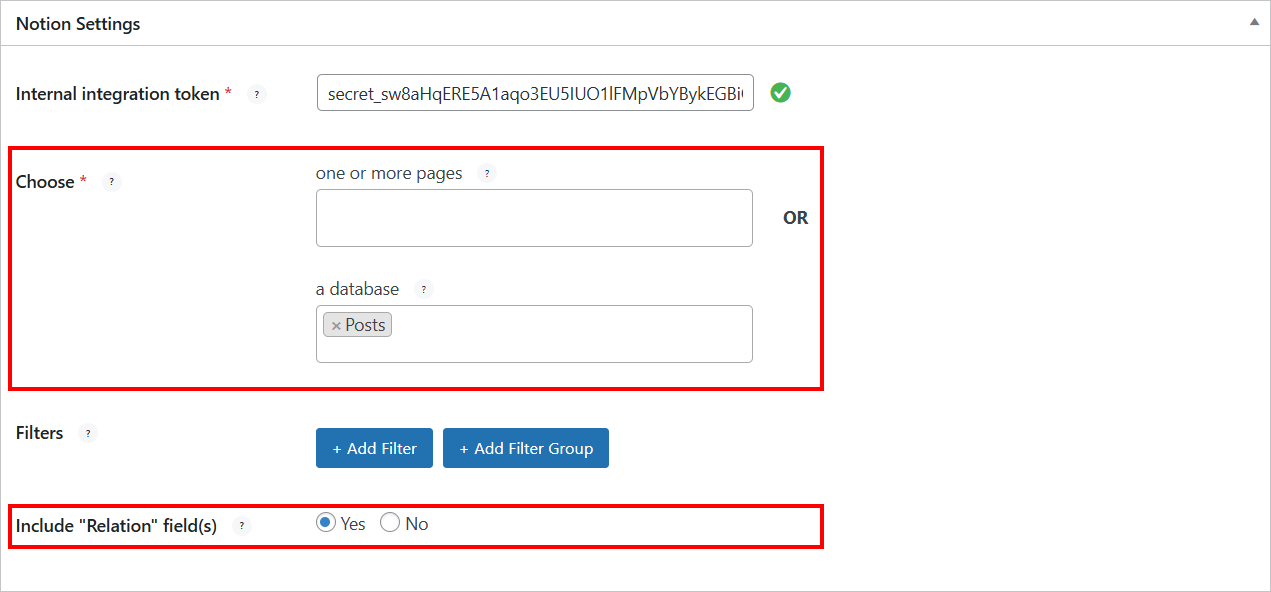
Step 1: Configure Notion Settings
Ensure you've selected the main table, not the linked table. After selecting the main table, fields from the linked table will become available in the mapping selection list.
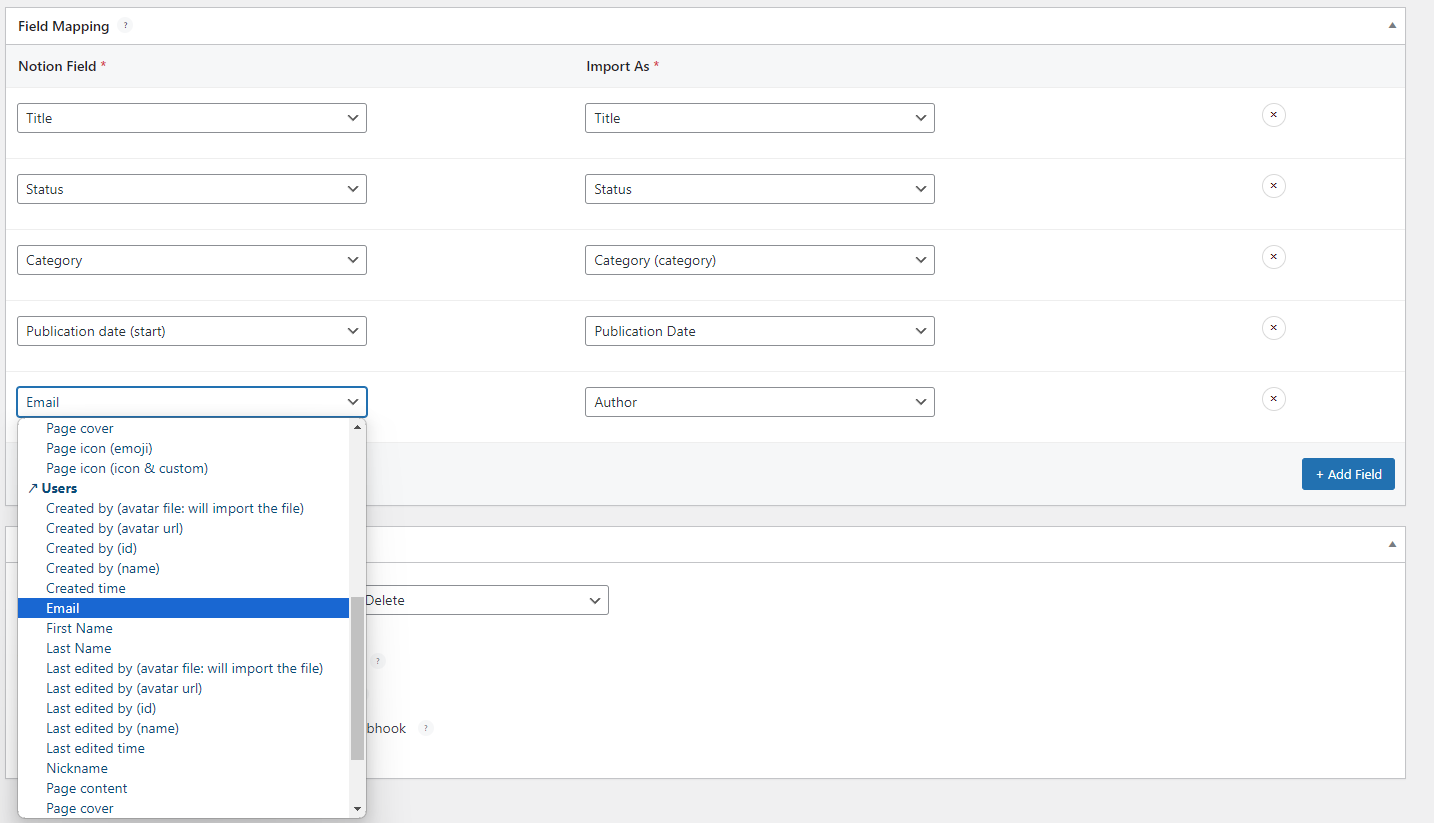
Step 2: Field Mapping
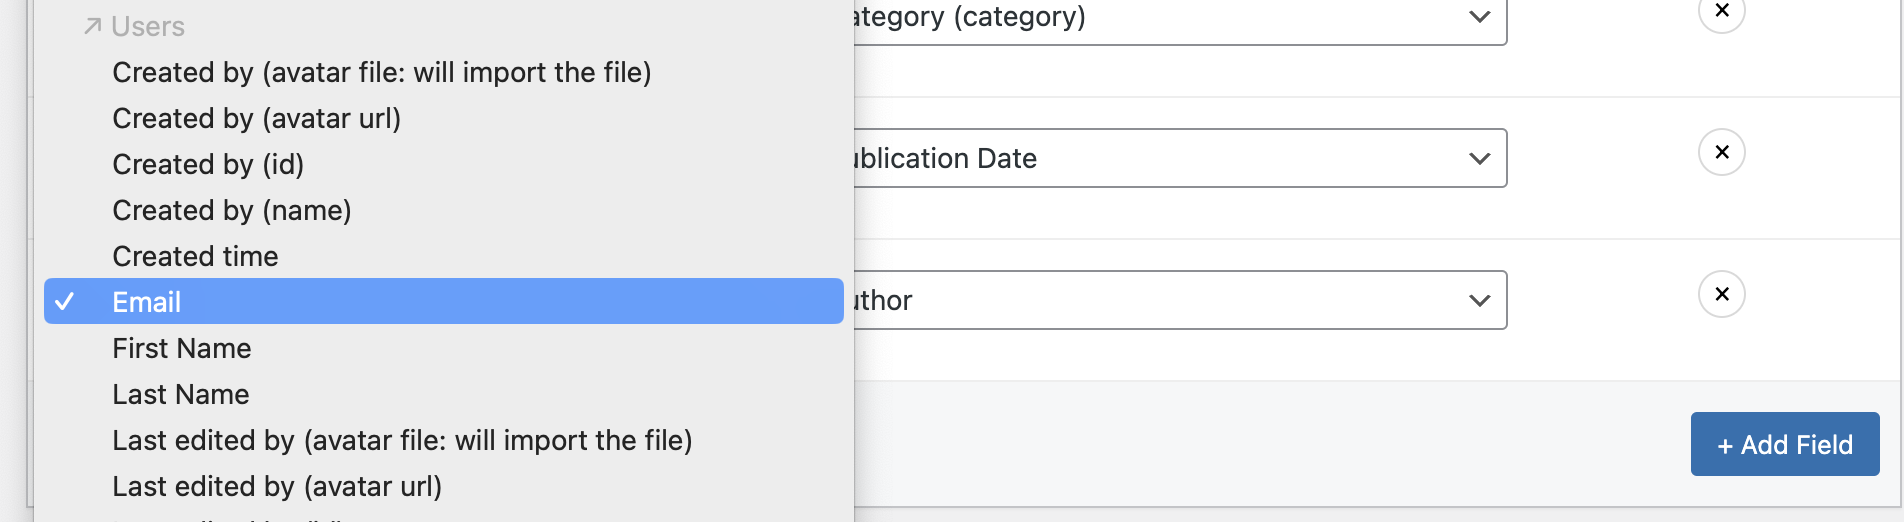
Use the mapping feature to link data from the related table. For example, you can map the "email" from the "Users" table to the post "Author" in WordPress.
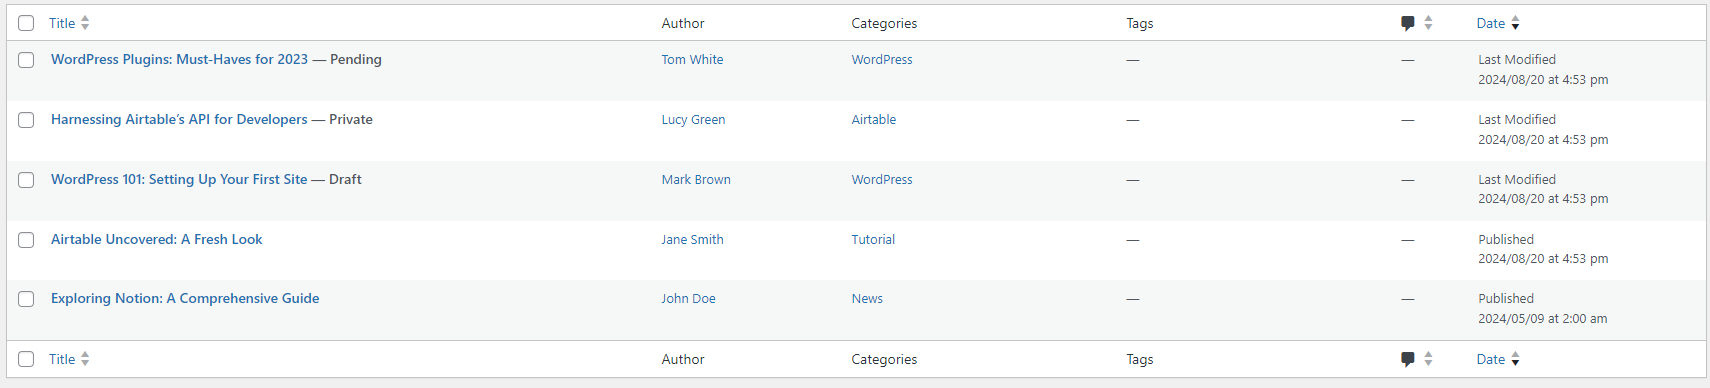
Step 3: Synchronize
After completing your mapping, synchronize everything. You now have all your posts with their respective Authors!
Link Relation field to ACF Repeater field
ACF Pro offers advanced capabilities for handling multiple options or records within a relation column. For instance, if a post has multiple authors, you can map all the authors to a field created with the "Repeater" feature in ACF Pro.
If you're using ACF (Advanced Custom Fields), the process of using the "Relation" field is similar to the example above. You can map the "Relation" field from Notion to any ACF field in WordPress.
Step 1: Add More Authors to Each Post in Notion
Modify your Notion database to include additional authors for each post.
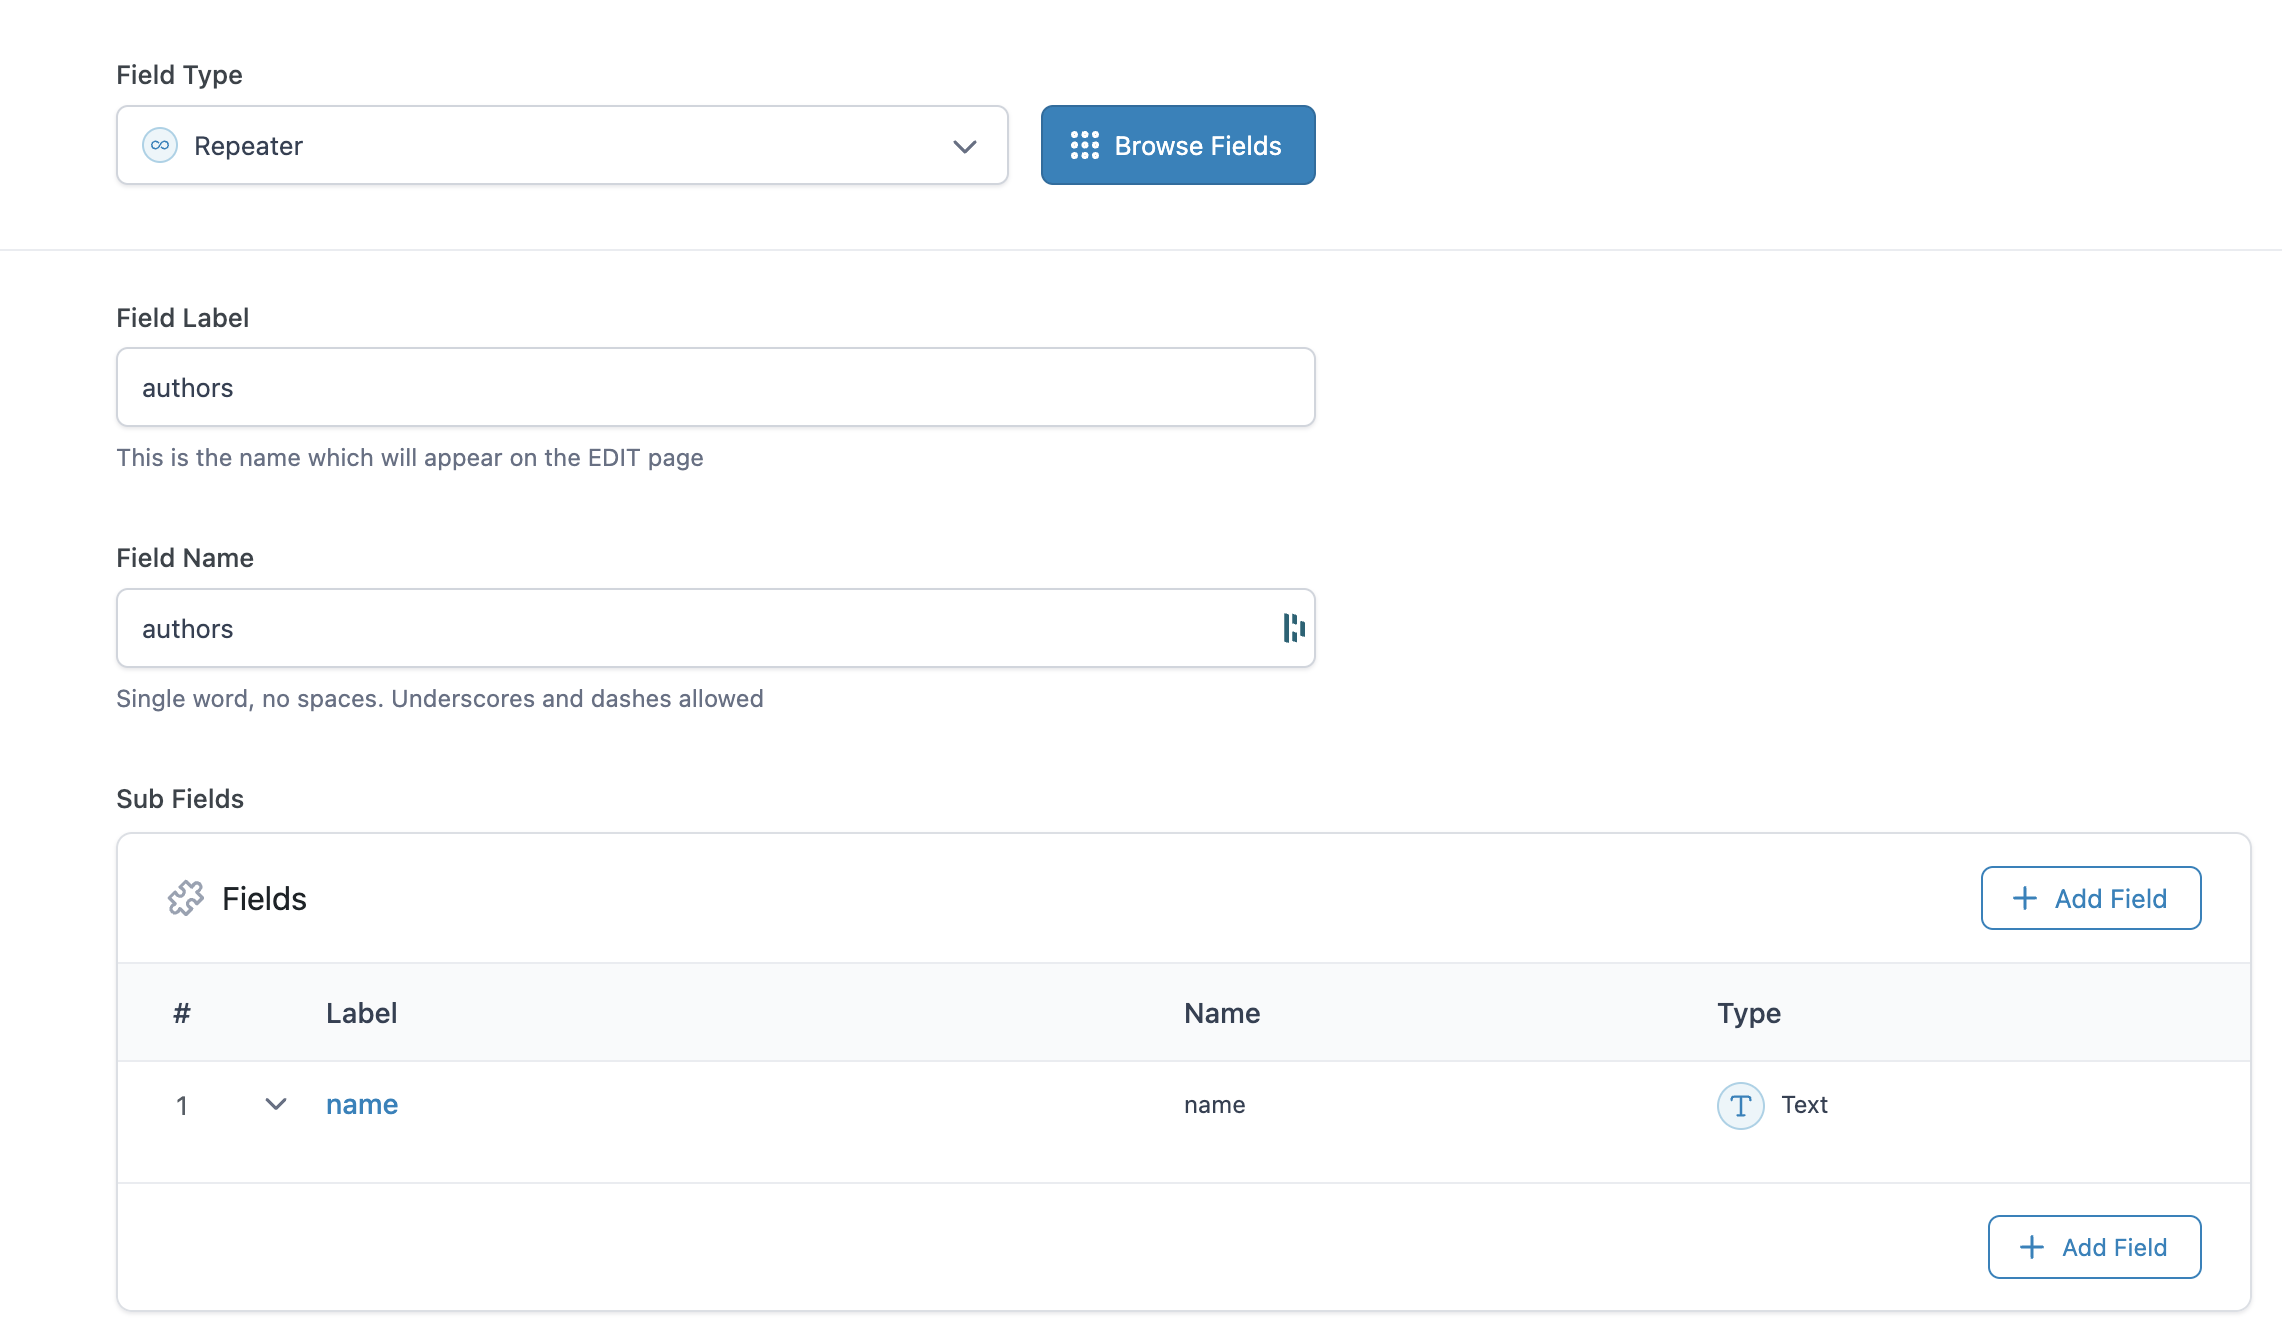
Step 2: Create the Repeater Field with ACF Pro
In WordPress, create a "Repeater" field using ACF Pro to handle multiple authors.
Step 3: Map the Field in Notion WP Sync
Map the new Repeater field to "Author [All Links]" in the plugin.
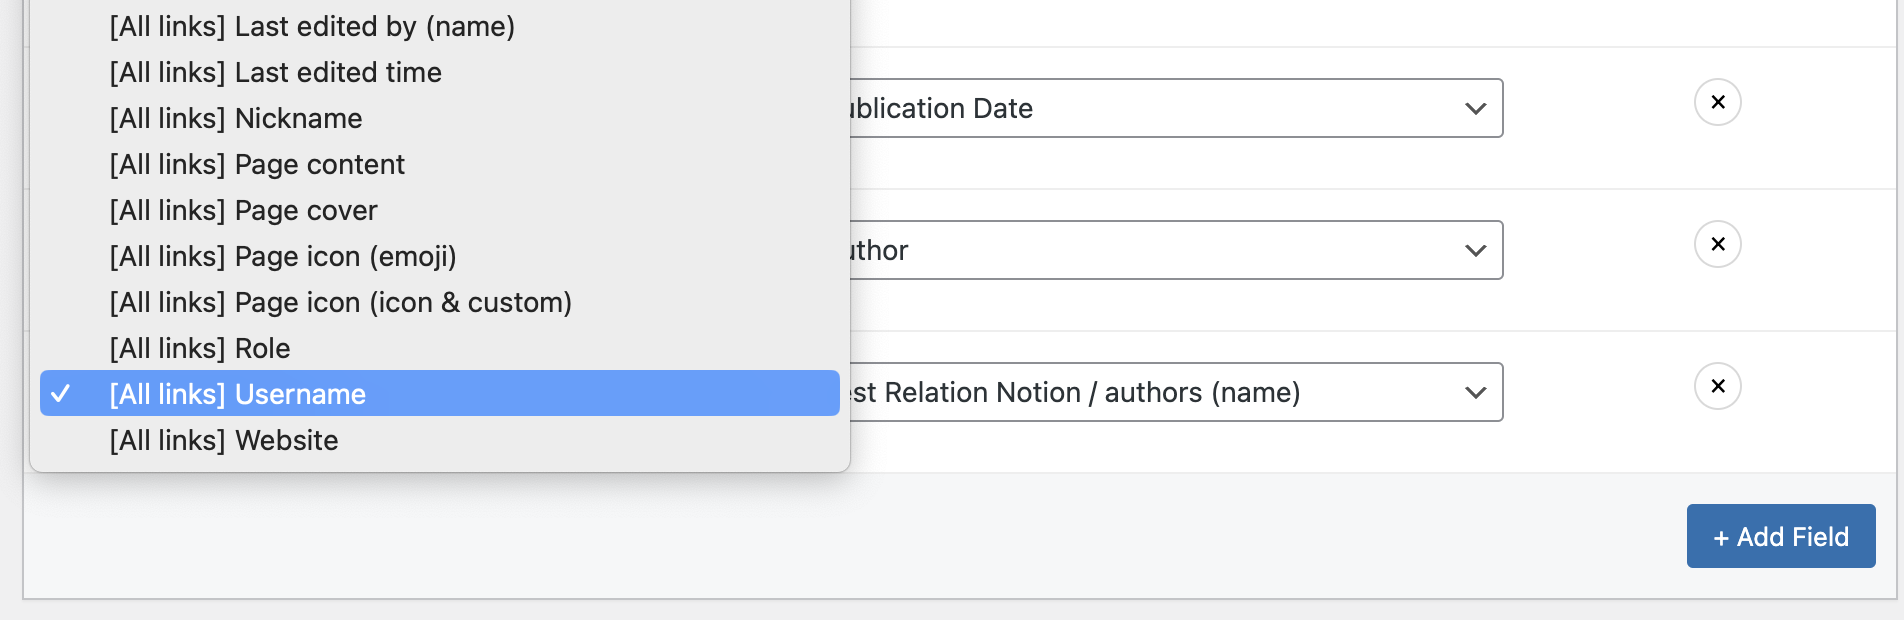
Result
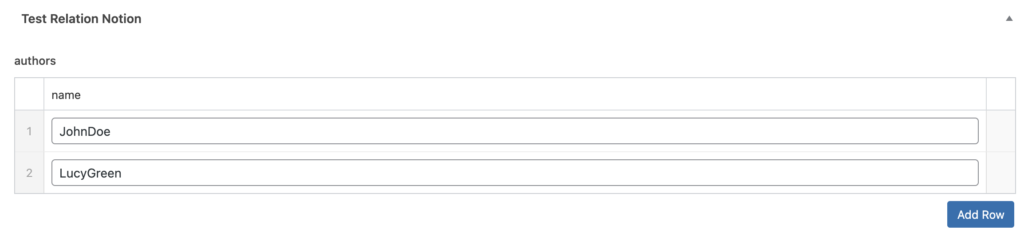
Note: the difference between selecting "Username" and "Username [All Links]" is that the former will only map the first author, suitable for a single WordPress field or ACF. The latter will map all records, but this can only be mapped with a Repeater field available in ACF Pro.
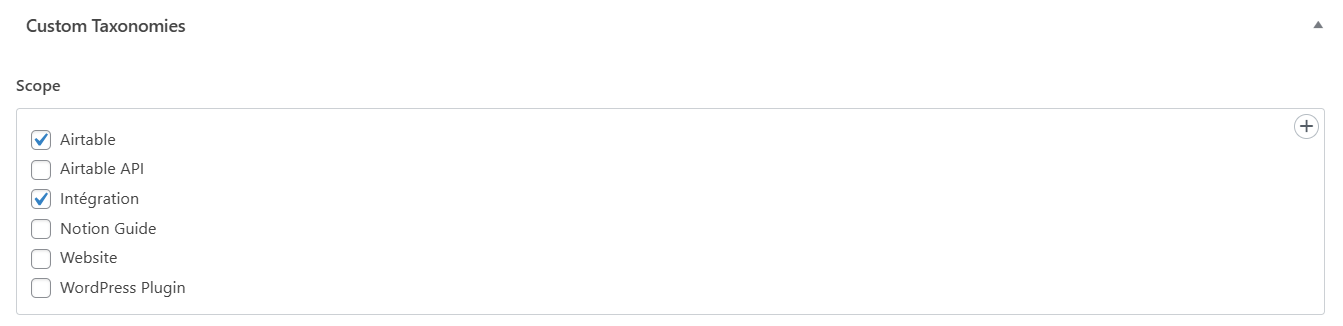
Link Multiple Records to ACF Taxonomy Field
With Notion WP Sync Pro+, you can now use an ACF Taxonomy field to display data from your linked base. It works similarly to the Repeater field. When mapping with an ACF Taxonomy field, you can only select Notion fields prefixed with "[All links]".

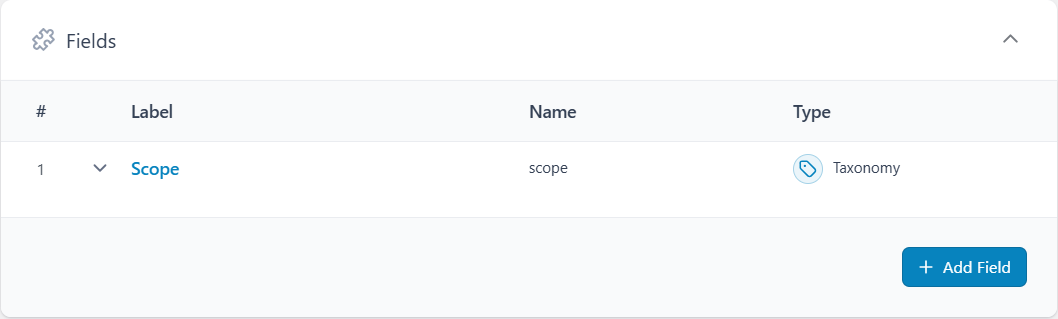
Step 1: ACF Setup
I have set up a Taxonomy field where I'll import my "Relation" Scope.
For the field setup, select Create Terms option, choose Multiselect or Checkbox for the Appearance, and activate Allow Null option.
Step 2: Connection editing
Back in the Notion WP Sync Pro+ plugin, make sure you select the main table, not the linked one and select the option Include "Relation" field(s).
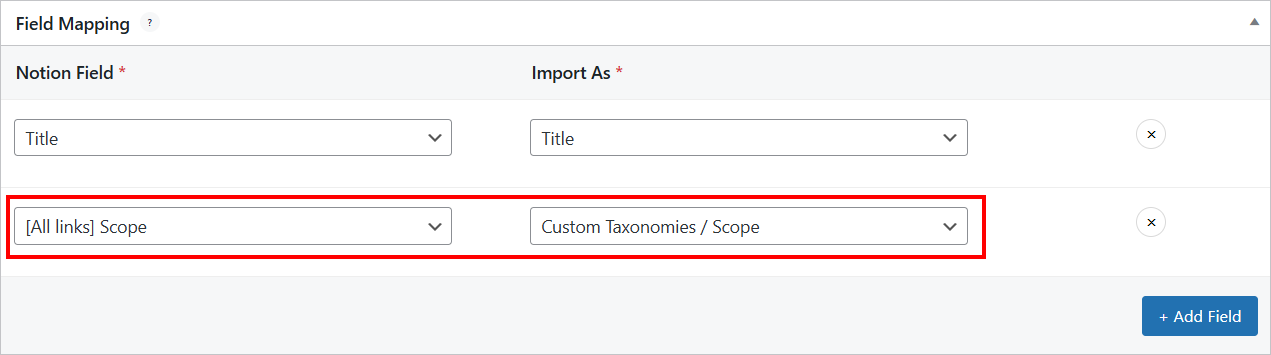
Step 3: Field Mapping
Map your linked records to your ACF Taxonomy field.
Result
This will allow you to display all the information from your linked records!