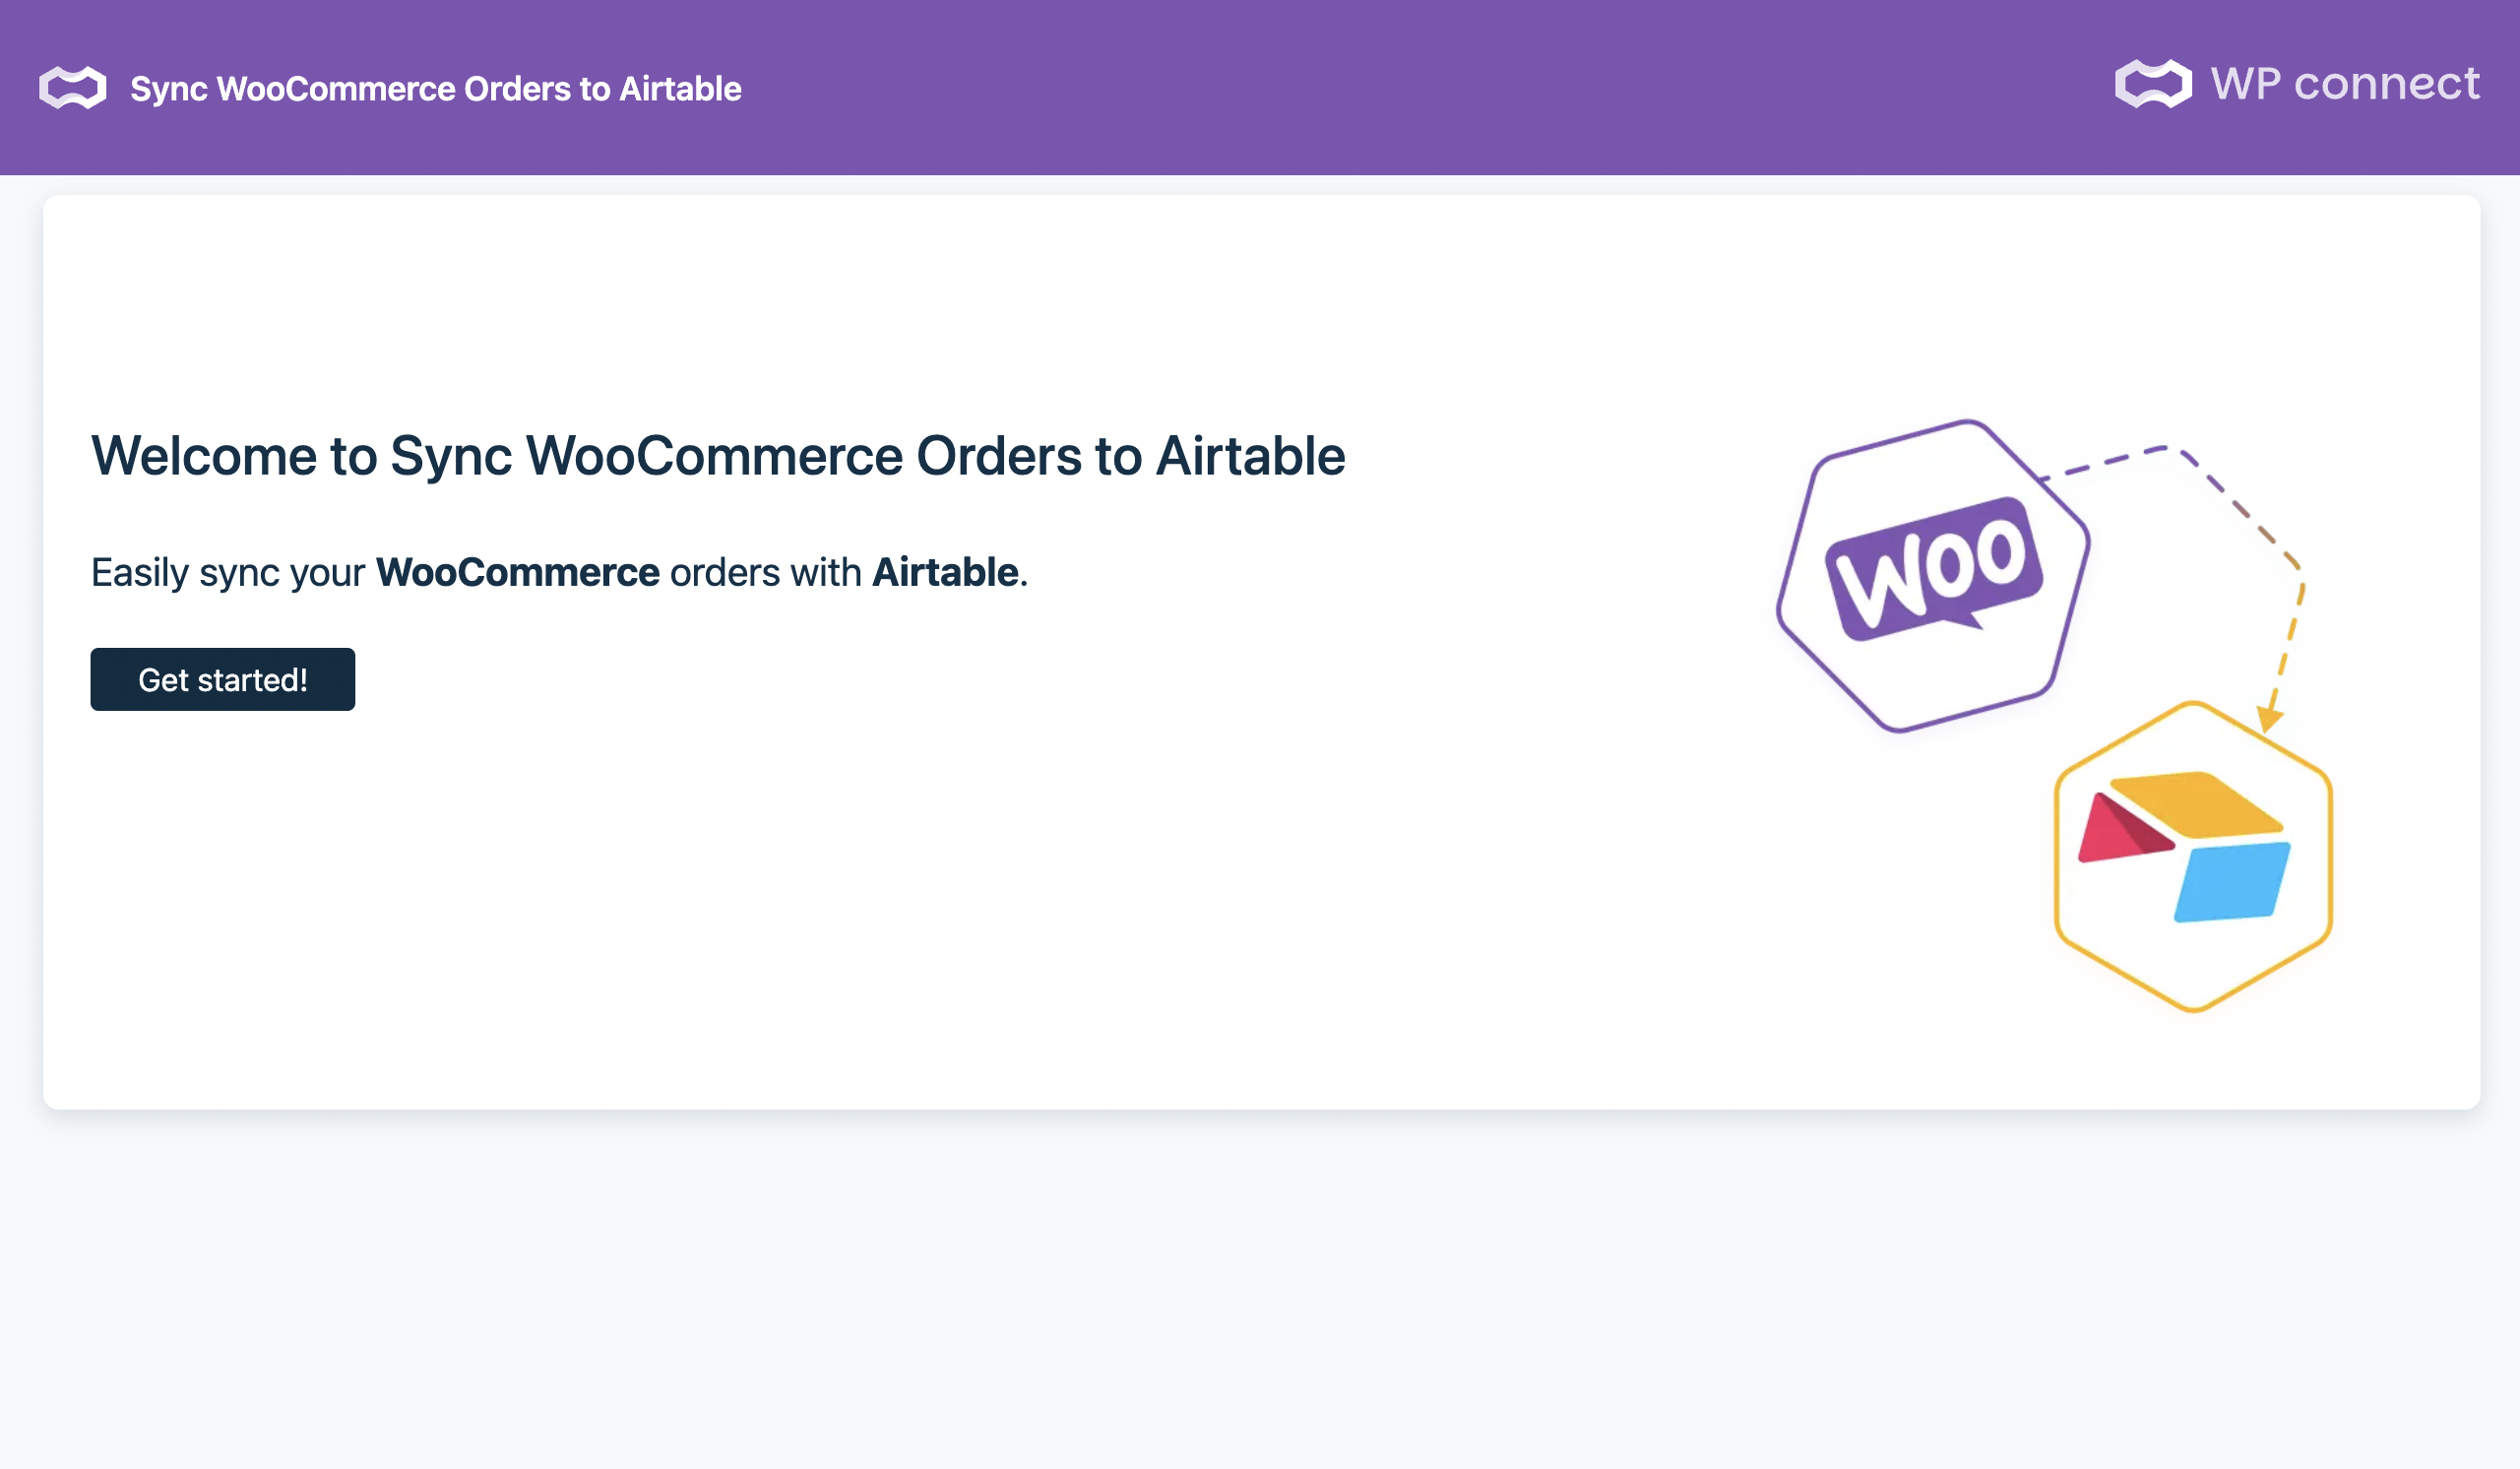
Sync WooCommerce Orders to Airtable Documentation
With our Sync WooCommerce Orders to Airtable plugin, you can connect your WooCommerce store to Airtable and automatically send your order data to a custom Airtable base — making it easier to manage your sales outside the WordPress dashboard.
Installation
To install the Sync WooCommerce Orders to Airtable plugin, follow these steps:
- Log in to your WordPress dashboard.
- In the WordPress dashboard, go to Plugins > Add Plugin.
- Search for “Sync WooCommerce Orders to Airtable“
- Click on Install Now, then Activate.
- Go to WooCommerce Orders to Airtable > Set up in the WordPress admin menu to begin setup.
⚠️ Please note that the WooCommerce plugin must be installed and activated to enable the Sync WooCommerce Orders to Airtable plugin.
Set up your WooCommerce Orders to Airtable plugin
Create a Airtable Access Token
Before using your Sync WooCommerce Orders to Airtable plugin, it must be configured with your Airtable access token.
Before starting the wizard, which will help you quickly configure the plugin, prepare your Airtable access token:
- Log in to your Airtable account to define your token:
- Click on the Builder Hub menu item in your account drop-down menu.
- Click on Personal access tokens in the left side menu.
- Click on + Create new token button.
- Give your token a Name and follow the instructions given by our wizard for the Scopes and Access to configure it.
⚠️ For the plugin to work properly, you must set:
– Scopes: data.records:read, data.records:write, schema.bases:read and schema.bases:write
– Access: All current and future bases in all current and future workspaces - Click on Create token button.
- Leave the pop-up displaying your token open; we’ll be back in a moment to copy it. In Your token has been created pop-up, click on Copy button then click on Done button to close it.
📌 If you need help to create the token, see this video to learn how create a token in Airtable.
To start the wizard: click on WooCommerce Orders to Airtable > Set up menu in the WordPress dashboard, and the wizard will appear.
Follow these steps:
- Click on Get started! button.
- Go to your Airtable account. When the “Your token has been created” popup appears, click Copy, then click Done to close it.
⚠️ Don’t log out of your Airtable account for the moment.
- Go back to the setup wizard and paste your token in the Access token field.
- Click on Check→ button: your plugin is now connected!
- To continue setting up your sync, select either our ready-made Airtable template or connect your own Airtable base.
Pick a Airtable Base
When you create your first WooCommerce Orders sync from WordPress, you’ll have the option to either copy our ready-made Airtable template or connect your own Airtable base. Once the base is ready, return to the Sync WooCommerce Orders to Airtable interface to complete the setup and start syncing your orders.
Copy the Sync Woocommerce Orders to Airtable Template
If you selected the WooCommerce Orders template during setup, the next step is to copy the template to your Airtable account, otherwise continue to the next step – select the table.
This template is designed to make syncing your WooCommerce orders easy. It’s also fully compatible with Air WP Sync for WooCommerce
Once copied, the template will be added to the workspace linked to your access token.
⚠️ Never rename the template
⚠️ Don’t modify the template before your first successful sync.
⚠️ Make sure you’re using the latest version of the template.
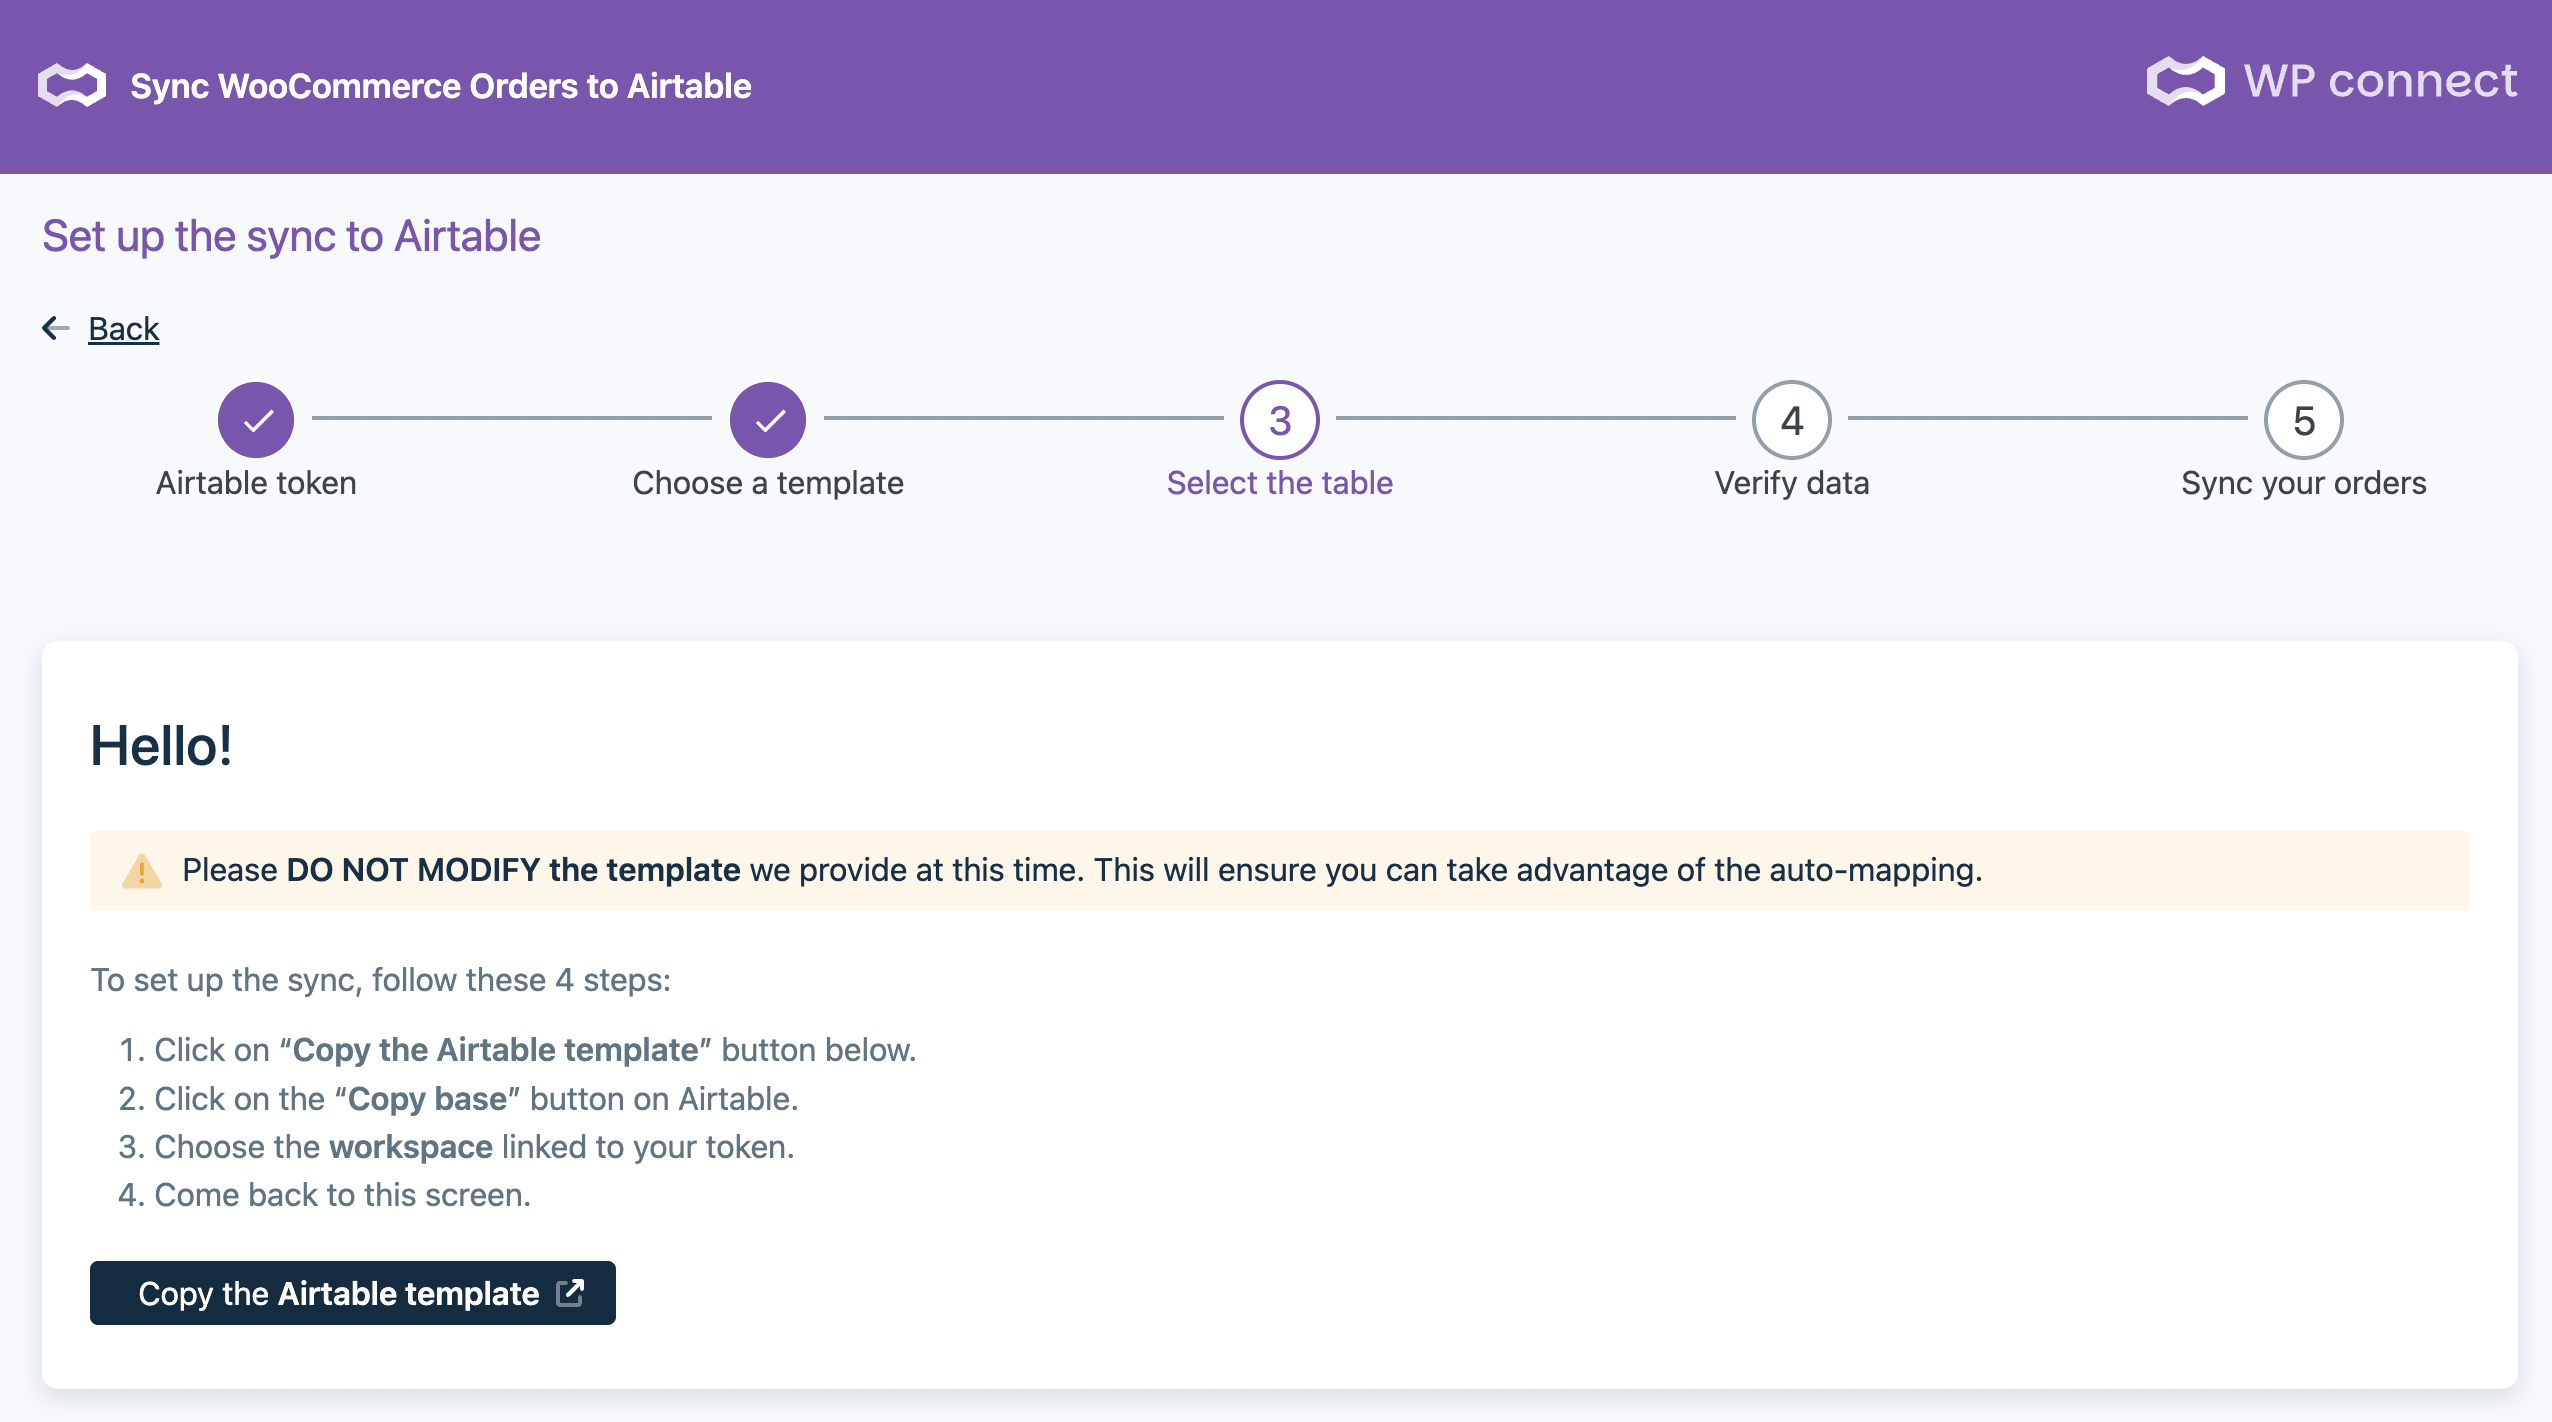
Copy and connect the Airtable template in 4 steps:
- In WordPress, click the Copy our Airtable template base button. This will open the template in a new Airtable tab.
- In Airtable, click the Copy base button (at the top right of the page, next to the template name).
- Choose your workspace, then click Add base.
- Go back to the Sync WooCommerce Orders to Airtable setup screen. You’ll now see that the template is successfully connected to the plugin.
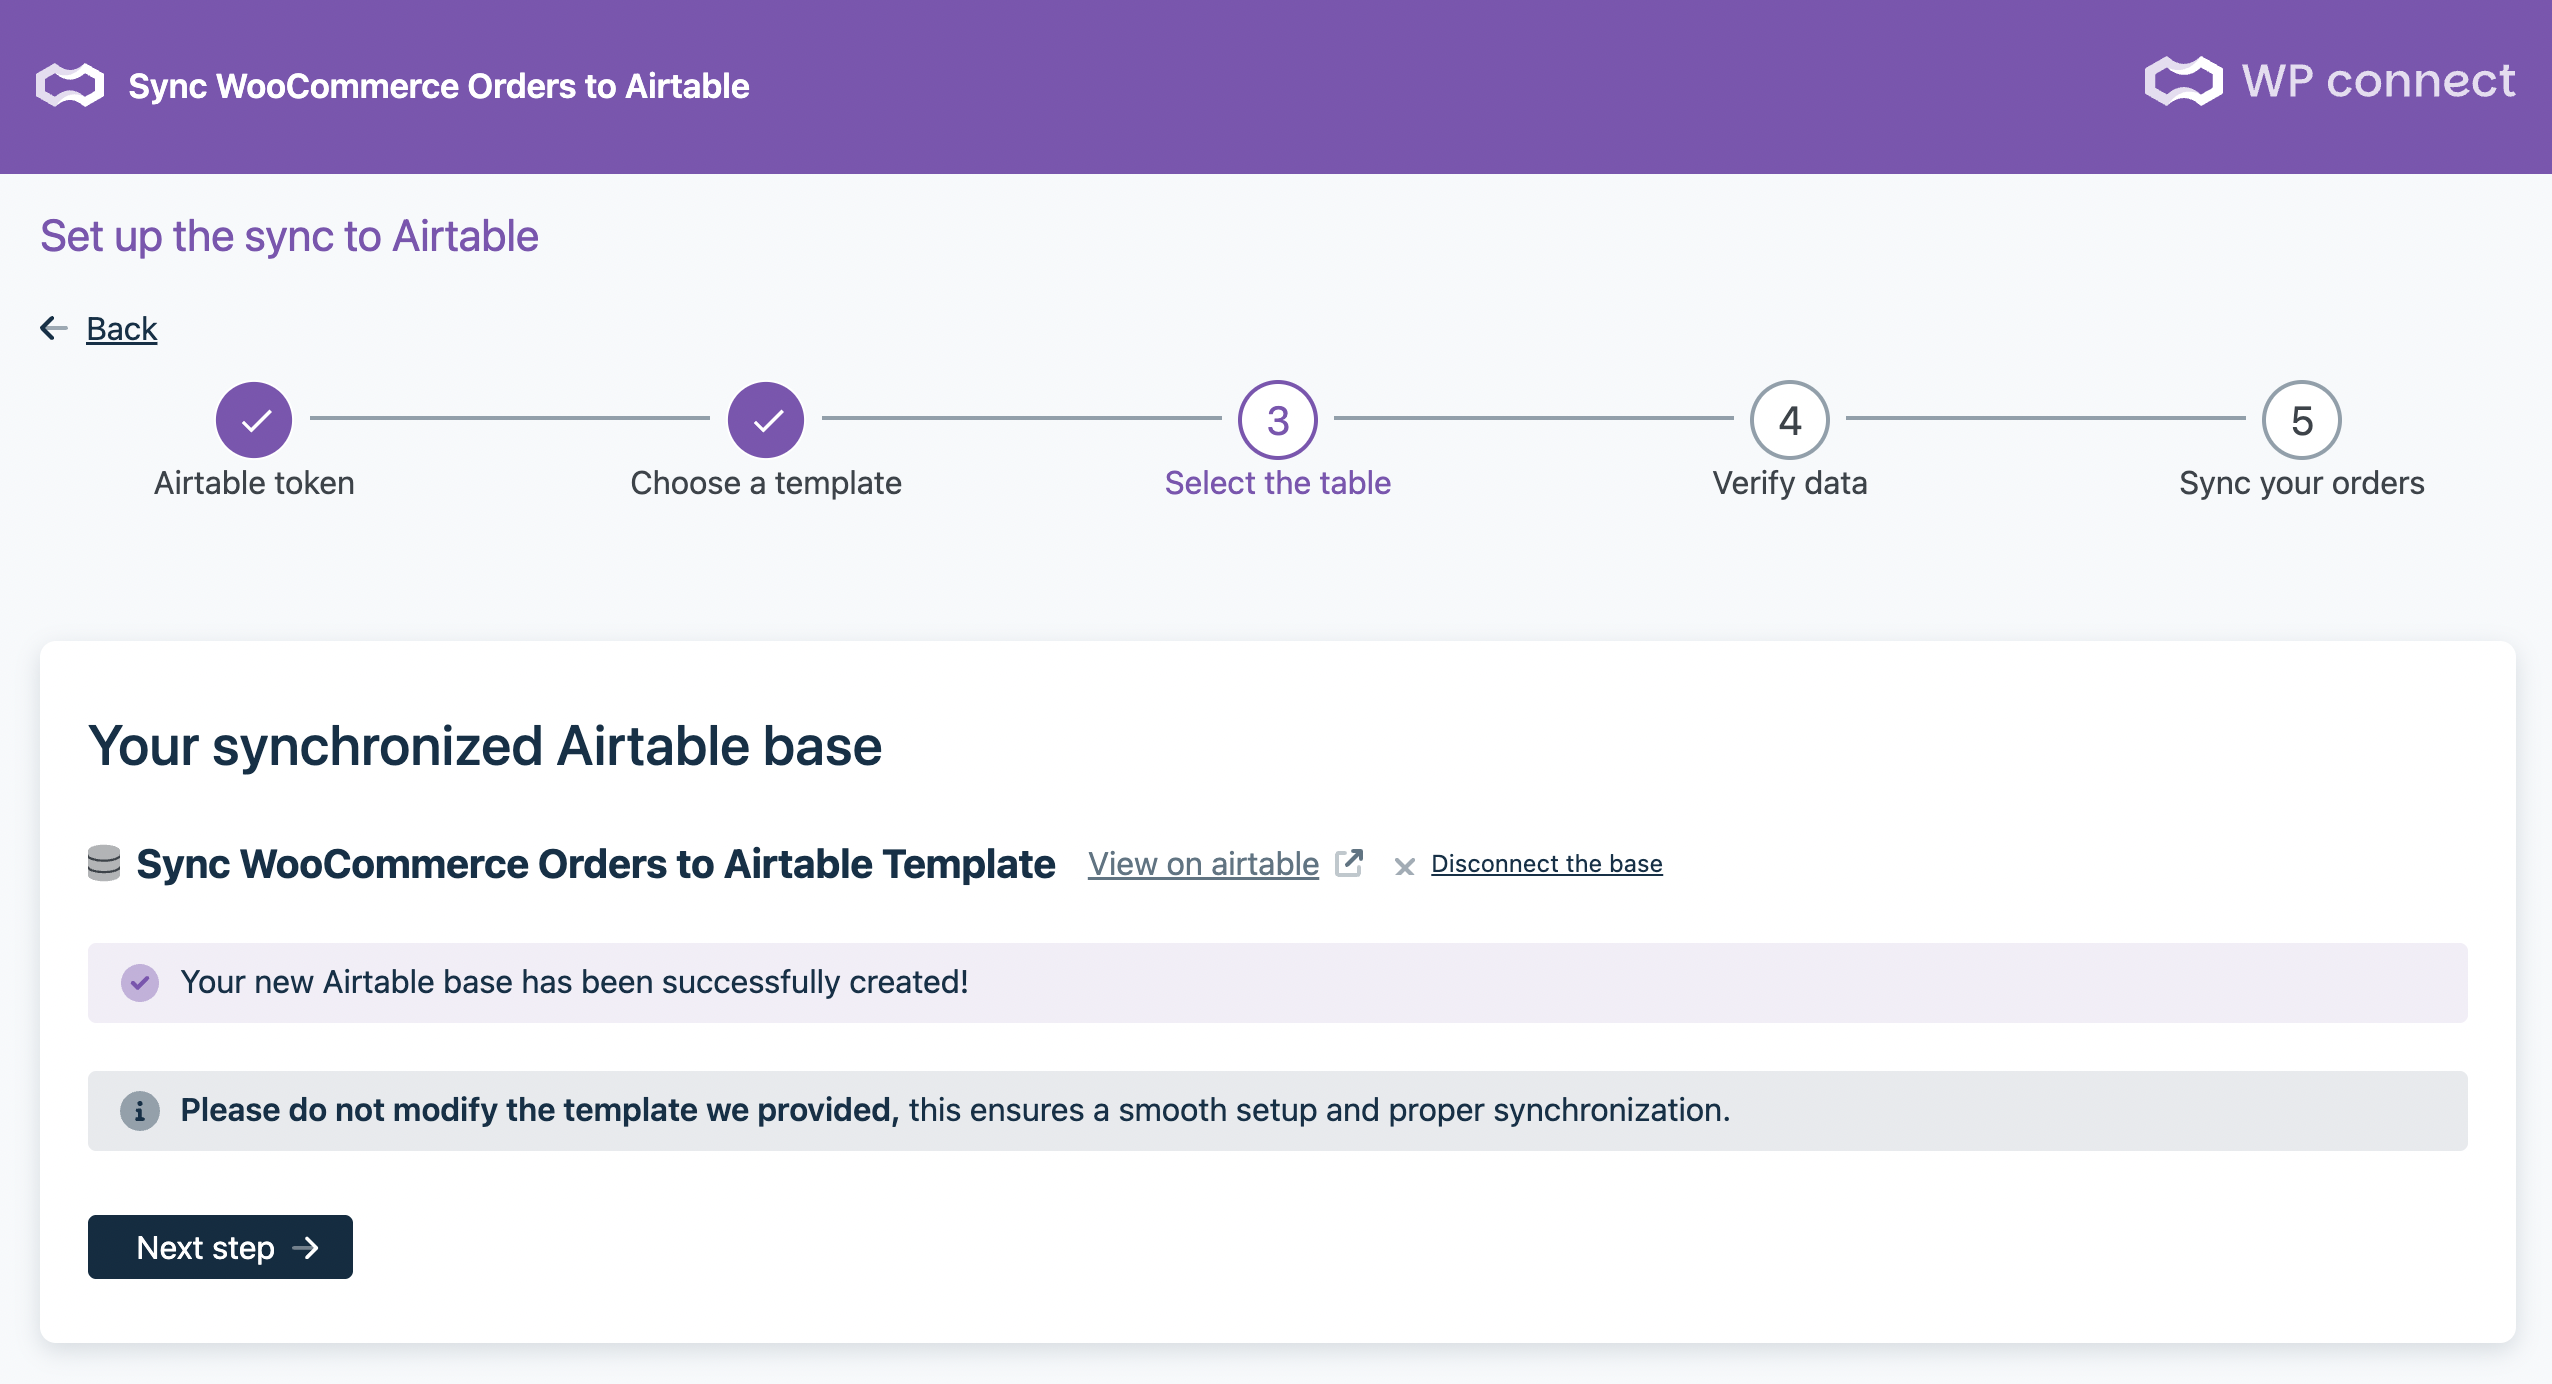
You’re all set!
Now you can create your first sync WooCommerce orders into Airtable. Follow to the next step – Verify data
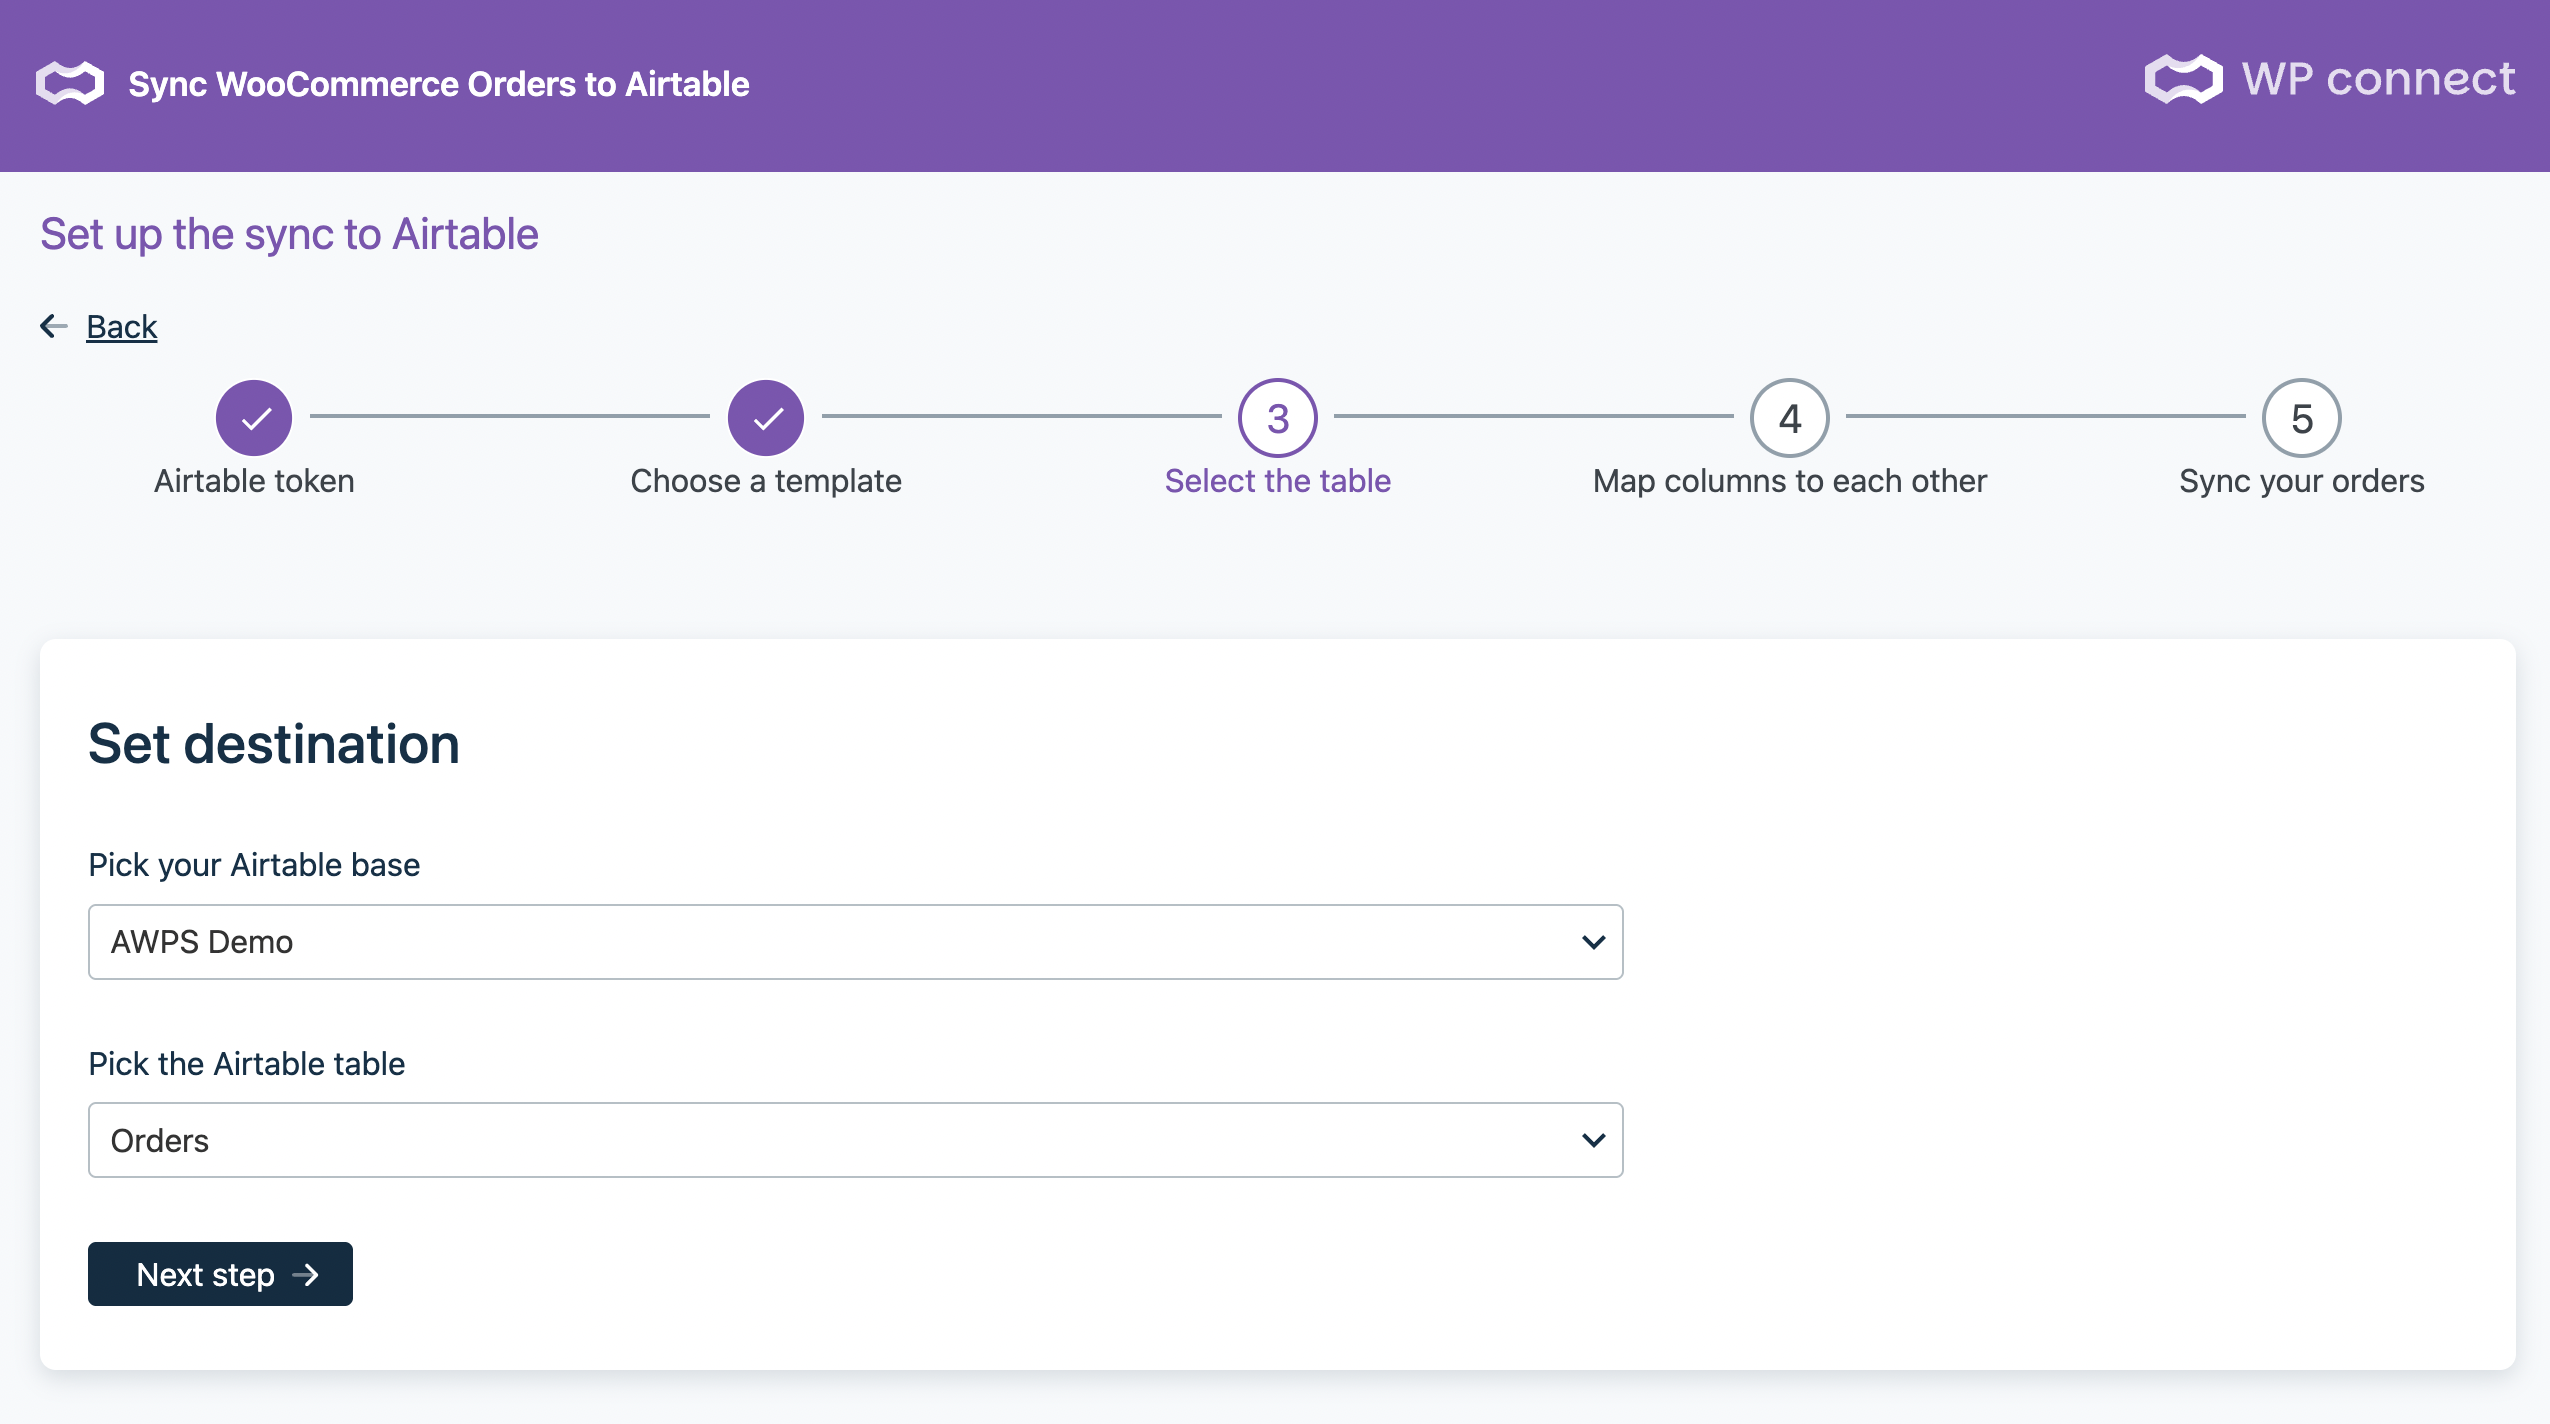
Select the table
If you chose to start from scratch, now it’s time to select your Airtable base and table.
Once selected, click Next to move to the next step – verify data.
Verify data
If you’re using our ready-made template, the field mapping is done automatically.
You’ll still be able to add, or remove columns later — after your first sync.
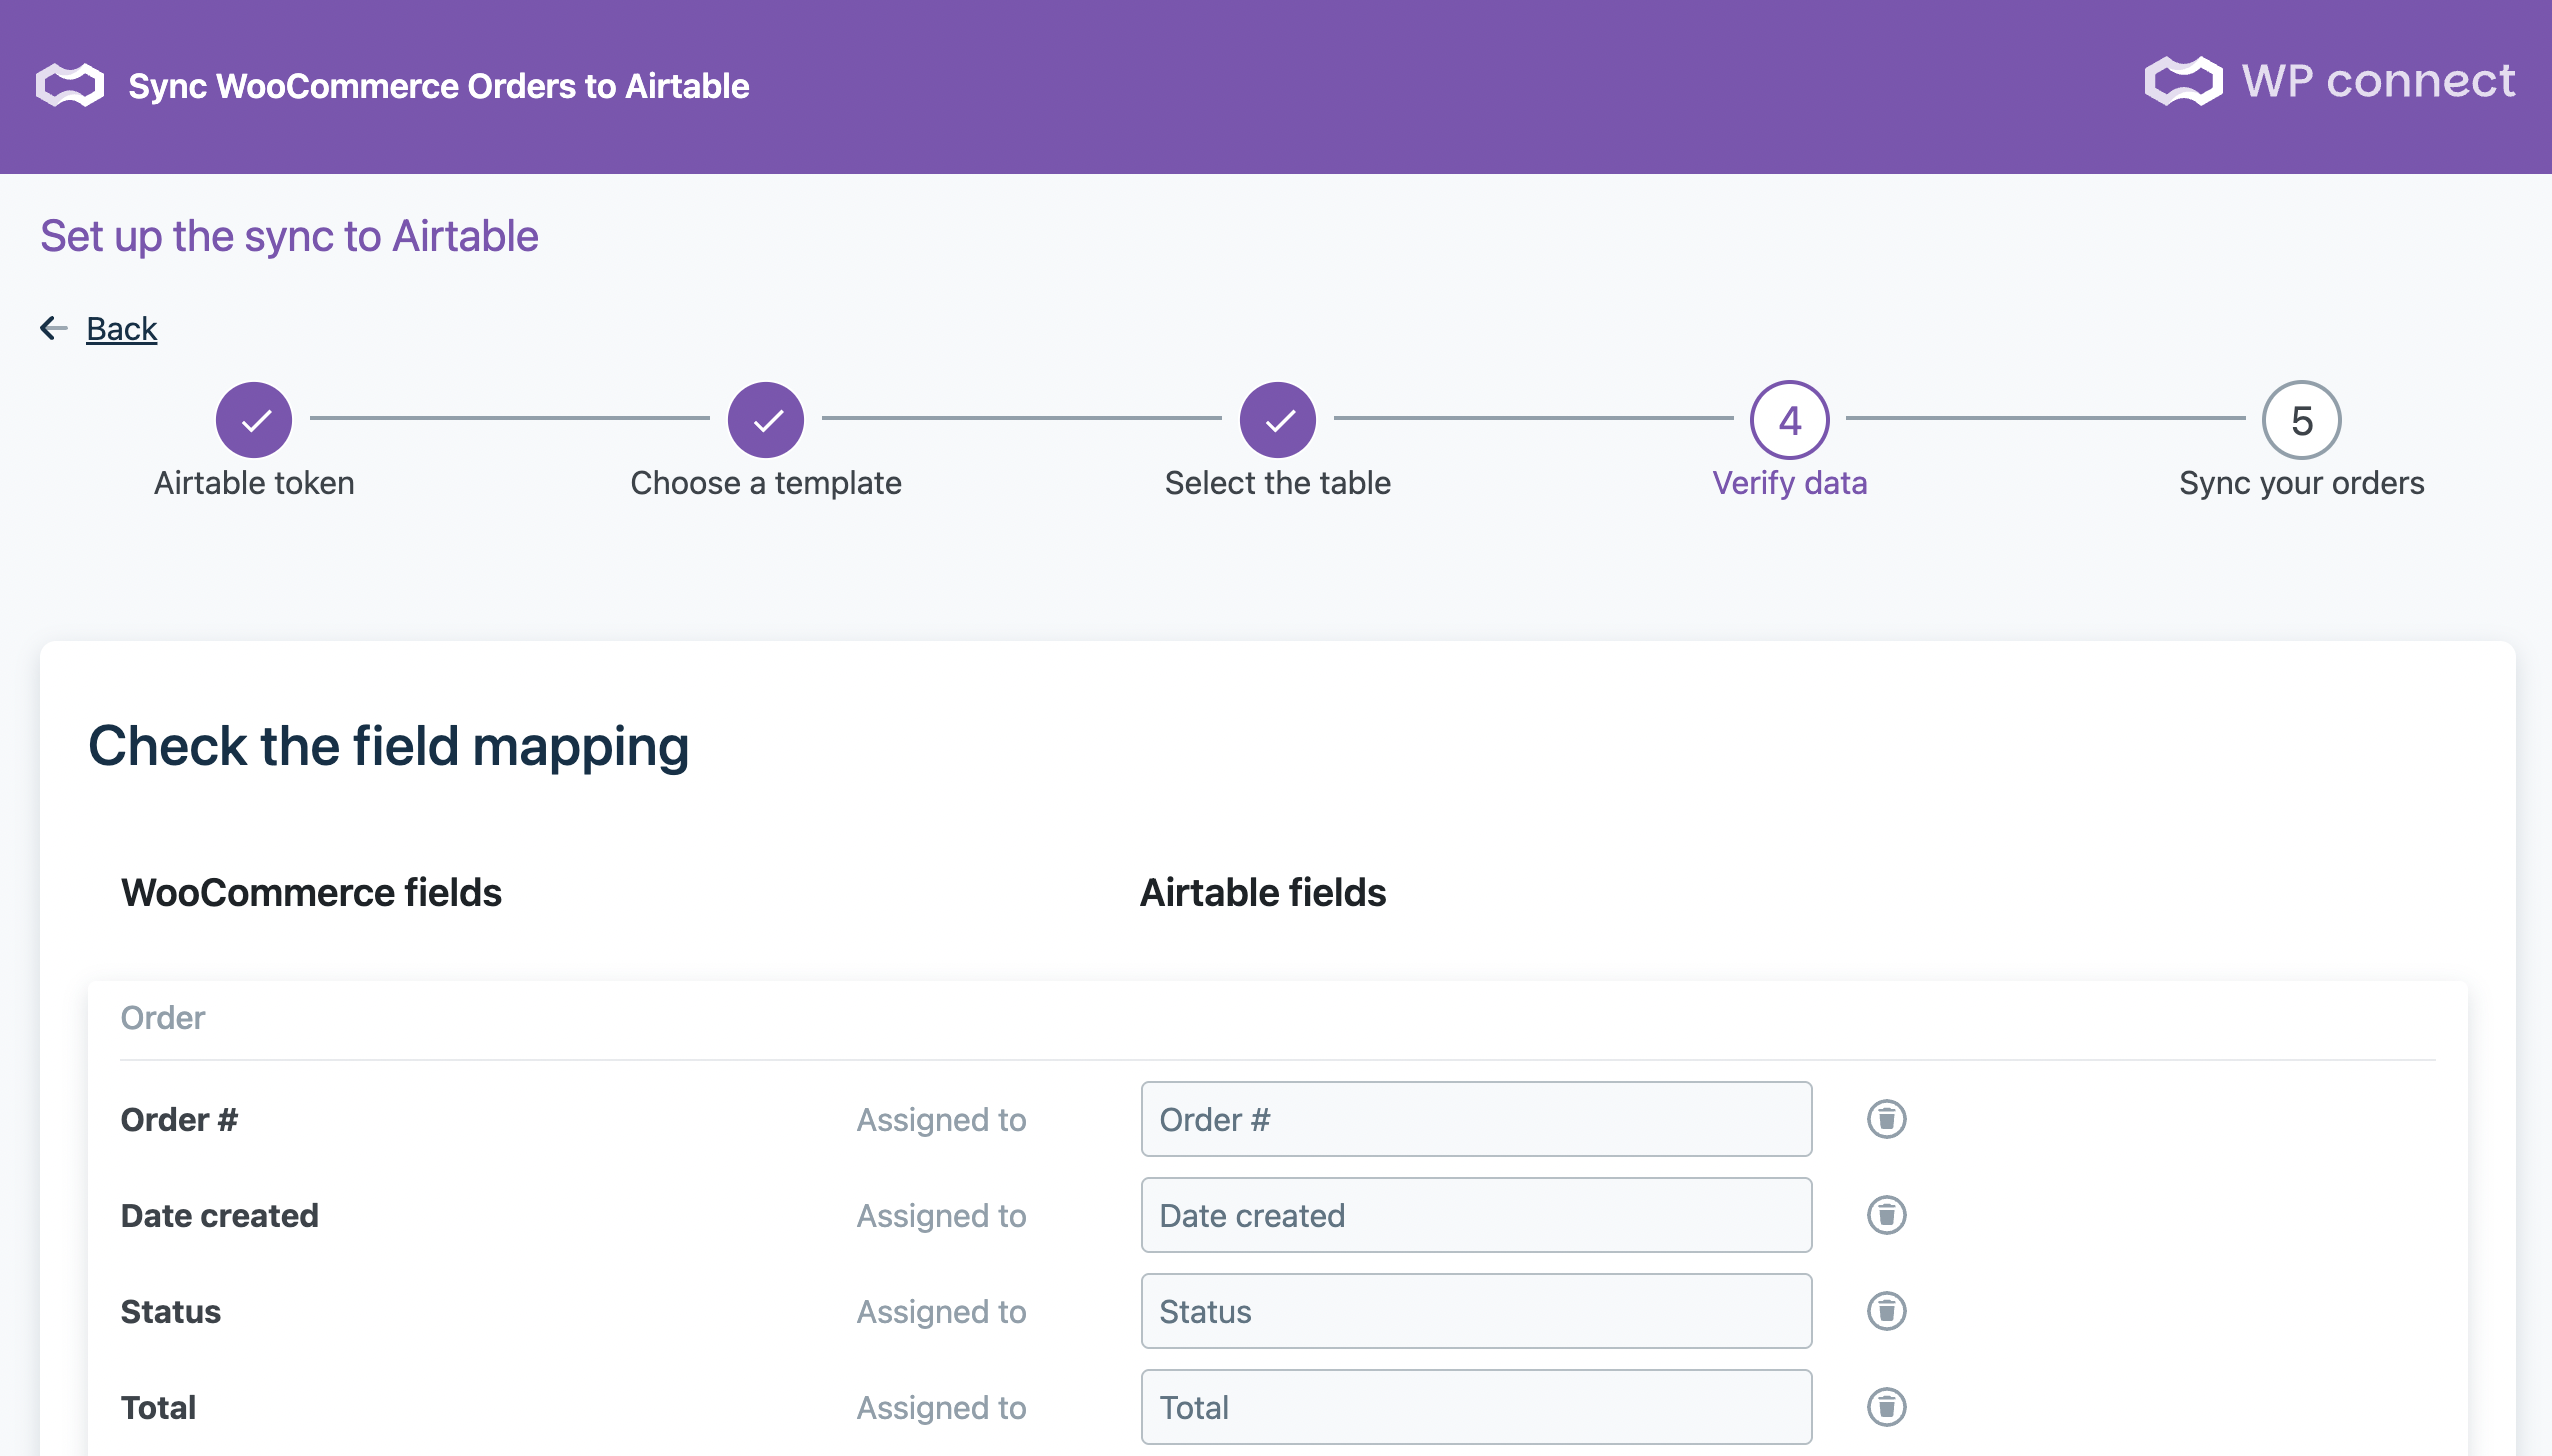
If you selected the custom table (from scratch), you’ll need to manually map all the fields.
Make sure to include at least the key fields:
- Order #
- Date created
- Status
- Total
Click on Verify mapping, then go to the next step – Sync your orders.
Sync your orders
In this step, you can choose how your orders should sync:
- Manual: Sync only happens when you click the Sync button.
- Automatic: Sync runs automatically every time a new order is created in WooCommerce or when an order status changes.
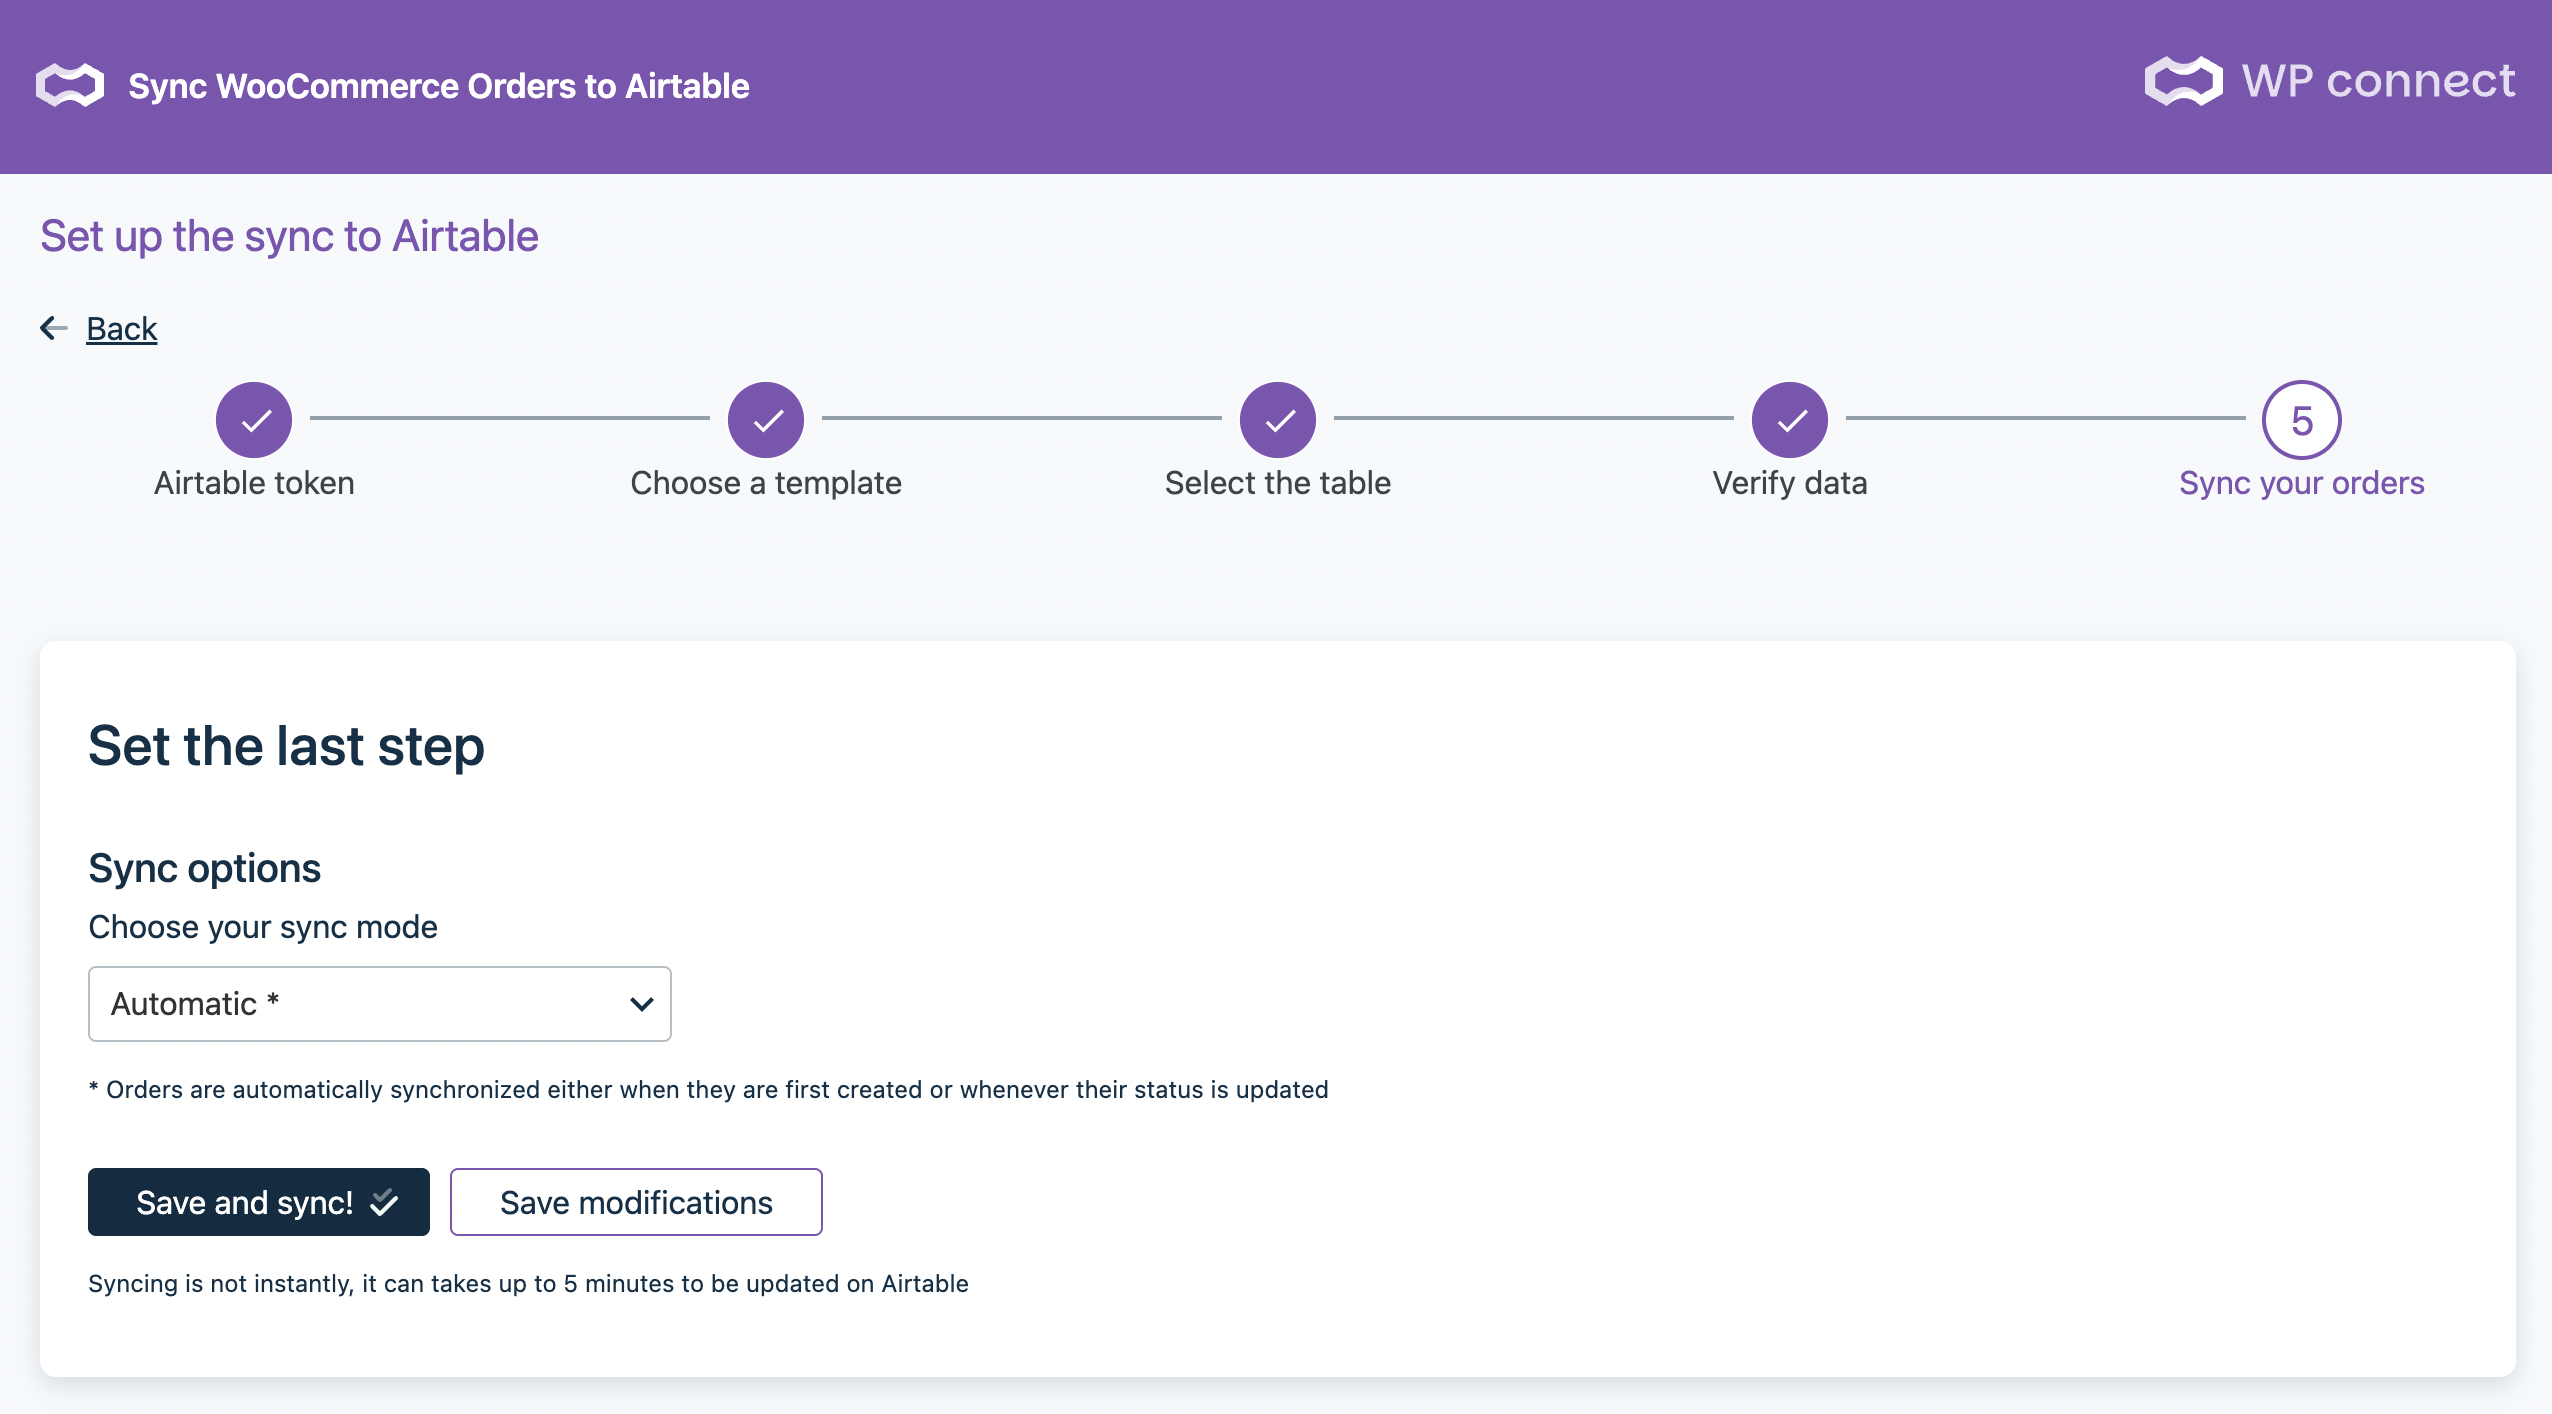
⚠️ IMPORTANT:
If you manually edit order details like name or address, those changes won’t sync to Airtable.
Only status changes will trigger a sync.
So, if you’ve made manual edits, be sure to update the order status to reflect the changes in Airtable.
Now click on Save and sync! and save lot of time.
Modify your mapping
To modify the mapping after a first sync, follow these steps:
- Click on WooCommerce Orders to Airtable > Set up menu.
- The last screen of the wizard is displayed, and to modify the settings you can use the ←Back links to reach the desired screen.
- Edit all of desired settings and click on Next Step→ until you reach the last screen of the wizard.
- And click on Save modifications and Sync! or Save modifications button, both will be enough to continue syncing.
If you click on Save modifications the Woo connection is saved (and published) and the message “Setting saved” is displayed.
If you click on Save modifications and Sync!, the syncing is saved and published, the sync starts.
Mapping
Description of mapping
The fields are grouped into different sets with a common theme as:
- Main – Fields describing the products, i.e Name, Description, Status, Categories, Tags, Product Image, etc.
- General – Fields concerning price and taxes, i.e Regular price, Sale price, Tax status, Tax class, etc.
- Inventory – Fields concerning the stock, i.e SKU, Stock quantity, Low stock threshold, etc.
- Linked Products – The fields Upsells and Cross-sells.
- Shipping – Product size/weight fields, i.e Weight, Length, Width, Height, etc.
- Added fields – The fields that you add.
📌 Mapping fields will differ according to the Type of product selected and whether or not the Activate inventory management option is enabled.
Modify the mapping
Once the first synchronization has taken place, and only then, you can customize the mapping by adding or deleting fields.
Add a field
To add field to the mapping, you need open the Woo connection, and use ←Back links to access to the fields mapping:
- Then click on Add field button: a row is added in the Added fields section.
- Choose the WordPress field from the drop-down list, and for the field from the Airtable base, there are two possible cases:
- It is automatically selected by the wizard, because it’s a part of pre-configured fields.
- Or you need to select it yourself in the drop-down list.
Delete a field
To delete a field, open the Woo connection and use ←Back link to access to the fields mapping then click on the Trash button at the end of the right-hand line: the line is deleted without a confirmation message.
⚠️ The required fields as Product Name, Regular Price, SKU, etc. can’t be deleted.
When you have added or deleted a field in the mapping, you must save changes by clicking on Next Step→ button then click on Save Modifications button. You can also click on Save modifications and Sync! button to save changes and synchronize your data as of now.
Airtable Database
Access to the Airtable database
To access quickly to the Airtable database:
- Go to Your synchronized Airtable base, by clicking on WooCommerce Orders to Airtable > Set up menu.
- Click on view on Airtable link.
- Login to Airtable if needed.
- The database used in Sync WooCommerce Orders to Airtable plugin is automatically displayed.
Disconnect the Airtable database
If you wish to change the database connected to the Sync WooCommerce Orders to Airtable:
- Go to WooCommerce Orders to Airtable > Set up menu.
- Go back to the step 3 – select a table
- Click on the Disconnect the base link.
- In the pop-up window, click on Yes, I want to disconnect my base button to break the link with your database
- Then you can use a template from scratch or connect again our template
Support
To get support click on support. You are redirected to a new tab with our WP connect Support center where you can post a ticket describing your problem or request, after logging in.
Limitations
These third-party plugins aren’t supported:
- WooCommerce Bookings
- WooCommerce Shipping
- WooCommerce Subscriptions
- WooCommerce Product Add-Ons
- WooCommerce Tax
- WooCommerce Box Office
- WooCommerce Memberships
- Product Recommendations
- Composite Products
- Bundle Products
- Extra Custom Product Options for WooCommerce
Troubleshootings
You’ve modified the structure of the Airtable template, but nothing has changed in the plugin interface: this behavior is normal because for performance reasons, the structure of your Airtable base are cached for 15 minutes. See above how to purge the cache.
If required, you can access logs via an FTP connection in this folder:
/wp-content/uploads/sync-woocommerce-orders-to-airtable-logs
And you can access the logs of the last synchronization: click on WooCommerce Orders to Airtable > Set up then click on the Download logs button.