Create WordPress users from Airtable with Air WP Sync
Our Air WP Sync plugin allows you to synchronize WordPress users directly from Airtable. In this guide, we'll walk you through the steps to import and sync users from your Airtable base into your WordPress website. With this feature, you no longer have to manually add and update user information in WordPress.
Setting up your Airtable base
Before diving into the synchronization process, make sure that your Airtable base contains column properties that align with WordPress user properties.
You can set up the following columns:
- Username
- First Name
- Last Name
- Nickname
- Website URL
- Biographical Info
- Role
- Locale
The Username and Email fields are mandatory, while others are optional.
To use the Role field in mapping, make sure you use non-capitalized values such as subscriber, author, contributor, editor, or administrator. If you use values with uppercase letters, the value used will be the one defined by default in the Default Role field.
For the Locale field, you must use the values corresponding to the different locales existing in WordPress with their abbreviation such as en_US or fr_FR. Note: the language corresponding to the Locale field will be assigned to the user if the language is actually installed on the site. Otherwise, the language assigned to the user will be the site's default language.
Connecting Airtable to WordPress
- Log in to your WordPress dashboard.
- Navigate to the Air WP Sync plugin in the left-hand side menu.
- Click on Add new to create a new connection.
- Enter your Airtable API access token.
- Choose your Airtable base, table, and view (optional).
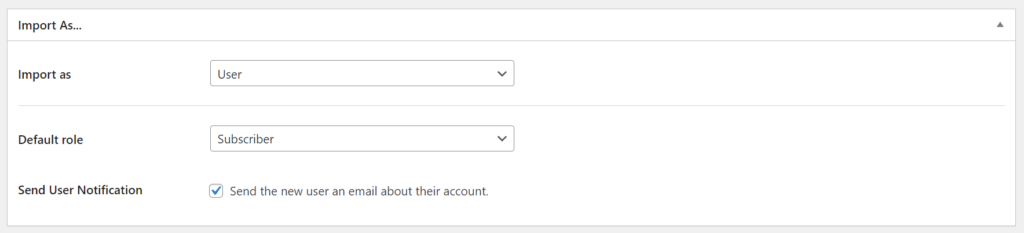
Setting Up Users Import
- Select User in the Import as dropdown menu.
- Define the Default Role and the Language for the imported users.
- If you want, check the Send User Notification option.
If the Send User Notification option is enabled, it sends an email alert to users upon syncing, prompting them to set up their account password.
Mapping Airtable Fields with WordPress
While editing your connection in the Air WP Sync plugin, you will find the Field Mapping section.
In this section:
- Choose an Airtable Field — from the dropdown menu, select which field in your Airtable base you want to synchronize to WordPress. For instance, if you have a column named "First Name" in Airtable, you'd start by selecting that.
- Select a WordPress user property — match the Airtable field to a corresponding property in WordPress where you want that data to appear. If you selected "First Name" from Airtable, you'd map it to the First Name field in WordPress.
- Repeat steps 1 and 2 for each field you want to synchronize.
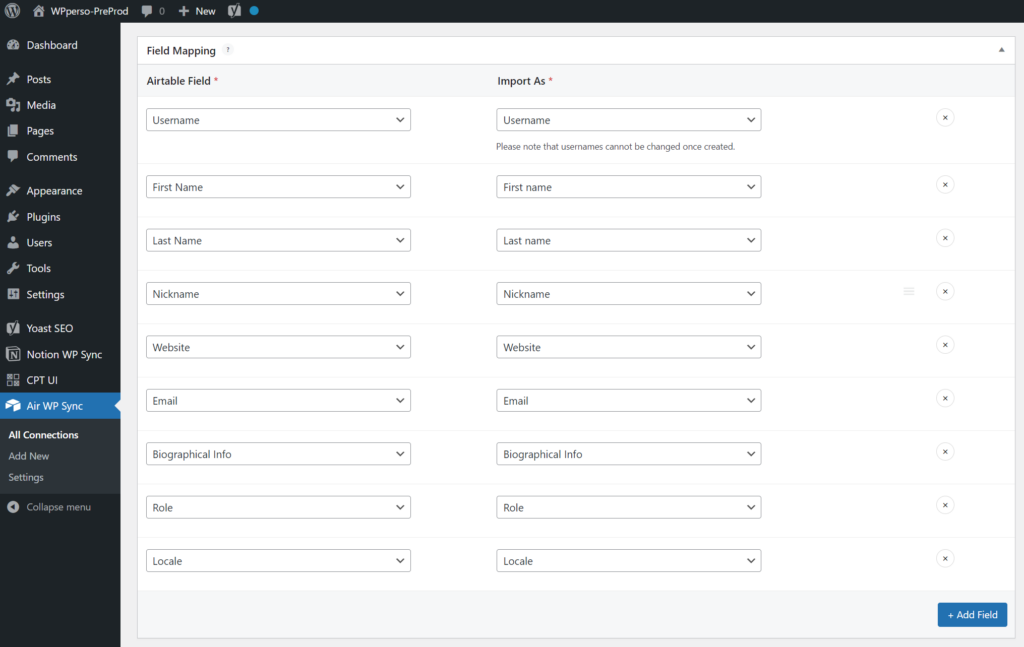
After mapping your fields, click Update, then Sync now to import user data from Airtable.
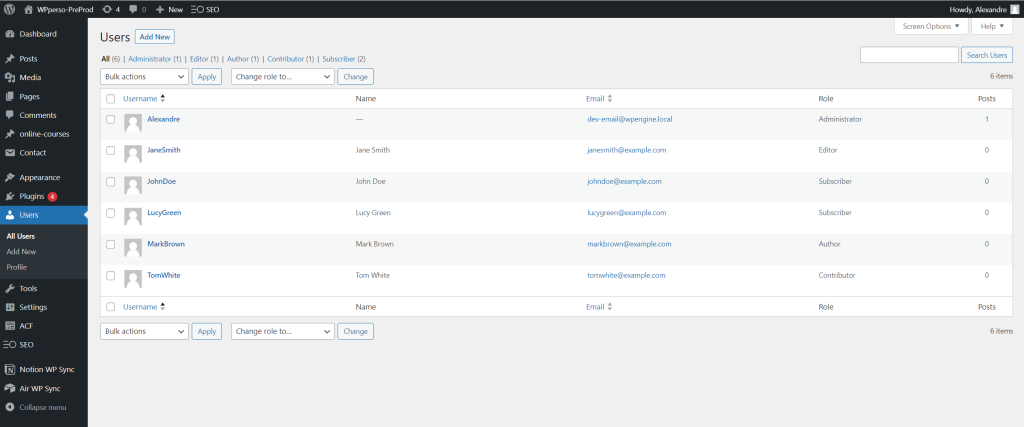
Reviewing Imported Users
- In the WordPress dashboard, select Users from the side menu.
- The list displays all users imported from your Airtable base.
For a more granular view, click on an individual user. You'll see a complete profile with all the synced data from Airtable.
Scribe Tutorial
In this step-by-step Scribe tutorial, we explain how to synchronize WordPress users from your Airtable base.