Notion WP Sync Documentation
⚠️ IMPORTANT NOTE
Notion WP Sync is a ONE-WAY SYNC – From Notion to WordPress ONLY!
Changes made in WordPress will NOT sync back to Notion, so be sure to manage your data from Notion to keep everything updated correctly.
Installation & Settings
To install our Notion WP Sync plugin in WordPress, follow the steps below:
- Download the plugin file to your computer
- Log in to your WordPress dashboard.
- On the left-hand side menu, click on Plugins and the Add New.
- Click the Upload Plugin button at the top of the page.
- Click the Choose File button and select the plugin file you downloaded in step 1.
- Click the Install Now button.
- Wait for the plugin to be installed, and then click the Activate button.

After installing and activating the plugin in WordPress, it will appear in the admin menu and access to the connection and configuration settings.
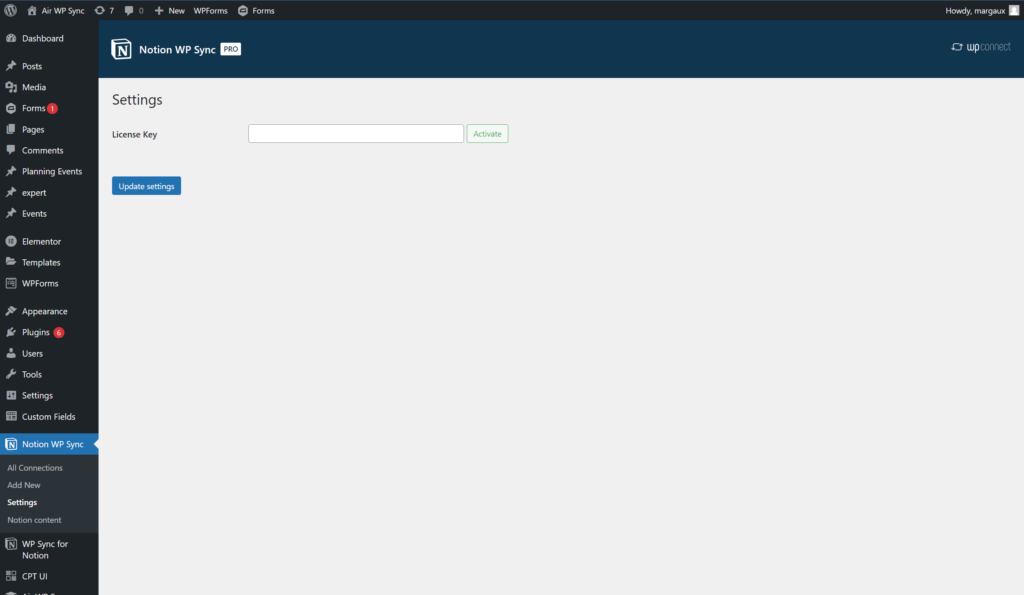
Before creating a connection, your are prompted to enter your license key to validate the installation of the plugin. To activate this license key, go to Notion WP Sync > Settings.
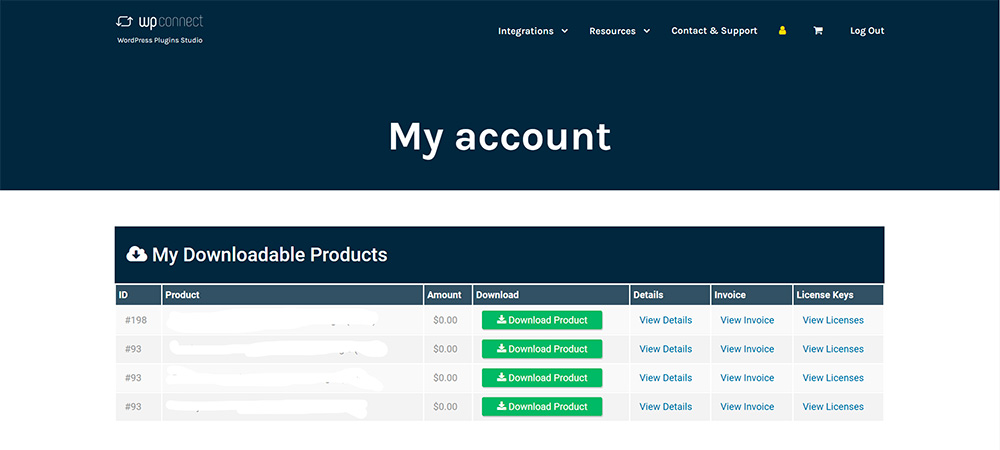
This license key is available both in your purchase confirmation email, as well as on wpconnect.co > My Account > My Downloadable Products > License Keys, View Licenses.
You will then be redirected to the purchase page of your product. Click on the key icon to see the license number appears and copy-paste it into your Notion WP Sync License Key field.
Once the license key is copied into the Notion WP Sync settings, be sure to click the Activate button. If your license key is valid, a green checkmark will appear and you juste need to save the settings by clicking the Update settings button.
You can then begin creating your connections.
Create a Connection
To create a new connection to your Notion account, go to Notion WP Sync > All connections, click the Add New Connection button and enter a name for your connection.
You will be asked for an Internal integration token to connect your account. We recommand that you retrieve this token using this link or view this video.
For a better comprehension, please follow theses steps:
- In your Notion account, go to the integrations page: Notion account > Connections > Develop or manage integrations.
- Click the New integration button and enter a name for your integration. Then select the workspace where you want to use the integration in the Associated workspace field. Select “Internal” for the Type. And click on Save button.
- Once the integration successfully created, click on Configure integration settings button: an Internal Integration Secret is already created.
- Please select the Content capabilities “Read content” and the User capabilities “Read user information including email adresses“, and click on Save button.
- Now, you can click on Show then Copy the Internal Integration secret. You can paste it into the Internal integration token field of your Notion WP Sync plugin.

⚠️ Once your Internal integration token has been entered in the field, you have to share your Notion pages or databases with your integrations to see their in the differents select fields of your plugin.
To do this, please select the more option button at the right top of your Notion page ou database, hover the Add connection option and select the connection you’ve just created. You can also consult the Notion Documentation Page to understand how to create an Internal integration token.
Import Settings
Notion content
You can import your Pages and Databases from Notion to WordPress.
- Notion Pages: they are essentially digital documents that can contain a wide range of information, from text and images to embedded files, databases, and more.

- Notion Databases: one of the most powerful features of the Notion platform, Notion Databases are essentially tables with customizable columns, where users can input and manipulate data in a variety of ways

Destination
You can import your content in several ways: Post type or Shortcode.
Post type
You can import your content in several ways: Post, Page or Custom Post Type.
Here’s how these three elements work:
- Post: an article is a content that can be published on a blog or website. They are generally used to display information. They are created and managed in the Posts section of the WordPress dashboard.
- Page: a page is static content that is usually part of a website’s navigation menu. They are used to display information. They are created and managed in the Pages section of the WordPress dashboard.
- Custom Post Type (CPT): a custom post type is a custom content type that can be created by WordPress plugins or themes. CPTs allow you to add specialized content types to your site such as events, products, portfolios, etc. They are generally used to extend the capabilities of WordPress and to add structured content to your site. They are similar to posts and pages in that they can be published on your site and viewed by users but they have their own unique labels and characteristics that distinguish them. There are several types of CPTs: CPTs created by plugins or themes that you have installed on your WordPress site, those that you have created via plugin such as Custom Post Type UI or ToolSet or those that have been created manually by custom development.
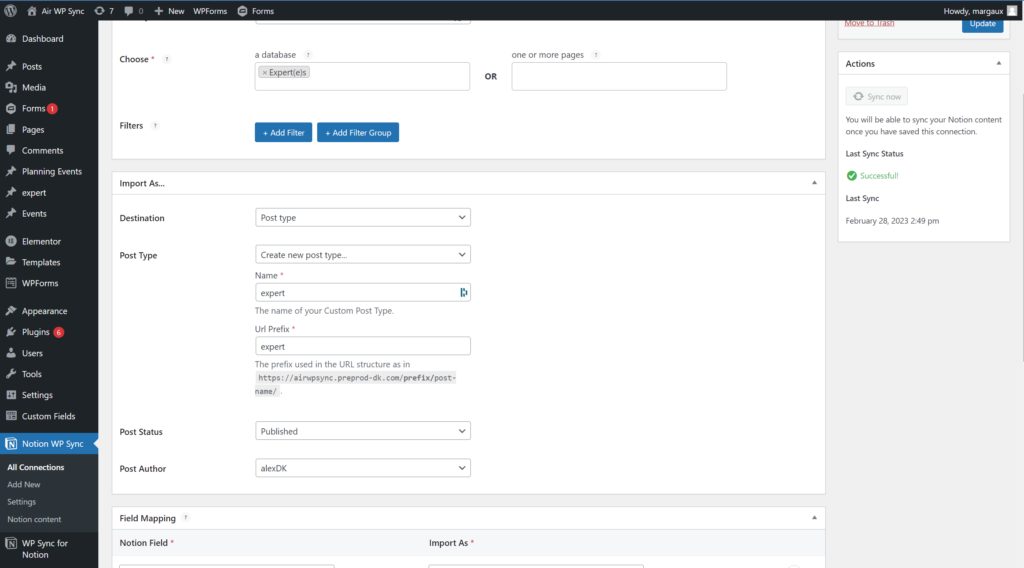
Creating Custom Post Type
In the case where you are using a theme and/or specific development, several other post types may be available to you. These are all Custom Post Types that have already been defined by your installed themes or plugins or by the developers of your WordPress site.
📌 Our Notion WP Sync plugin offers the ability to create your Custom Post Types on-the-fly specifically for your imported content.
For the Custom Post Type that you will create from the Notion WP Sync plugin, you will find the possibility of mapping the following WordPress fields: “Title“, “Content“, “Slug“, “Custom Field“.
It also allows you to create your own custom fields.
⚠️ CAUTION, if you decide to change the configuration and no longer use the Custom Post Type created specifically through the Notion WP Sync plugin, this CPT created on-the-fly will no longer exist in WordPress and the content imported will also no longer be available.
Shortcode
You can import your Notion content in shortcode.

Creating your shortcode content will create a Custom Post Type: “Notion Content“. This Notion Content CPT can be used by developers.
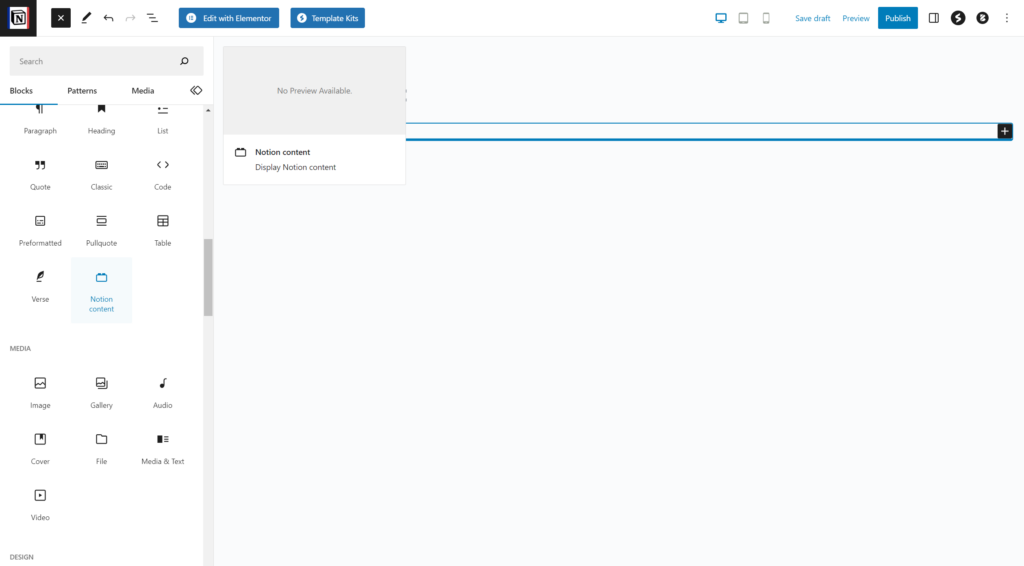
It can also be displayed thanks to our dedicated Notion Content block in Gutenberg editor.
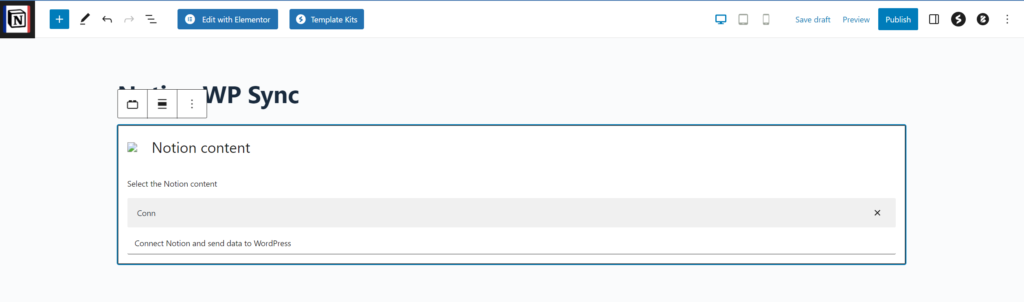
The generated shortcode can be used in the shortcode bloc of Gutenberg or different builder pages like Divi, Elementor, WP Bakery, etc.

Post Status
Like in WordPress, imported content from Notion can have different status: “Published”, “Draft”, “Scheduled”, “Pending”, “Private”.
Each of these status checks the following conditions:
- “PUBLISHED“ content is publicy visible on your website.
- “DRAFT“ content is saved as a work in progress and is not visible to the public.
- “SCHEDULED” content is set to be published at a specific date and time in the future.
- “PENDING” content is waiting for review or approval before it can be published.
- “PRIVATE” content is only visible to logged-in users with the appropriate permissions.
Depending on the status chosen, the synchronized content will receive the status defined in the settings.
If you decide to change the status in the configuration later, note that the change in status of already imported content will depend on the import strategy you have defined (see the different content import strategies).
📌 If you wish to use a property in your Notion database to define the status of posts, you’ll need to use the values defined in WordPress for this property. The article How to setup the Sync Status in Notion WP Sync? explains this in detail.
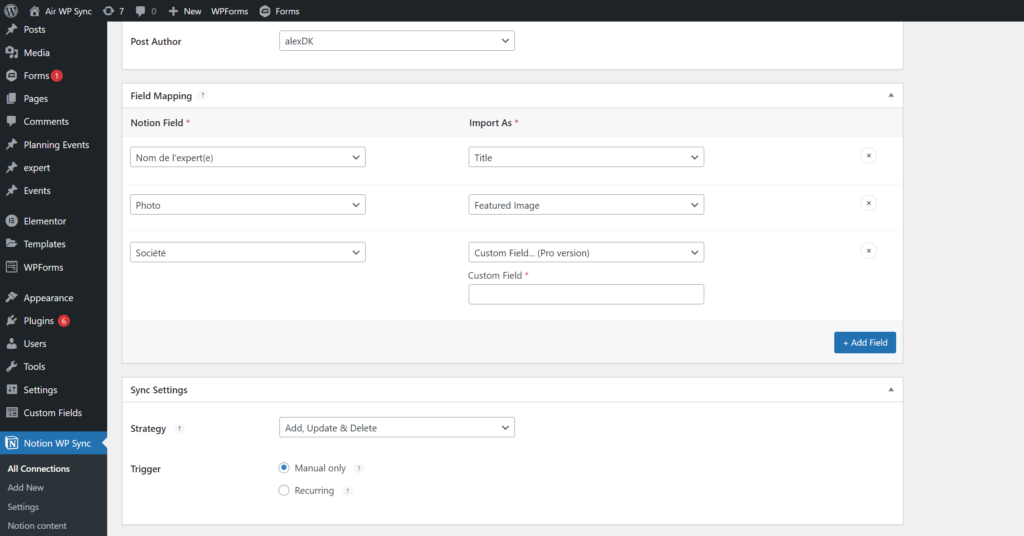
Post author
In the process of importing your content, you are required to choose an author that will be assigned to each imported content. The choice of this author must be made only among the registered users of the site, that is, users who have access to the administrative part of the site, regardless of their role.
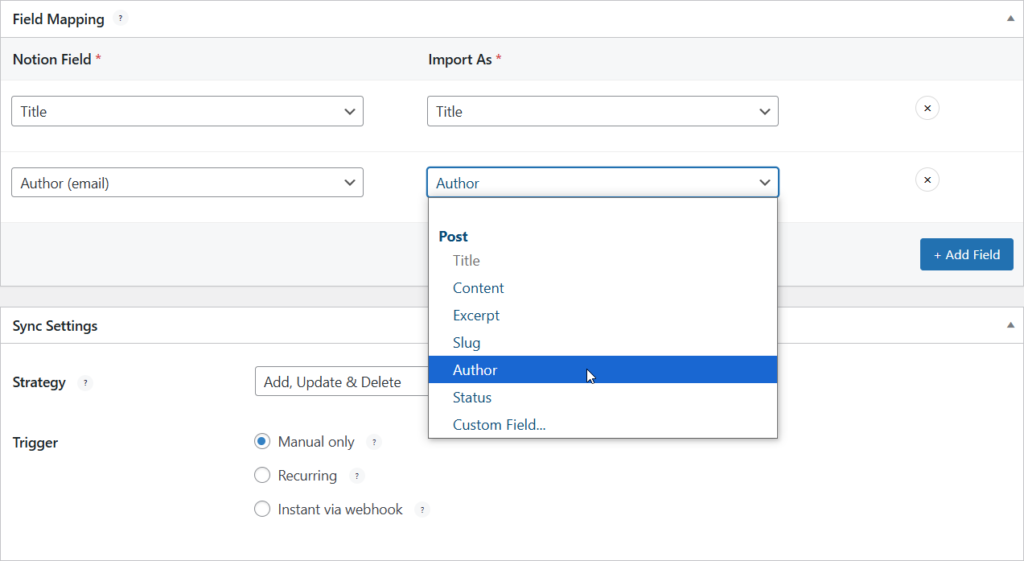
You can now use Notion’s author attribute to assign authors to posts, pages or custom post types (CPTs) in your mapping. This works for existing users in both Notion and WordPress. Simply map the “Author (email)” field in the Notion field column to the “Author” field in the Import as column in WordPress.
⚠️Users must already exist in WordPress with the same email address as their Notion account.
This feature does not create new WordPress users during content synchronization.
If a matching user is not found, the post will be assigned to the user defined in the Default Post Author field under the Import As section.
Color for the Default text in Notion
In Notion, ten colors are available for text, including the default one, called “Default text”: defined as white in dark mode and black in light mode.
You can define a custom color for text using the “Default text” format in Notion when importing content into WordPress.
In the Import As section, a color selector becomes available when you map the “Page content” Notion field — whether you’re importing it as a “Post“, “User”, or “Taxonomy Term”.
To set a color: click the Select color button and choose a color from the palette, enter a hexadecimal code, or pick one of the 8 predefined colors below the palette. In WordPress, the imported content will use this selected color.
To remove a selected color: click the Clear button.
⚠️The color you define here will only apply to texts formatted as “Default text” in Notion, and will not apply to texts formatted with another color, such as “purple text” or “red text”. These will retain the same color (purple or red) in WordPress.
Mapping Settings
You can now link your pages and databases fields with WordPress fields.
To do so, click the Add field button. Two drop-down lists are then available, one contains the fields of your Notion page or database, the second the WordPress fields with which you can map them.
Post
For posts, you will find the possibility to map the following WordPress fields: “Title”, “Featured Image”, “Content”, “Excerpt”, “Slug”, “Tag”, “Category” or “Custom Field”.
Page
For pages, you will find the possibility to map the following WordPress fields: “Title”, “Featured Image”, “Content”, “Excerpt”, “Slug”, “Tag”, “Category” or “Custom Field”.
Existing Custom Post Type
For existing Custom Post Types, i.e created by plugins or WordPress themes present on your site, you will find the possibility of mapping the following WordPress fields and any Fields linked to your CPT: Title, Content, Slug, Taxonomies or Custom Field.
Taxonomies are used to group similar content accross multiple CPTs. They can be used to create filters or searches for your content.
Example of fields available for a Property CPT: Title, Content, Slug, Property type (taxonomy), City (taxonomy), Custom Field, etc.
Custom Fields
You can also consider adding specific fields to your content imported from WordPress by mapping your Notion field to a custom field that you can name and which you will find in the imported content once the synchronization is complete.
⚠️ CAUTION, if you modify the configuration and remove a Custom Field that was created from the Notion WP Sync plugin, you will not find it in any of the imported content.
Sync Settings
You can choose the synchronization parameters of the Notion WP Sync plugin.
By clicking on Sync Now button, you can synchronize your content for the first time, even if you have not selected the Manual Only trigger.
Strategy
There are several import strategies for your Notion content in WordPress. We have defined 3 of them which are: Add / Add and Update/ Add, Update and Delete.
Each of these strategies works as mentioned:
- ADD mode will only add new content to your website and will not affect existing content.
- ADD/UPDATE mode will add new content and update any existing content if it has been edited in Notion
- ADD/UPDATE/DELETE mode will add new content, update any existing content if it has been edited in Notion and remove any content that has been deleted in Notion.
Trigger
Triggers allow you to control when data is imported from Notion to WordPress. There are three possible trigger options: “Manual“, “Recurring” and “Instant“.
- MANUAL: it allows you to manually import the data by clicking on the Sync now button. This is useful if you need to import data occasionally or want more control over when to import.
- RECURRING: it allows you to schedule the import of data at regular intervals. You can choose how often the import should occur, such as every “30 minutes”, “Once hourly”, “Once daily”, “Twice daily”, or “Once weekly”. This is useful if you want to regularly update your WordPress site with the latest content entered into your Notion workspace.
- INSTANT: it allows you to import data as soon as it is added or updated in Notion (depending on the selected import strategy). This is useful if you want your WordPress site to be in real-time sync with Notion, but it can also be resource-intensive if you have a large amount of frequently updated data.

Publishing
Once all the parameters have been configured, do not forget to publish your connection by clicking on Publish or Update button in the case of a configuration modification. And that’s it!
If you have chosen a manual synchronization, do not hesitate to click on the Sync now button to synchronize your first contents and see them appear in WordPress.
Supported fields & Content Blocks
Supported properties (databases):
- Checkbox
- Date
- Files & Media
- Multi Select
- Number
- People
- Phone number
- Rich text (“Text” in Notion)
- Select
- Status
- Title
- URL
- Formula
Supported content blocks (pages):
- Paragraph
- Heading (1,2,3)
- Bullet list/Order list
- Quote
- Table (Header column not supported)
- Toggle (See restrictions)
- Separator
- Callout (Boxed content – See restrictions)
- Image
- Video (Spotify & Loom links too)
- Files
- Columns
Not Supported fields, Content Blocks & Views
Here is what is not supported by our plugin yet:
- Task lists
- Web link previews
- Audios
- File insertion
- Board view
Chart view - Gallery view
- List view
- Calendar view
- Timeline view
- Synced database
- Bookmarks
- Table of contents
- Math Formula
- Button
- Breadcrumbs
- Synced block, Embeds
- Mention/Mention a page
- Child pages links/Internal links
- Date or reminder
- Equation – In this block
- AI block
- Checkboxes
Internal links won’t be converted to WP page links.
Only Table view is supported.
Restrictions
Notion is an application offering a wide range of functionalities.
We strive to maintain as many of these features as possible during our import process; however, due to compatibility issues with Gutenberg, choices on our end, or limitations of the Notion API, some of these functionalities still remain restricted with our plugin.
In Pages
Here is what we have decided to restrict in our plugin:
Toggles are now compatible with Gutenberg!
Therefore, we have added support for toggles; however, since nesting is infinite on Notion, we have decided to limit it to the second level. You will therefore not be able to have more than 2 levels of toggles (that’s mooooore than enough).
Please see the example below:
1. Works
2. Works too
3. Don’t work
Similarly, callouts are supported. However, you will not be able to nest one callout within another callout (well, one level is enough, right?).
Please see the example below:
1. ⚠️ Works
2. ⚠️ Don’t work
Compatibility Table
Troubleshootings
Make sure you have created your databases and Notion fields names before adding a new connection. If you don’t see it, wait 1 minute. For performance reasons, your Notion elements are cached for one minute.
If needed, you can access to logs from a FTP server in this folder:
/wp-content/uploads/notionwpsync-logs
Syncing Issues
Some issues can appear when syncing. Some hosting providers disable a handful of PHP functions to help ensure performant servers.
Notion API: 403 error
In your Notion integration settings, ensure that you have checked the token User Capabilities “Read user information including email addresses“.
Server Timeout
If you have a large amount of content to import, the synchronization process will take some time for all the data to synchronize, especially if this is the first sync. You may have what is called a “Server Timeout”. It will depend of the number of rows you wish to import, the size and the number of images but also of the server settings. This is all the more likely to happen if you have opted for a basic hosting offer.
Check with your hosting provider and increase the execution time, allowed memory size and file size to the maximum if needed.
Basic Authentification
In case you have configured a Basic Authentication to protect the access to the site or to some information of the site, the call to WP Cron is then impossible, making the recurrent and instantaneous synchronization impossible.
Cache issues with WP-Cron
WP-Cron needs page loading to trigger and therefore synchronize. In case you use a cache system (WP Rocket or WP Super Cache for example), it is therefore necessary to use a server cron.
Advanced Articles
GENERAL
- Create a Custom Post Type with Notion WP Sync
- Create WordPress users from Notion with Notion WP Sync
- How to use the Sync Settings in Notion WP Sync?
- How to setup the Sync Status in Notion WP Sync?
- How to use Notion “Relation” field with Notion WP Sync?
- How to create WordPress taxonomies from Notion with Notion WP Sync?
- Finding Custom Field Slugs for Mapping with Notion WP Sync
ACF, JETENGINE & META BOX